
")
")
Landscaping around the loading ramp
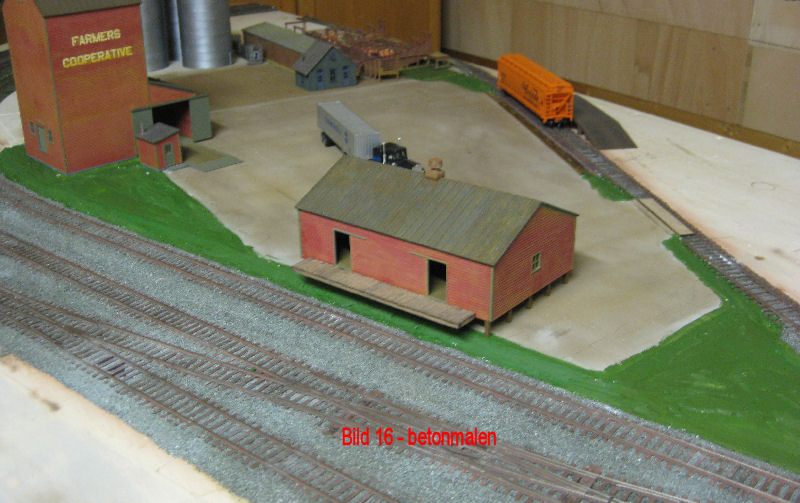
Fig. 16 - The edges of the concrete slab to the track/landscape were filled with plaster using pallet knives. In the area of the loading road up to the top edge of the sleeper. In the area of the warehouse and grain store, a trench (water drain) was formed. After the plaster hardened, the areas were colored using tinting paints (mixture of green and brown) from the hardware store. After the paint has dried, "greening" can begin. The materials can be found in Figure 15 under the Building Instructions button.
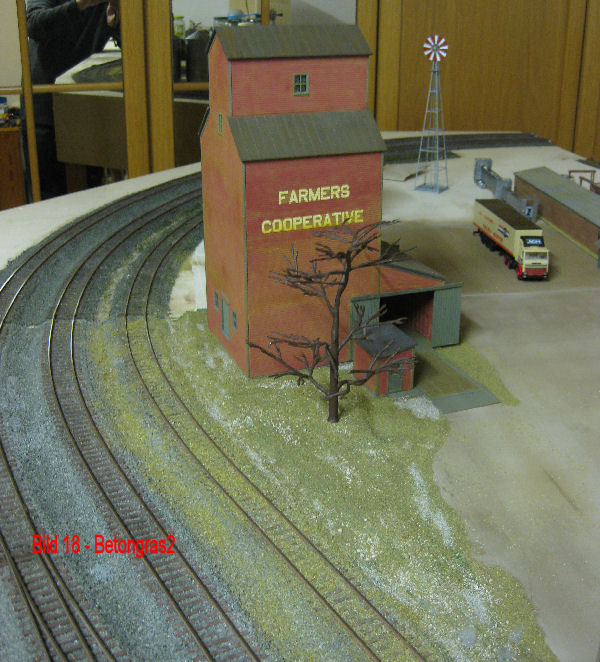 The first green is growing. The surfaces were painted opaque with undiluted white glue (Ponal). After that, grits of Asoa were trickled up with fingers in several places and then a mixture of several Turfs of Woodland was applied to the full surface with a sieve. After drying, the excess material can be removed with a brush and reused. The tree from the Walthers range (white metal) has already been painted brown. It will still get a color finish and of course its foliage. The materials used so far can be found in picture 17 under building instructions. Pictures about the completion of the tree will follow.
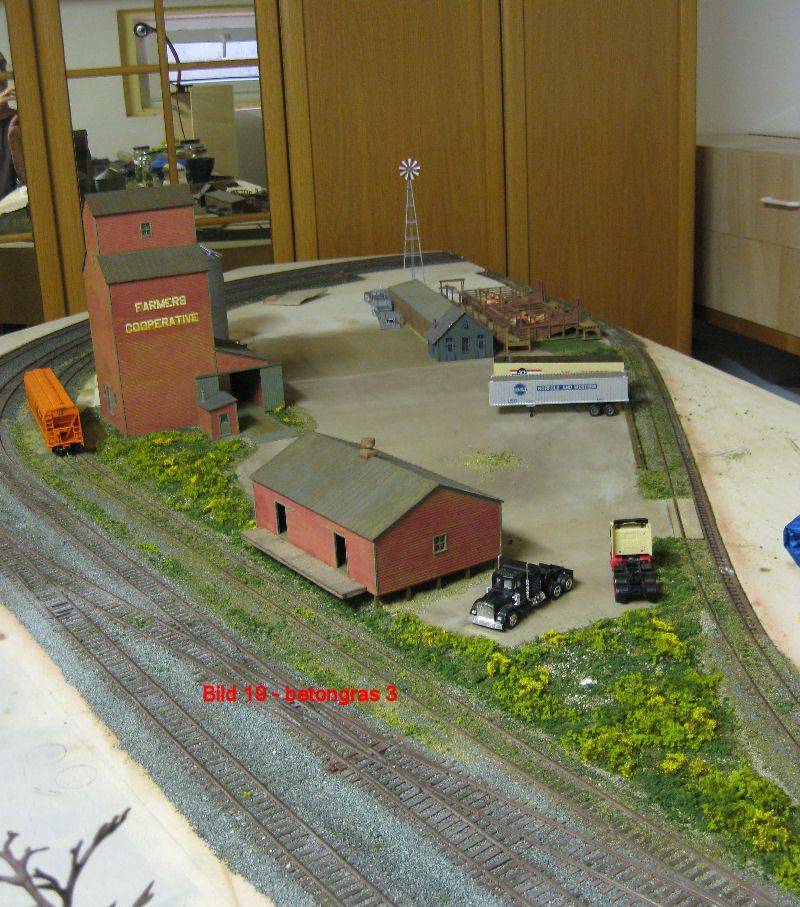 The second green grows. A mixture of the vodland varieties and Heki foliage flakes light and dark green. The bushes etc emerged from Hekiflor light and dark green and yellow. The bonding was done wet in wet, as with the crushed stone. Woodland was also applied around the storage shed.

A little closer
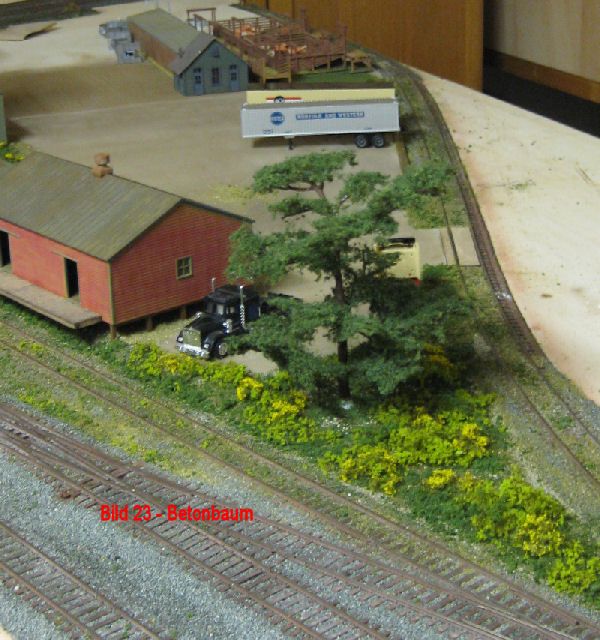
A finished tree (my first, by the way!) The foliage was made from the Woodland foliage material included in the tree kit mixed with Hekiflor
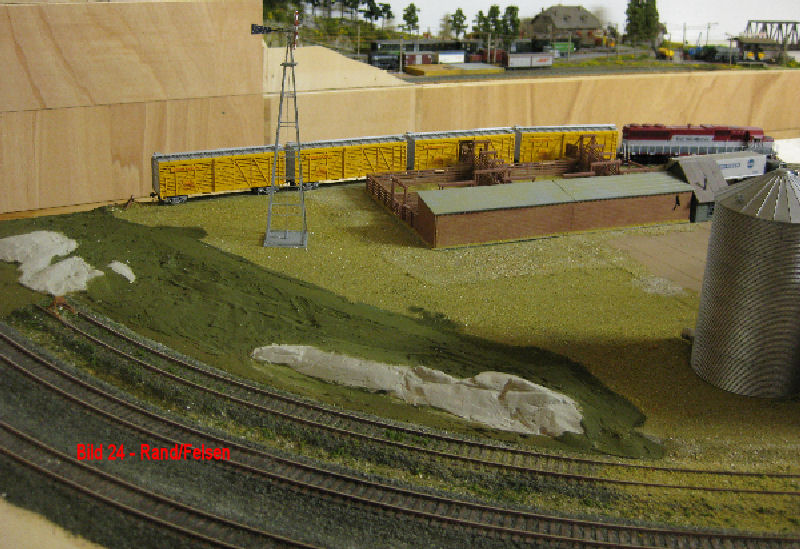
Fig. 24 - The rest of the interior of the module behind the loading road. Rocks are modeled at the edge. Model plaster was applied for this purpose. The basic structures were worked into the still slightly moist plaster using a palette knife. After drying, the rock formations were worked out with a chisel.
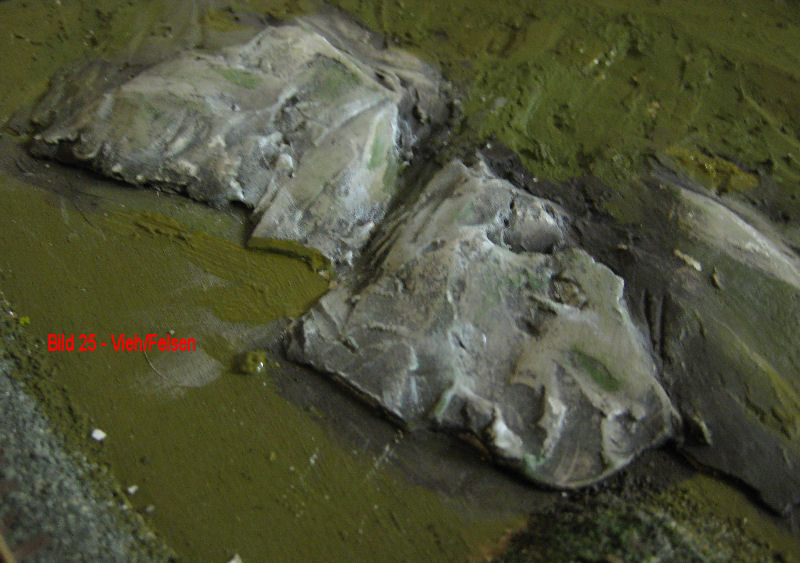
Fig. 25 - Heki granite paint was used for the first coat of paint on the rocks. After this paint had dried, a second coat of dark Heki glaze paint was applied. This paint was immediately washed off again with a wet cloth/potting sponge. The dark color remains only in the depressions. This creates an "aging" of the rocks. The remaining areas are then painted with tinting color (mixture of green and brown). After drying of all colors the depressions of the rocks were painted with green acrylic paint and the edges of the rocks with white acrylic paint with almost dry wiped out brush. The green paint represents the moss coverings located on rocks. The white paint sets "lights" on the edges. The materials used are again under the button building instructions.
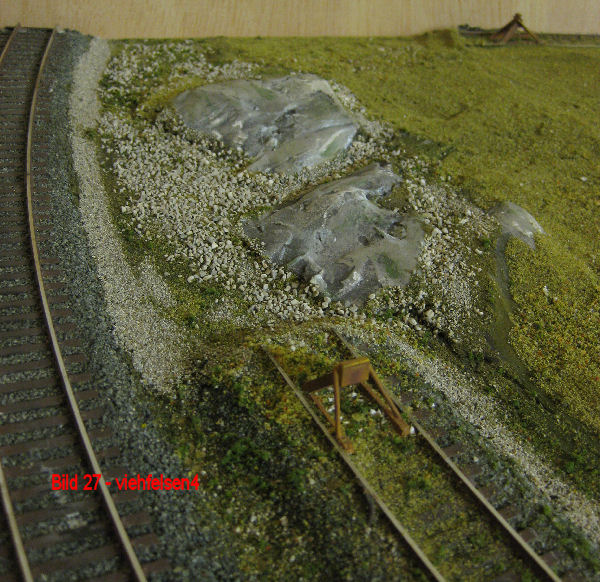
Fig. 27 - The edges towards the track were interspersed with basalt sand and stone/gravel/scrap from Asoa as well as Turfs from Woodland and a flake mix from Woodland and Heki. The first meadow green and the terrain around the silos (access roads Asoa gravel) were again applied with a mixture of several Turfs from Woodland with the sieve (see under building instructions).
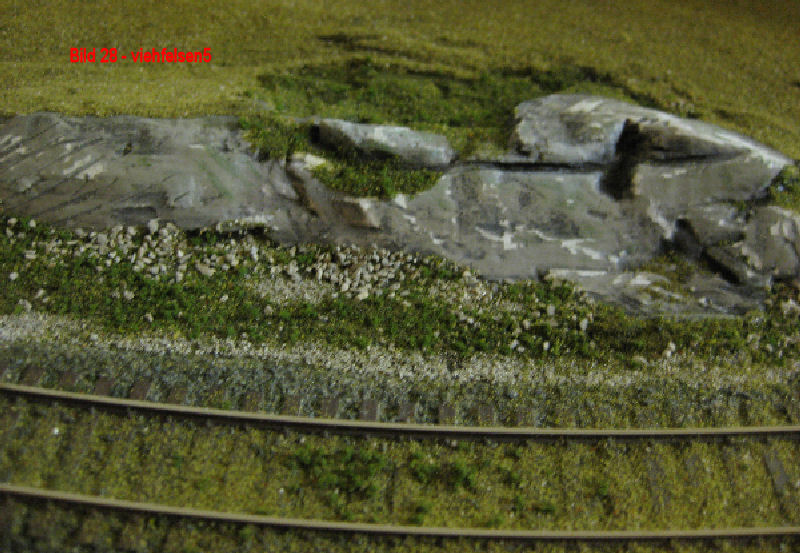
Fig. 28 - Closer look at another rock. Some rock surfaces were covered with green.
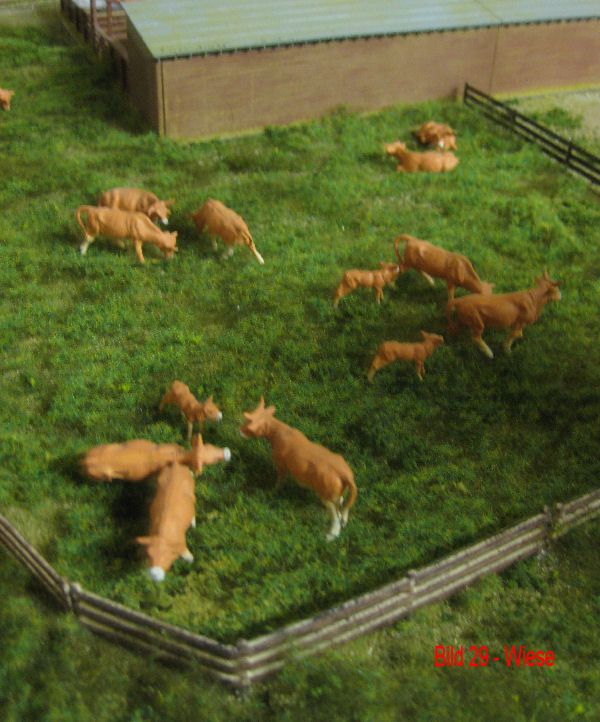
Fig. 29 - The pasture next to the cattleyard got a fence and her lush grass. The green application was made as in "first and second green", but with less proportions of sand. Bushes, trees, watering trough, etc. are still missing. The tall grass is a Heki product. The fence is from Noch. (See also under building instructions). Cows mostly stand or lie in groups. Bulls are taboo here!
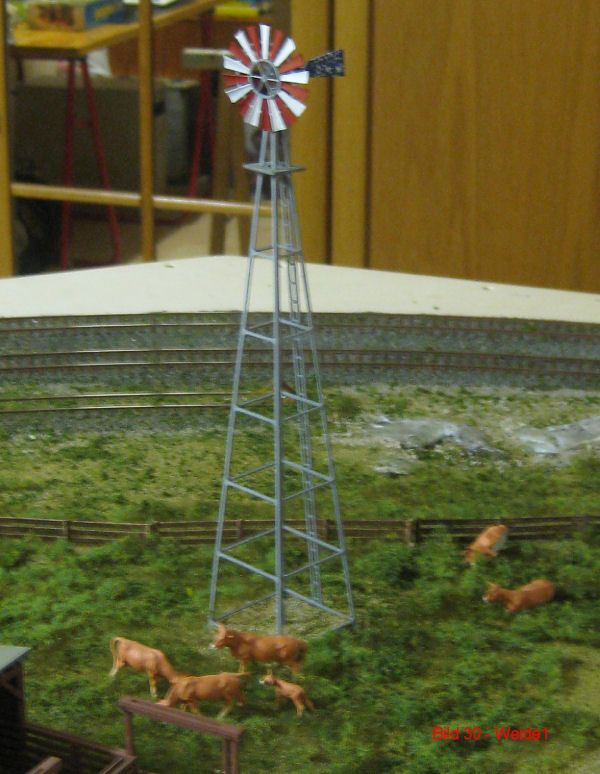
Fig. 30 - Again a detail with wind turbine for the water supply. Taking pictures with this newfangled stuff is not my world! The old SLR with real film I can better.
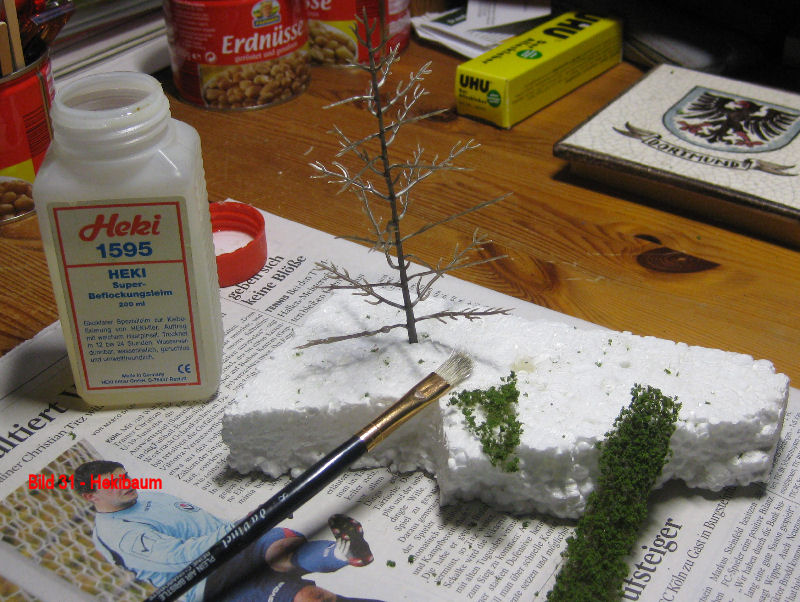
Fig. 31 - I still had in my fund a pack of tree kits from Heki (No. 1532). The kit consists of 15 plastic blanks and the pile material. For me, the things were always somehow too small. Habs then now nevertheless times tried. The branches of the plastic blank are first bent away from the trunk in all directions. Then covered with the pile material. For gluing, of course, the Heki flocking glue 1595 is suitable. From the pile mat I cut small strips with scissors and then pulled these strips apart in the shape and length of the respective branches. Then coated the branches with glue and laid the pile material on top and lightly pressed it into shape. Yes, I like Aapenös - and Dortmund is the hometown of my mother incl. BVB.

Fig. 32 - The first branches are covered. I have laid the pile quite "light", so that the branch structure still shines through.
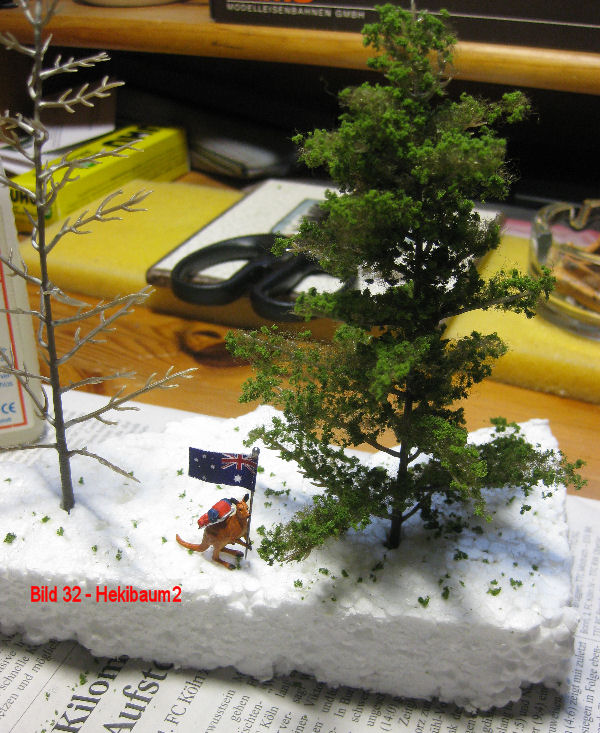
Fig. 33 - One tree is ready. In size comparison with Skippy (see under pictures) but a decent size for a still young tree. If you want, you can of course improve the tree blank with paint before covering it with pile. But in my opinion this is not absolutely necessary. When all trees are finished (each tree takes about 20 minutes to build) they will be installed together with the final design of this part. Pictures of this will follow as well.
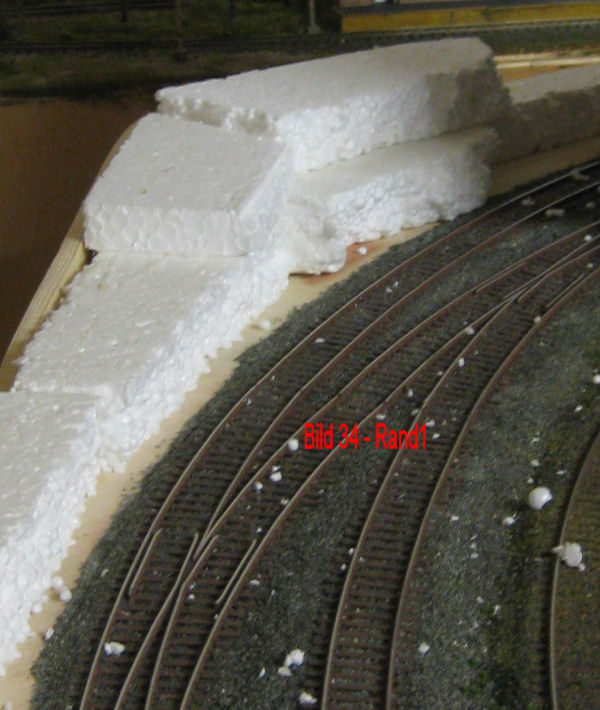
Fig. 34 - The outer edge of the module is created. First, a 5 cm high wooden strip was glued on. This was then sawed out with the jigsaw in the desired terrain shape and smoothed with the grinder/adapted to the outer wall of the module. Then pieces of Styrofoam were glued on with wood glue.
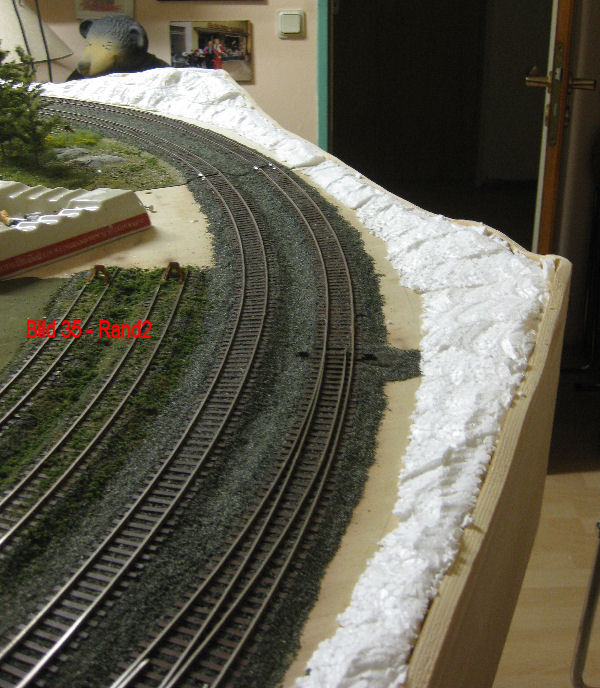
Fig. 35 - After that, the desired terrain shape is cut out of the styrofoam blocks with a homemade styrofoam cutter (built 20 years ago by our club boss!). During this work you should ventilate the room well! The stuff stinks to high heaven and the fumes might not be quite healthy either! Who allows the windows, has no flies or mosquitoes in the room in the next few days!
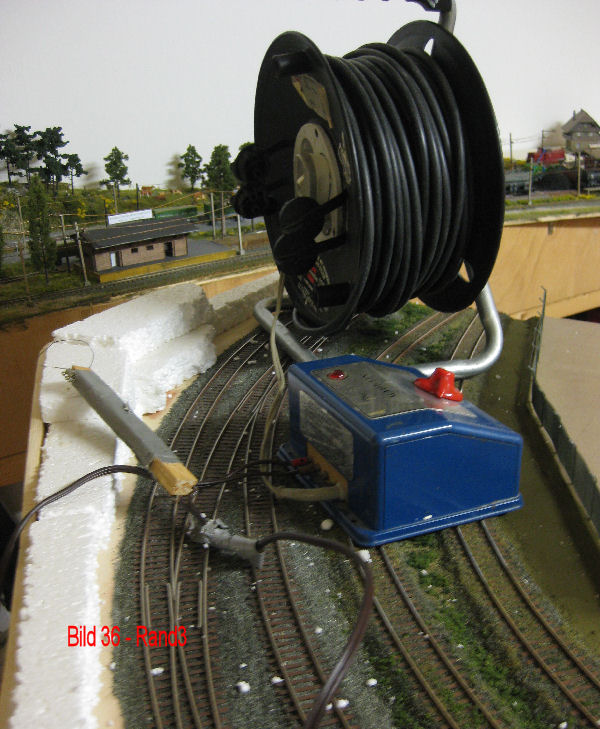
Fig. 36 - The tools for cutting styrofoam! To work with these tools, see the button Building instructions.
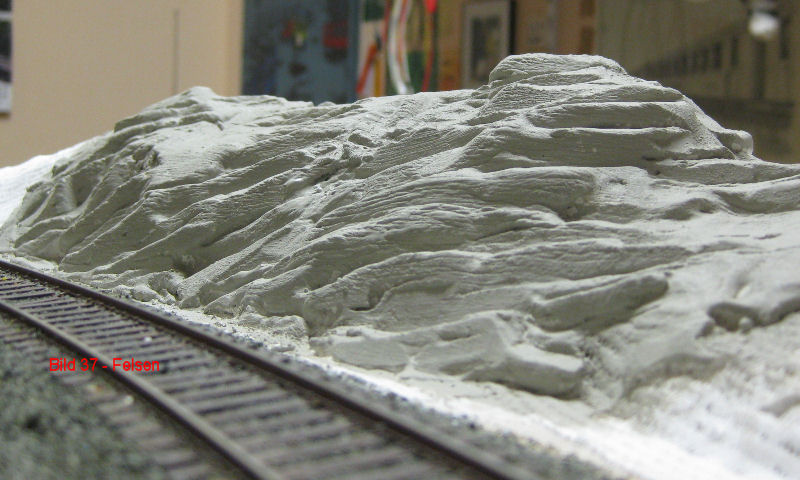 Fig. 37 - The finished styrofoam molds are then covered with plaster bandage. The plaster bandage pieces required in size are cut out of the bandage on a roll. The pieces are fixed by painting over them with water. The work is ok when the honeycomb structure of the bandage is almost not visible. Once the bandages are dry, they will have bonded firmly to the styrofoam substrate (allow to dry for 24 hours). Plaster bandages are available in tournament packs from your local pharmacist. Feel free to ask if he might have expired stock. The 10-pack of fresh bandages used here cost about 20 euros.
Our border is to have rock formations in some places. For this purpose, modeling plaster is mixed and applied in a thick layer at the desired locations. As soon as the plaster has set a little, the shapes are pressed into the plaster with a palette knife. Allow the whole process to dry for another 24 hours.
When modeling the rock shapes, it depends on the rock to be depicted. In our case it is granite. Before starting, you should look at granite formations in nature or in books. Rock formations consist of layered rocks/plates. These plates usually always have a directional course. This can be seen well in the picture. To secure the railroad line running directly next to it, the rock here has been removed in steps.

Fig. 38 - Once the plaster layer is dry, a sharp chisel is used to carve out the final structure. The result should be reasonably smooth panel surfaces and sharp, almost vertically sloping edges to the next panel. After that, the Gibs is lightly brushed with a wire brush. This results in the typical scoring. When this has been done to satisfaction, the first coat of paint follows. The granite paint from Heki was used here.
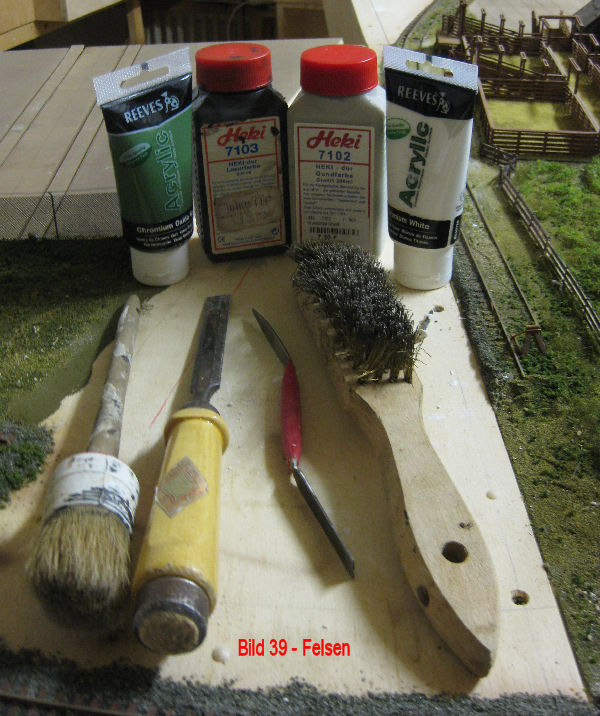
Fig. 39 - The tools and colors used. The other colors already shown in the picture are still being applied.
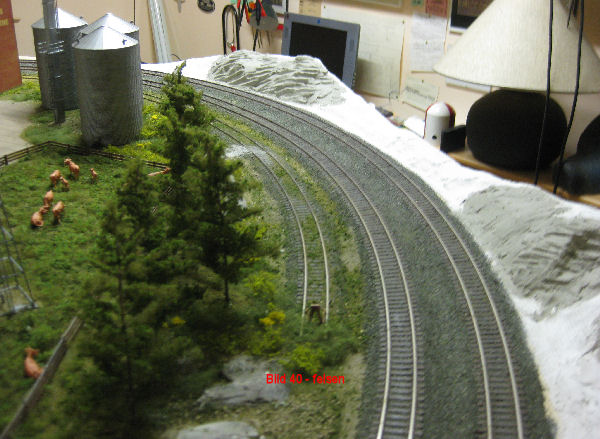
Fig. 40 - This is what our curve looks like so far.
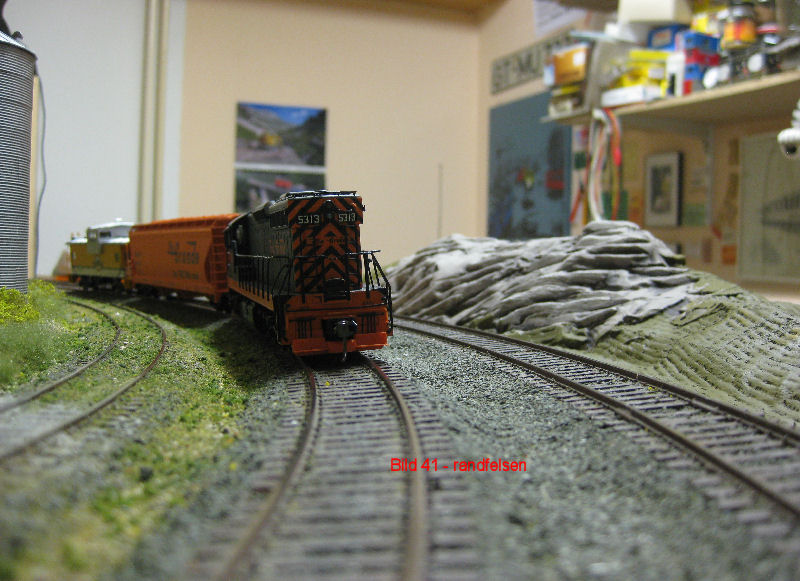
Fig. 41 - The rock has received its first patination with Heki glaze paint. This paint is applied over the entire surface, slightly diluted with water. Allow to set briefly and then remove the paint with a wet sponge until the granite tone, slightly tinted, reappears. The glaze remains on edges, crevices and grooves. The rest of the terrain is colored with an olive/brown (mix as you like) tinting paint from the hardware store.
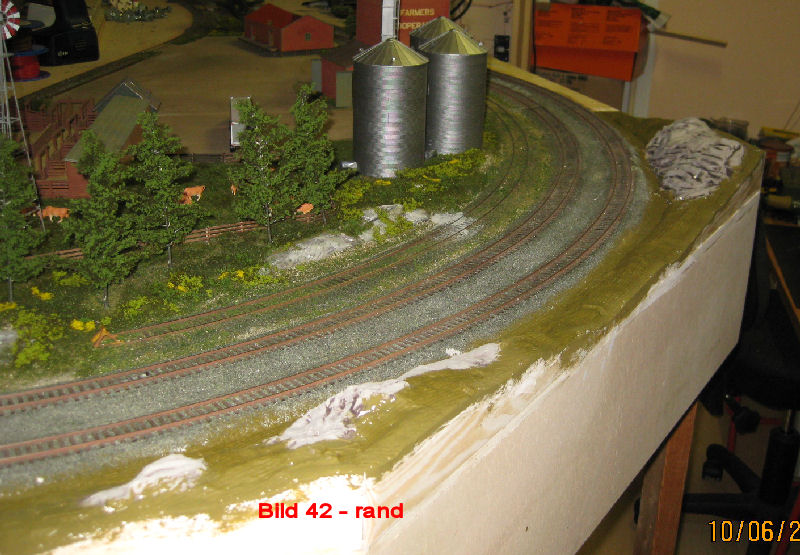
Fig. 42 - Again, a picture of the edge in its current processed state.
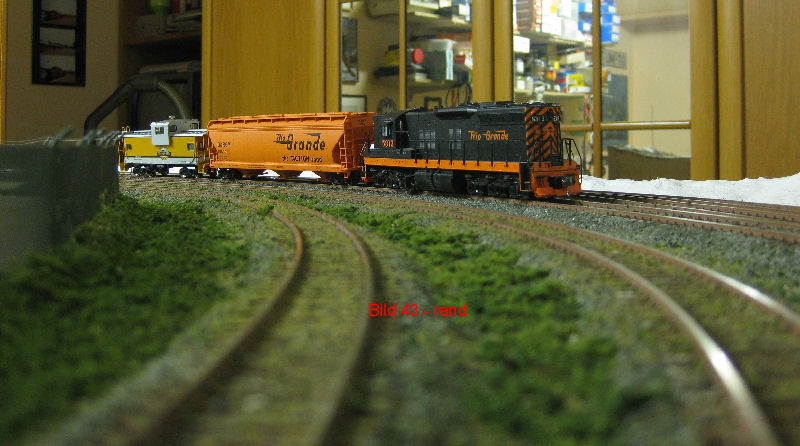
Fig. 43 - The Rio-Grande Local picked up the grain car at Lotzburgh. The train is about to enter the Dakota City yard. On this section of the curve, the basic greening has been completed. Behind the locomotive, the edge previously covered only with plaster bandages can be seen.
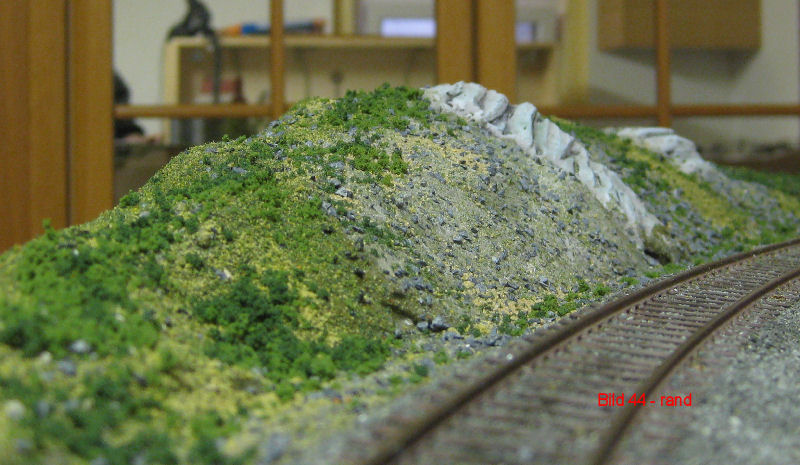
Fig. 44 - it's greening! The slope was first coated with Ponal. Then a mixture of several, sieved grains of road gravel and Woodland turf varieties was applied. After this first "base" dried, more (lighter) turf varieties, sand varieties and Heki flakes were applied wet on wet. Now higher grasses and bushes are still missing.
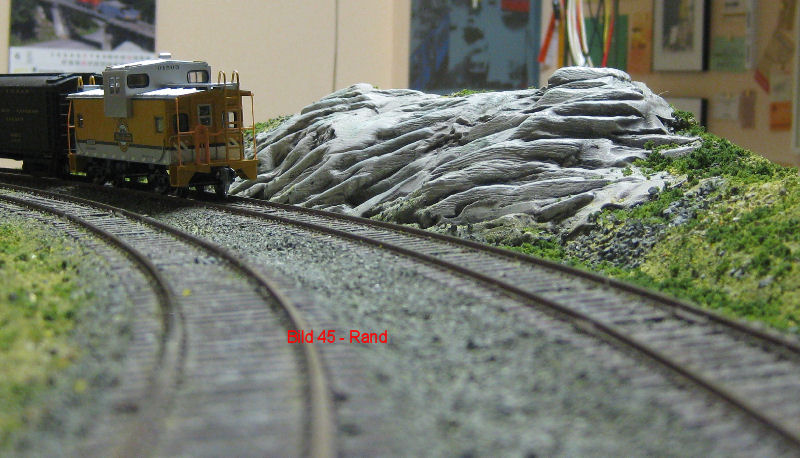
Fig. 45 - A reshot on the Rio Grande Local at the larger rock.

Fig. 46 - The finished greened border area. In some places, Heki wild grass was applied and the bushes were indicated with Heki Flor light and dark green. Fixed again wet in wet.
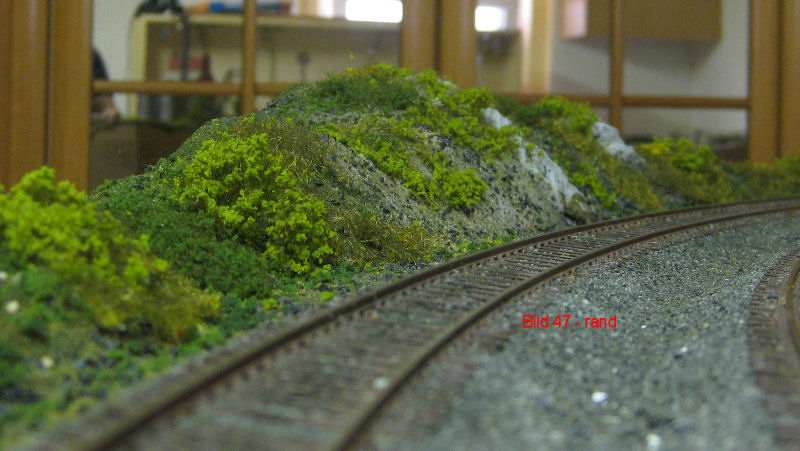
Fig. 47 - A different perspective
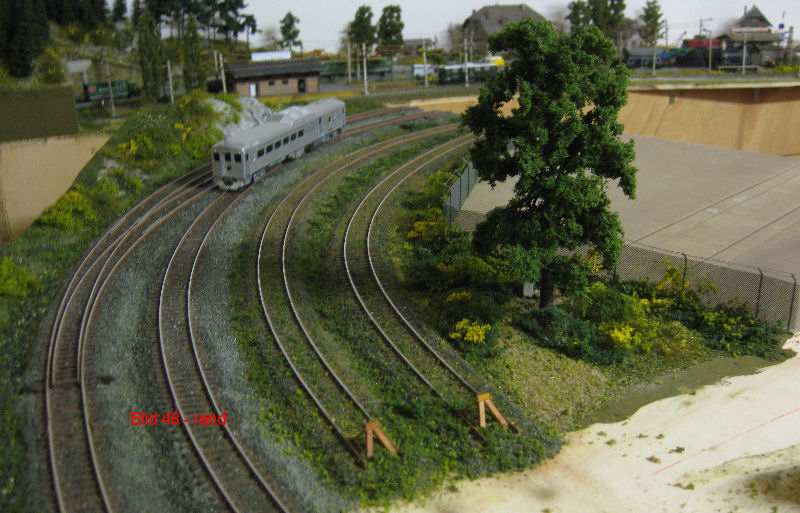
Fig. 48 - The edge strip of the 2nd curve module and the area between the tracks and the fence to the container station are finished. As background the landscape of the lake valley in Switzerland with standard and narrow gauge!
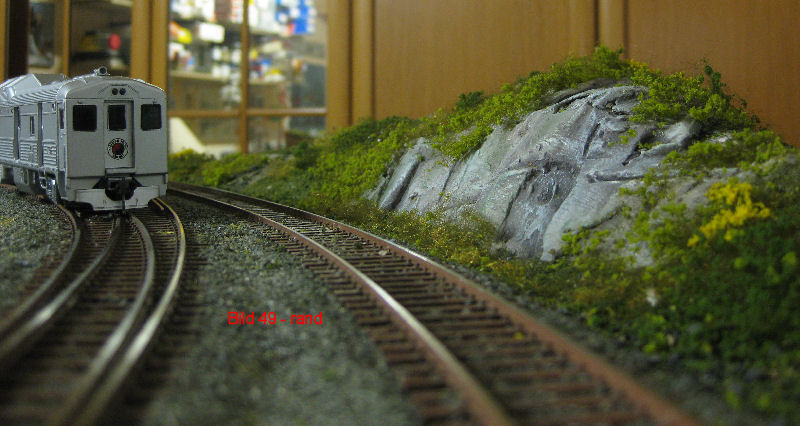
Fig. 49 - An overgrown granite rock.
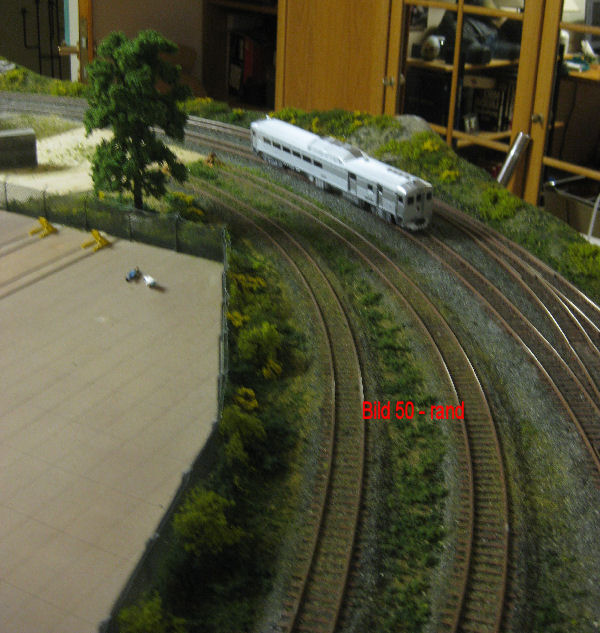
Fig. 50 - again a general view (unfortunately not quite sharp...I cans just not with the modern stuff!) And the beekeeper and his assistant I forgot...the pickup is also missing.
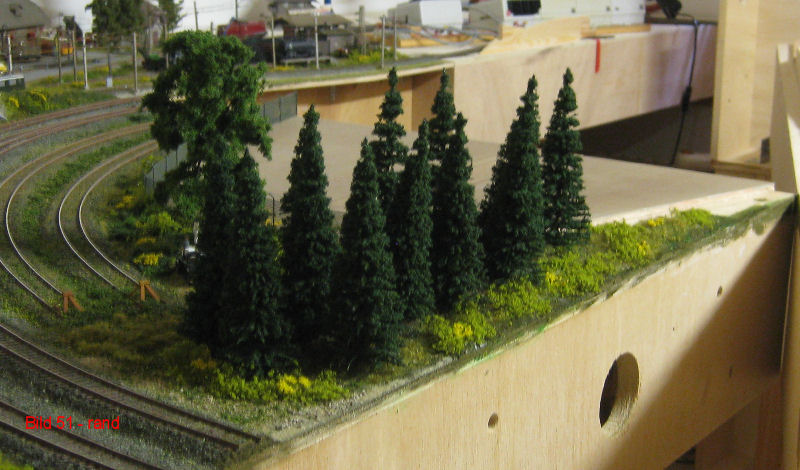
Fig. 51 - The last landscape strip of the turning modules is also finished.
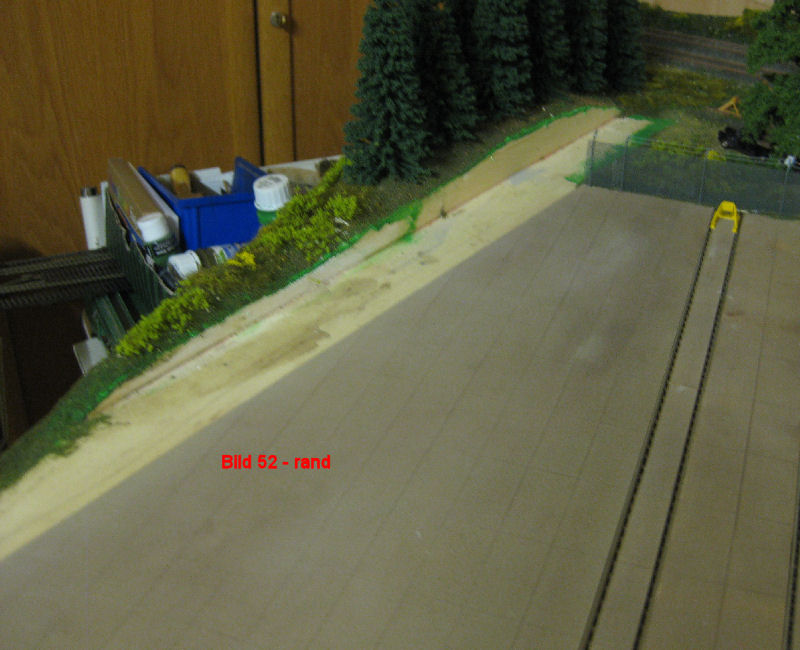
Fig. 52 - The dividing backdrop, which is currently in the works at Andy's, is inserted into the strip that is not built on.
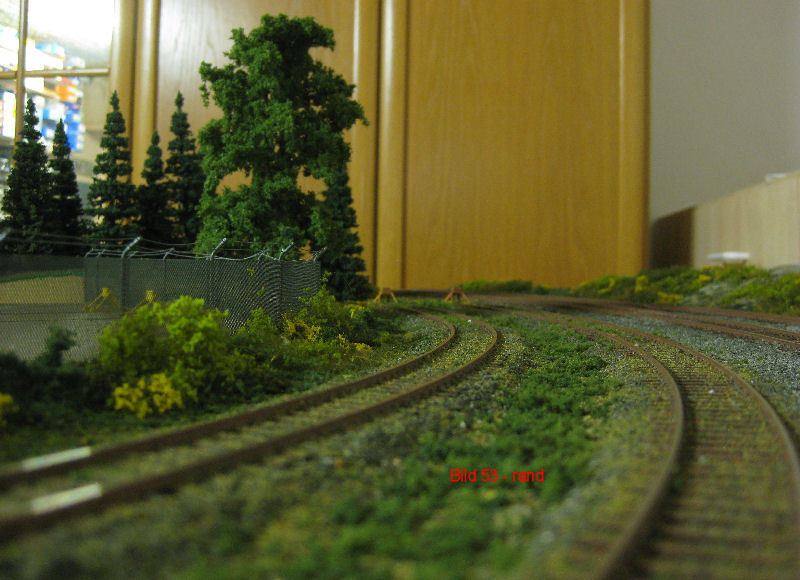
Fig. 53 - A picture on the fence.
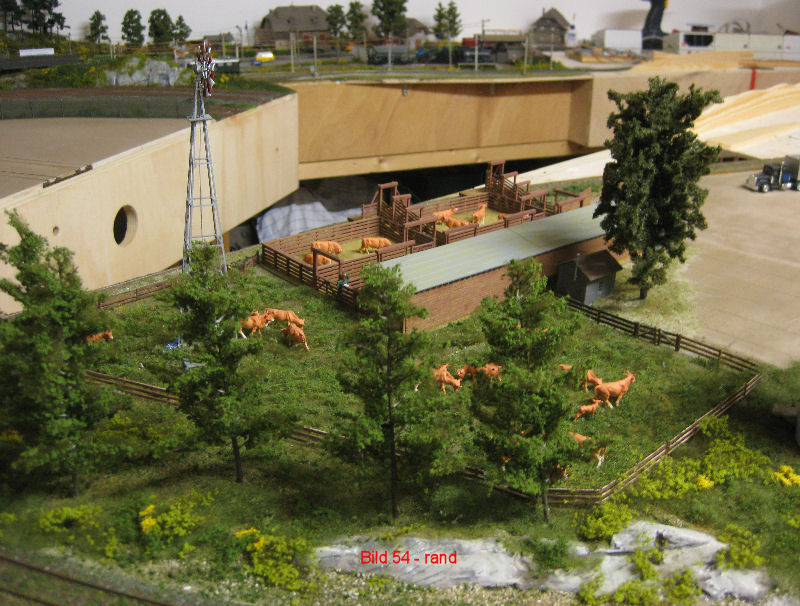
Fig. 54 - The cattle loading is also (almost) finished. Bushes are still missing at the edges of the building. In front of the fence facing the loading road, there will later be space for the employees and their horses or vehicles.
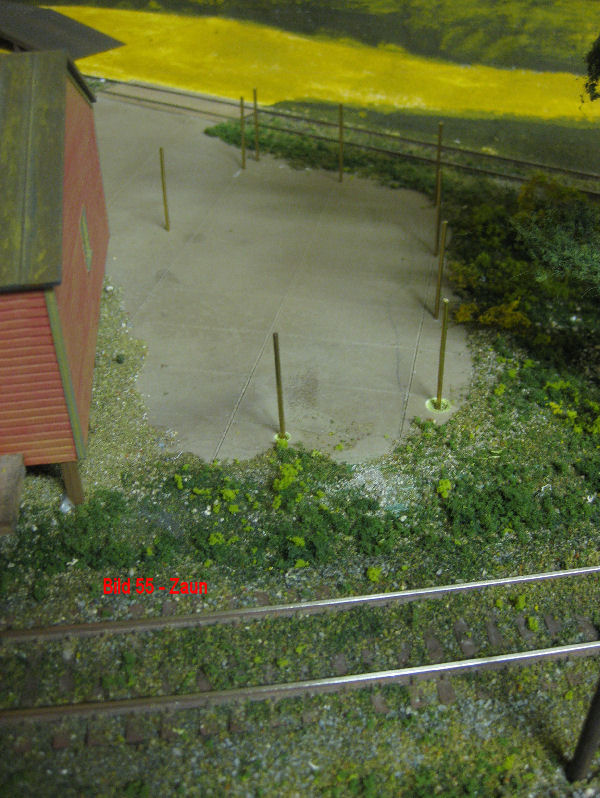
Fig. 55 - Next to the warehouse will be a fenced storage area. The fence posts (brass wire 3cm) are already set. Gate and wire mesh fence are at Andy's for painting. The shelves will also be made by Andy.
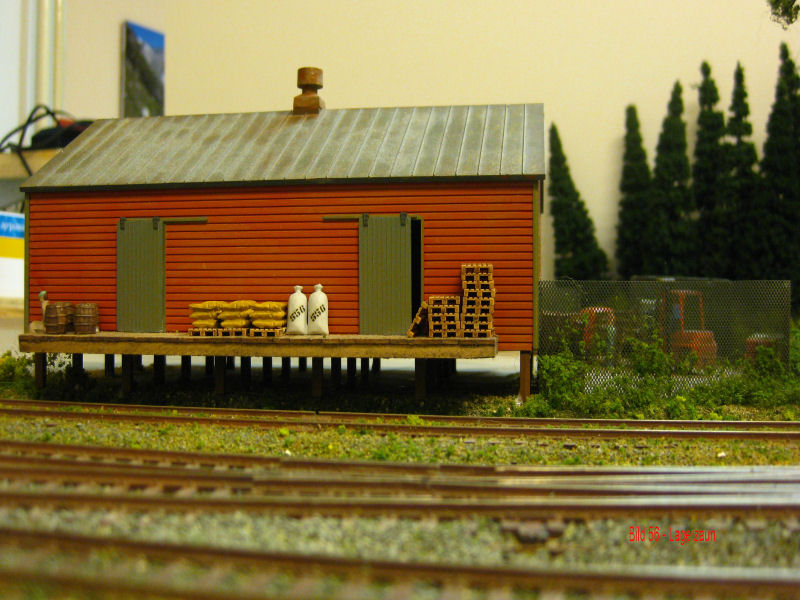
Fig. 56 - The fence made by Andy is mounted. At a common tinkering day in Bernd`s cellar on 7.8.11 Andy had brought prepared cargo and many other decoration parts. With it the small storage place could be "furnished".
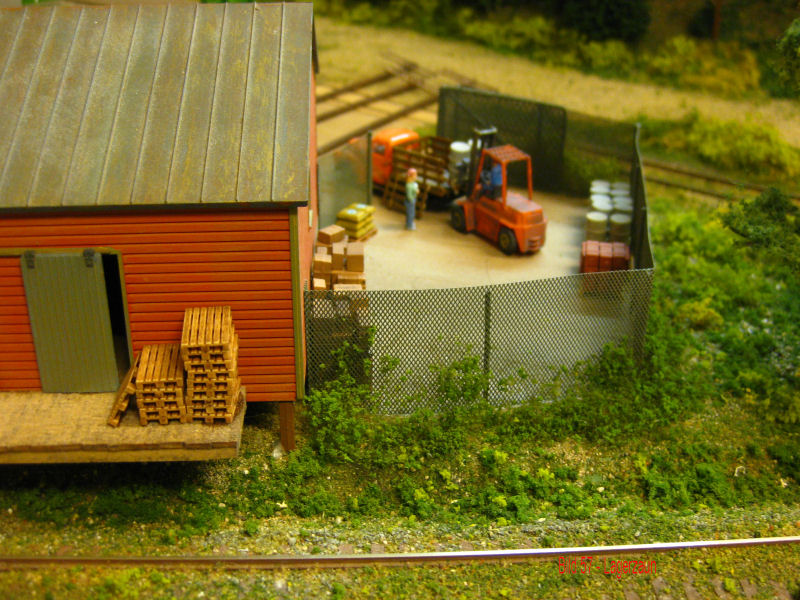
Fig. 57 - The warehouse manager controls the loading of seed barrels onto the pickup truck of one of the cooperative's farmers.
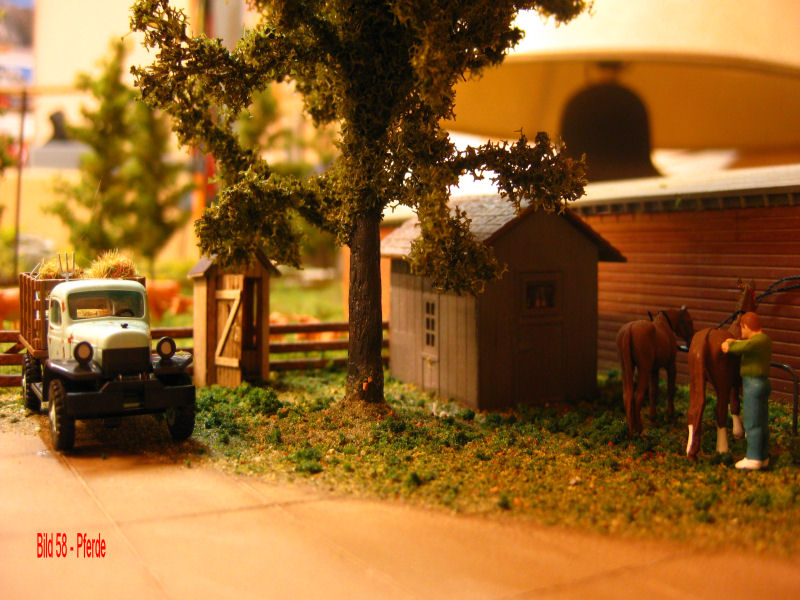 Fig. 58 - On the long side of the cattle loading, the cowboys have set up. There is a pole to hitch your horses to, a staging area with a tack room, and an outhouse. The pickup truck is probably a piece of junk, even by Anerican standards.