
")
")
Track material used: We use track material Code 83 from Walthers/ Shinohara. Only flex track is used. The turnouts and crossings in the main lines are #6. The curved turnouts in the turnaround modules are #8. In the sidings and other sidings we use #5 size turnouts. All tracks are fixed with nails from Walthers. The rail joiners and the bumping blocks are also supplied by Walthers. The buffer stops were sprayed yellow. To cut the tracks cleanly to length, we use a special side cutter for track profiles. This produces a burr-free clean cut. Before we bend flex track, we solder the rail profiles of the flex track and the track/switch already laid before it in their rail connectors. This allows the flex track to be bent without coming loose again from the rail joiners.
Switch machines: We use motorized switch machines from Fulgurex. They are converted to AC capability by rectifiers. This allows us to set the drives with the normal analog "transformer AC" via toggle switches, which are mounted close to the location in the side panels of the modules on an aluminum sheet. Since the end of 2014, we have been converting to servo drives (Conrad). Controlled via switch pilots from ESU, which are also controlled analog via pushbuttons. A good idea from Andy...who else!
Couplers/uncouplers: All cars are equipped with Kadee couplers #5 (metal). A super coupler that allows smooth engagement and disengagement even on curves. By hand, uncoupling in the train set is possible without problems, e.g. with a "shish kebab skewer" etc., which you insert into the coupler and then turn slightly. In places that are difficult to reach, we install uncoupling magnetic plates from Kadee. These plates are about the same thickness as the Hekibettung we use.
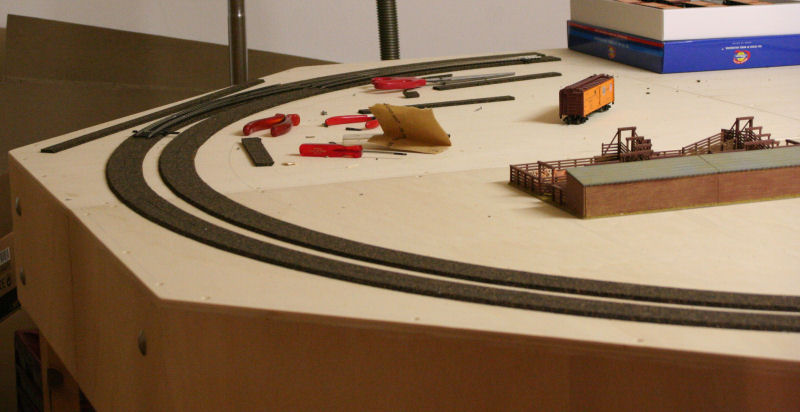
On the corner module glued bedding of the company Heki No. 3195. Very good insulation, also good to lay in the arch. Can be trimmed well with cutter or scissors. The bedding was glued with Ponal-Express.
The tracks are laid on the ballast and fastened with rail nails. For each turnout, the hole (10mm) for the motorized underfloor turnout drive from Fulgurex is drilled beforehand centrally under the setting sleeper.
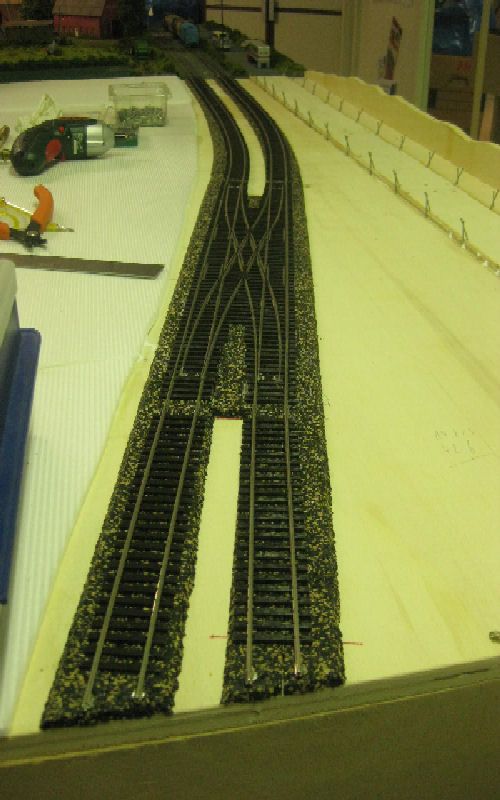
The first completed turnout road for the land station. Some sleepers still have to be pushed in. The small irons of the sleepers are removed with the cutter beforehand.
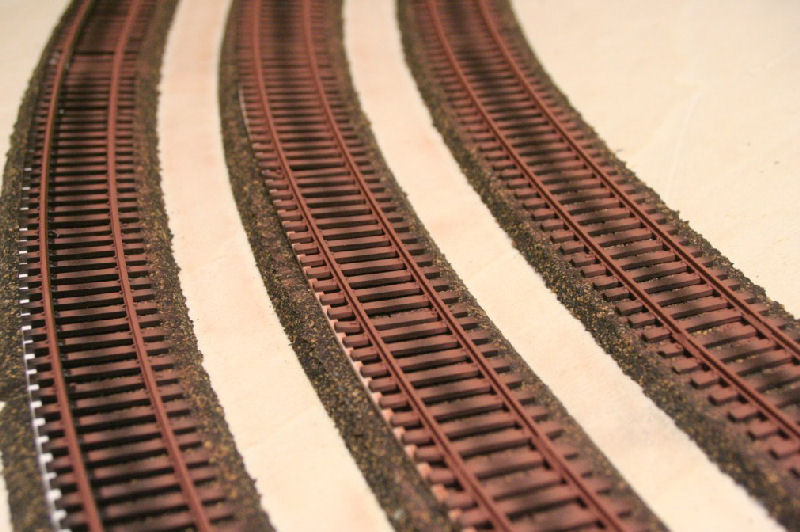
The curve laid from flex track was slightly raised on the outside. How we make this superelevation, you can find below.
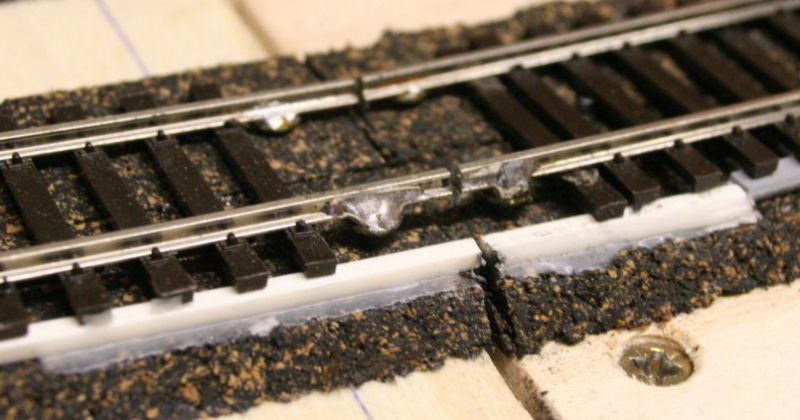
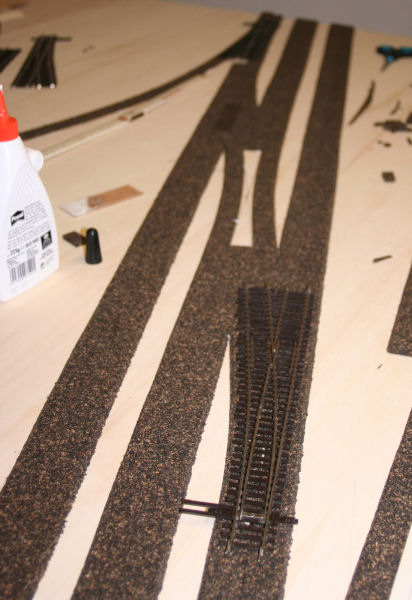
Module separation with track elevation: We usually lay the flex track completely across 2 module boxes. At the module edge, 4 sleepers each, which are later pushed under again, are removed from the track. Then four Spax screws 2.5x16 are screwed in close to the module edge. The height of the screws is determined by passing the track lying on the ballast over the screw heads. The track should not hook. If a curve elevation is installed, as shown here, it is temporarily placed underneath beforehand to determine the screw height on the higher side. Then solder is applied to the screw heads and rail connectors are slid onto the ends of the track sections and solder is applied. The track is laid and nailed on the inside of the track. On the higher outer side, the elevation stiffener (in our case a plastic profile) is placed underneath when nailing. Then the track profiles are soldered onto the screws. Only then is the track separated at the module edge with a diamond disk clamped in the small drilling machine (in our case: Proxxon Minimot). This ensures that the tracks are always at the same height when the layout is built. In 2015, we decided to remove the superelevations again (although well laid!). With our long trains, there were always problems with individual cars (tipping!). In addition, there were always problems at the module transitions with the superelevations.
Track construction for this section has been completed.
Track cant with smooth transition to superelevation: The track cant is 2.00 mm. It consists of a square plastic profile, which comes from the model building supplies (ships / aircraft). The profile strip is supplied in a length of approx. 100 cm. This very flexible strip is placed under the sleepers on the outside. After that, the tracks are also nailed on the outside. At the module edges, the strips are additionally secured by Ponal. To achieve a slow transition into the superelevation, Andy cut strips of about 40 cm length in the width of the underlaid profile from a 0.5 mm thick plastic plate from Plastruct (via Piko). The first strip remains in this length. On top of this, 2 more strips of different length (about always 1/3 shorter) are glued with superglue. The entire strip is then pushed under the outer sleepers. This rail piece is also nailed afterwards.
 31.10.2014 - We have removed the overheight again. Although, at least Andy's wagons were all weighted according to Fremo standard, individual wagons fall out in the Ueberhoehung. Andy has moistened the track ballast and then removed the tracks incl. the plastic strips.The tracks are now re-laid and soldered to the module edges on rail connectors with the screws.


For the area of the sidings station we use bedding plates from Heki. A normal bedding strip from Heki is placed on each of the last right and left tracks.
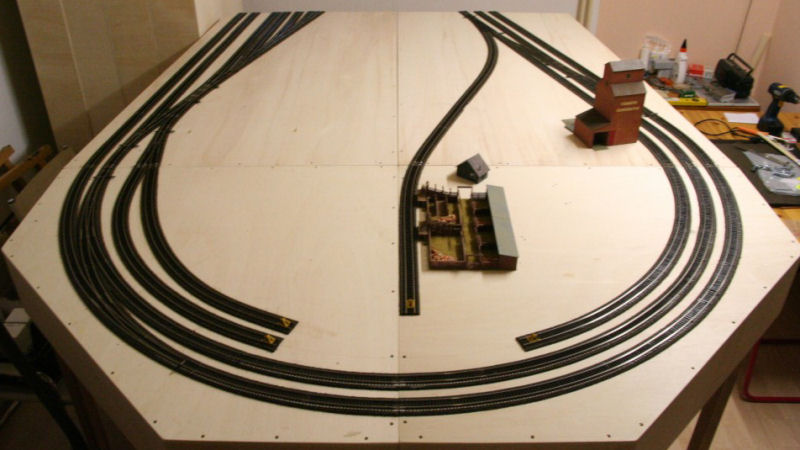
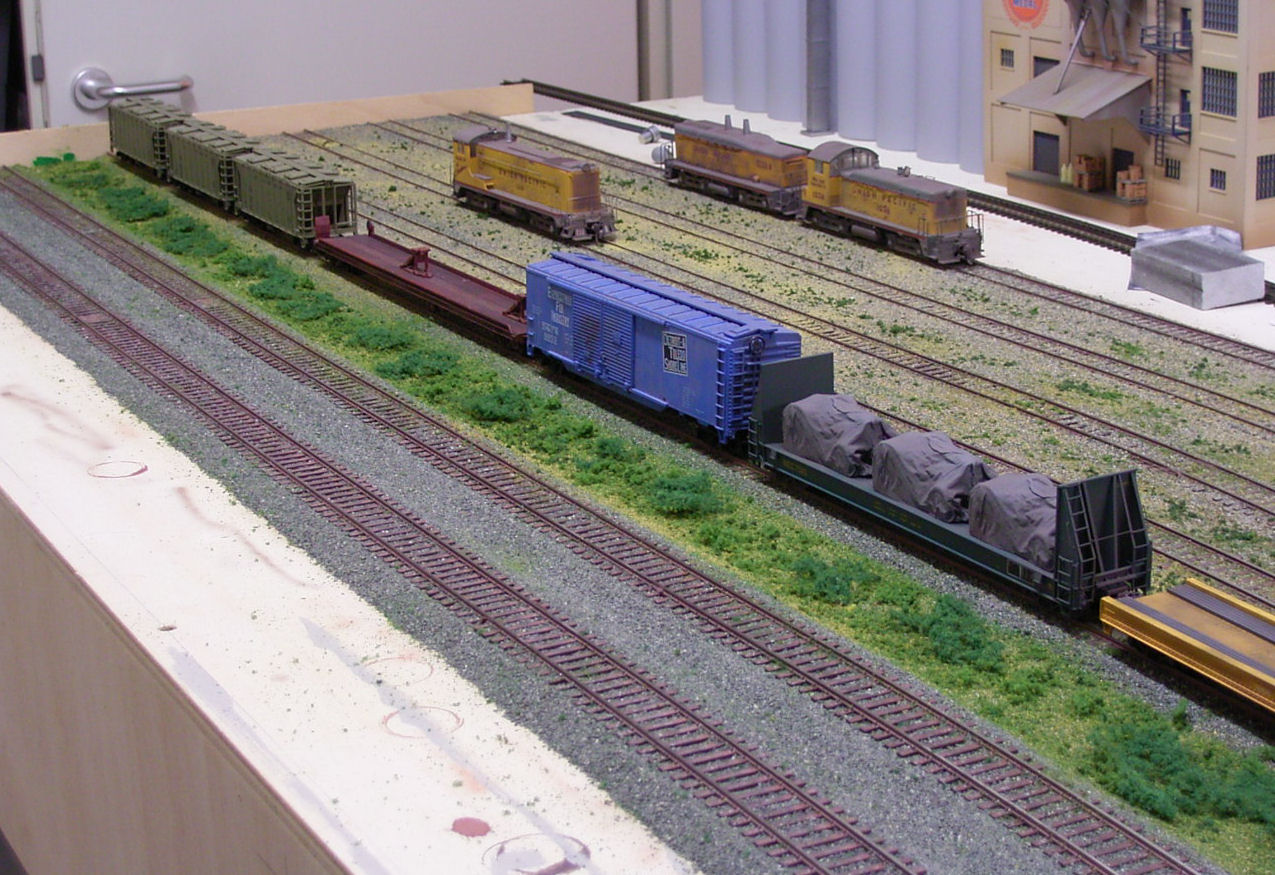
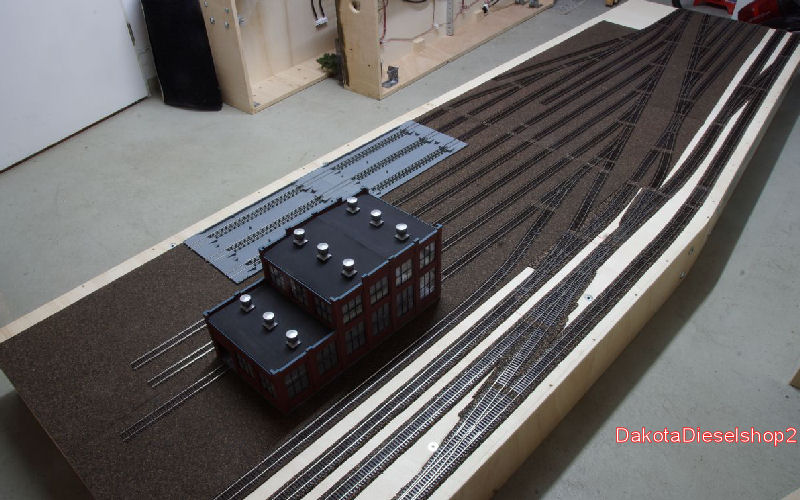
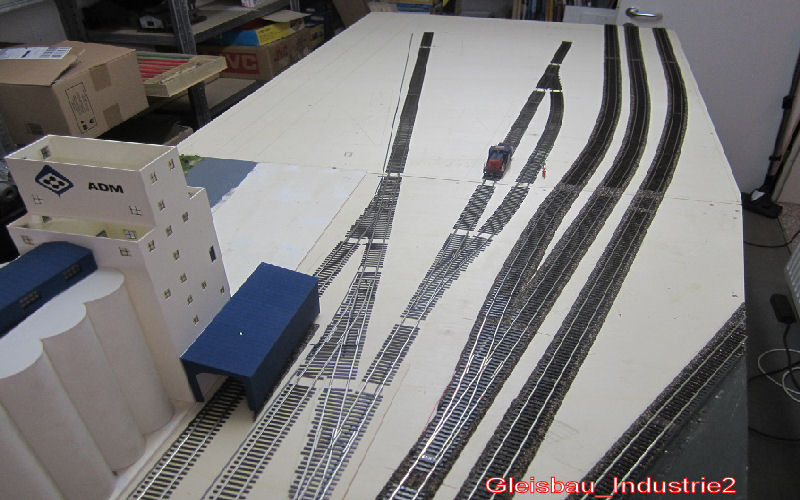
The first standard module of the stabling yard is ready in terms of track. At the back left, the two tracks of the container station are connected. The tracks will be extended a bit to the turning module, which is not attached here. The house scenery on the left will not stay like this. The trailer train shown here will fit into the tracks of the container yard. The ballast train is already there for weeks!
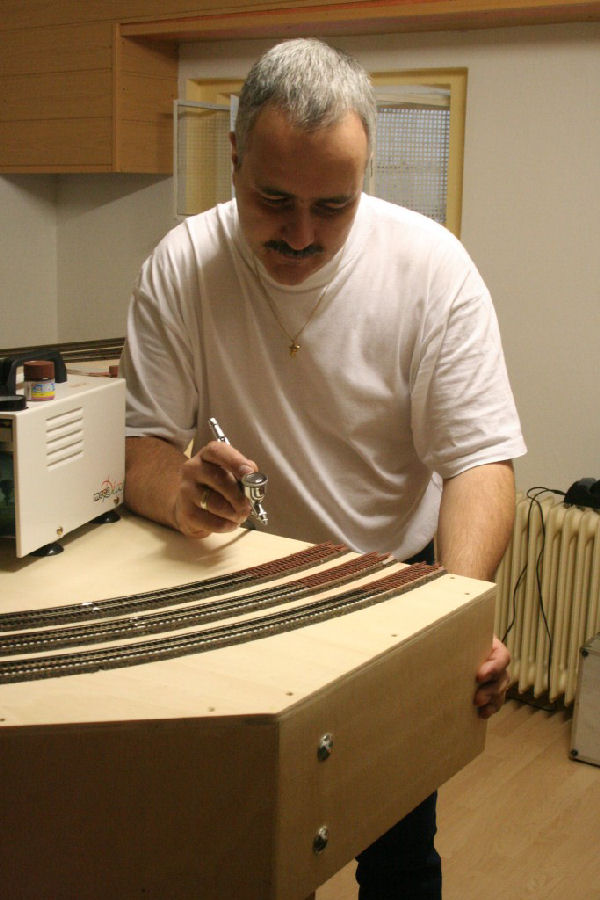
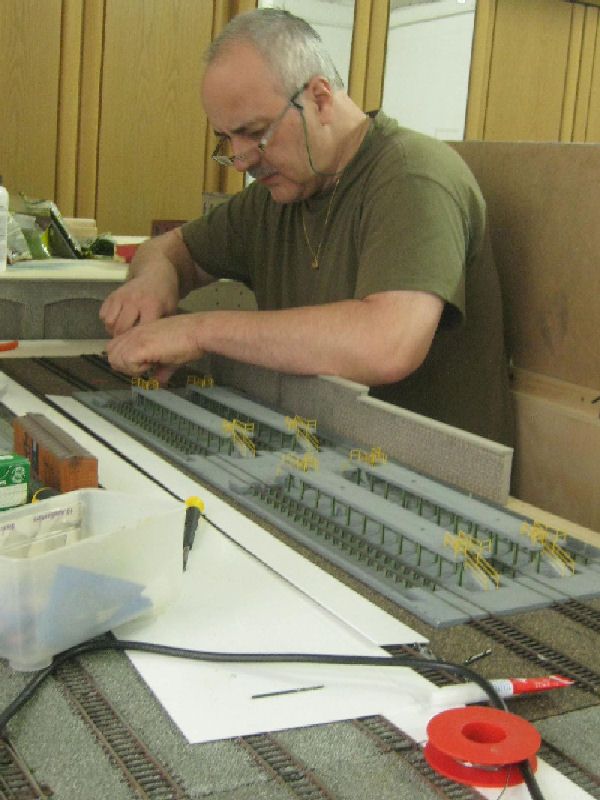
 Airbrush - First, the rail profiles and the small irons are sprayed rust-colored with the airbrush gun. After the first coat of paint has dried, the entire track is sprayed with a dust color. A darker stripe remains in the center. After the paint has dried, the running surface of the track sections is rubbed bright again with a ROCO rubber. Sandpaper will cause scoring in the profiles (dirt can get stuck). Andy does the airbrushing with a compressor. This is absolutely necessary for our track lengths. For airbrushing in general, see the Building Instructions button.
In the meantime, Andy is again applying the rust coat to the rail profiles and the small irons with a narrow brush. This method is faster. He uses the water-soluble airbrush paints that he has always used, diluted with one or two drops of water. This spreads the paint better.
Ready painted tracks on a turning module.

Finished painted entry tracks to the land station.
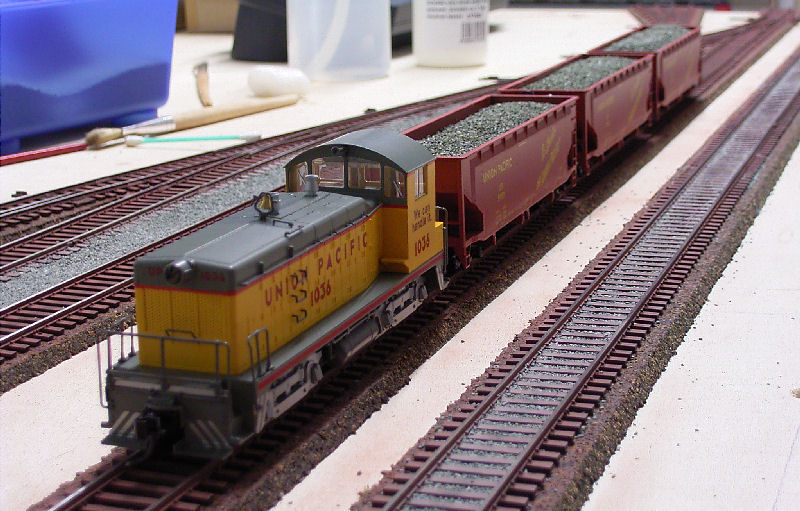
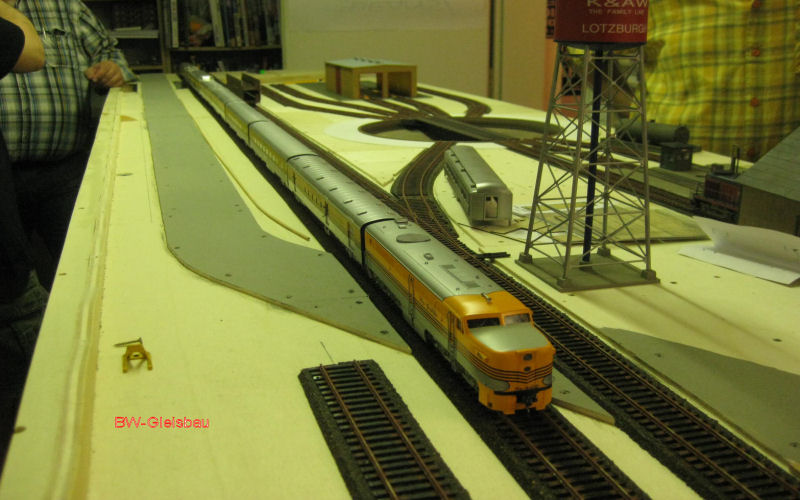
The ballast arrives. Finally with a UP switcher on the sidings being built in Andy`s basement.
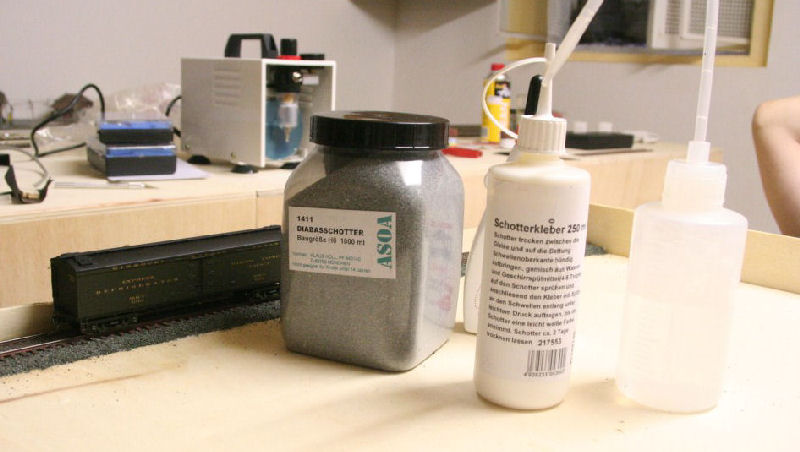
We obtain the ballast from Asoa. It is the basalt gravel HO in the 1000 ml bottle (order number 1411). The ballast is very productive. The ready-mixed glue comes from Conrad (250ml) as does the dosing bottle for the water/rinsing agent bottle. Further are needed: Wood glue (with us Ponal-Express) Bristle brushes in several sizes and for the distribution of the ballast plastic packaging cans of 35mm film. Good that Bernd still takes analog photos!

First, we spread ballast sparingly in the middle of the track over a length of approx. 10 cm using a film can that is somewhat compressed at the top. Then the ballast is spread over the middle of the track with a slightly wider bristle brush (about the width of the sleepers) until the sleepers are exposed again. The ballast remaining on the sleepers is then swept off with a small bristle brush. We then use the same brush to evenly tamp the ballasted track gaps. It is now important that the moving parts of the turnouts can run freely. In the area of the tongues and the setting sleepers, we take special care that no gravel grains remain on the sleepers or in the mechanics of the setting sleeper. The setting sleeper itself and its guides are provided with a drop of machine oil. No glue can stick to the oil. Thus, the mechanics of the turnout remain movable. Now an undiluted Ponal-Express stiffener is applied to the outer edges of the track bed. This prevents the ballast from slipping down the incline again when the ballast is now placed on the outer sleeper strip. Now the ballast is applied and spread as described above. In the slopes, we make sure that the ballast bed does not have any depressions.
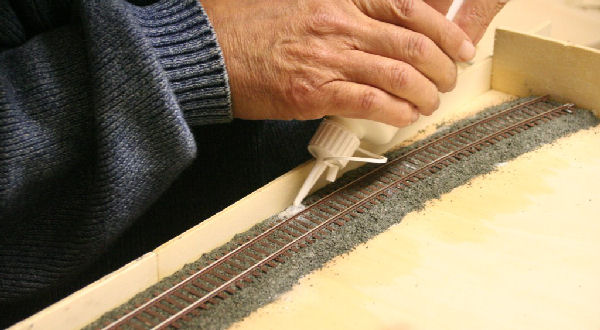 As soon as the wood glue on the edge of the track bed is halfway dry, you can start fixing the ballast. First, the ballast bed is wetted with water to which washing-up liquid is added (3 drops are sufficient for the bottle shown above - too much washing-up liquid leads to extreme foaming). The long spout of the bottle is passed around the outside of the ballast bed. The rinsing agent distributes the water over the entire ballast bed. The thin-bodied ballast adhesive is then distributed in the same way. The glue results in a slight white coloration. This gives a good control of the glue distribution. Now let the whole thing dry for at least 24 hours. After that, any "holes" or imperfections that may have appeared can be repaired. The board attached to the end of the track piece (at the same time module edge) leads to a clean edge.
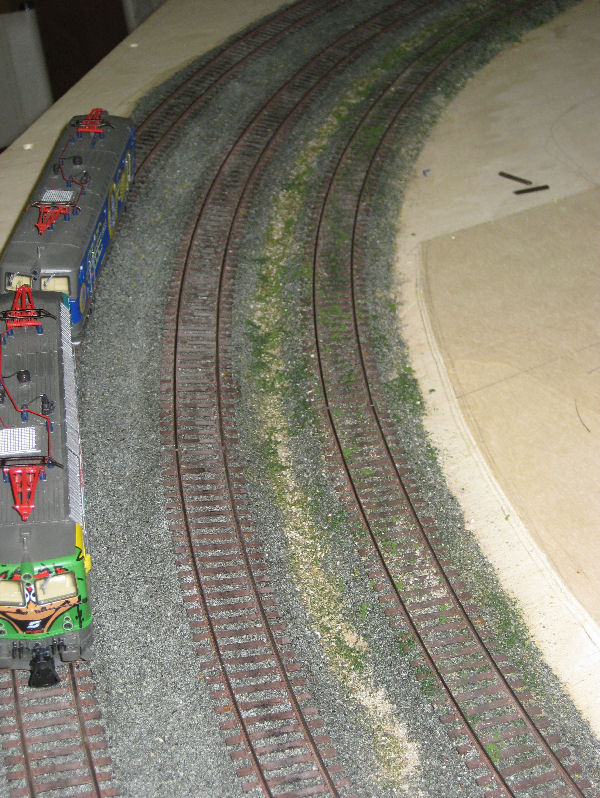
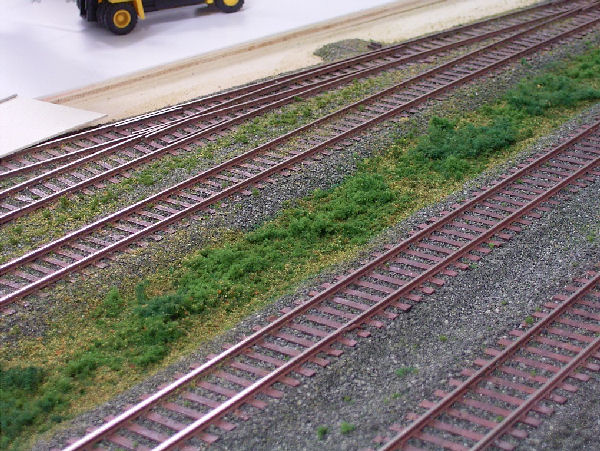
In the first picture, the spaces between the main tracks are already ballasted. The main tracks are kept free of vegetation. The siding and its space between the main track got the first layer of "overgrowth". The material was applied loosely again and then "glued" according to the method described above. The further "Verwucherung" is only in the course of the terrain construction to get a "picture" here. What are the two "Austrians" in double traction doing there? What probably - looking at Indians!
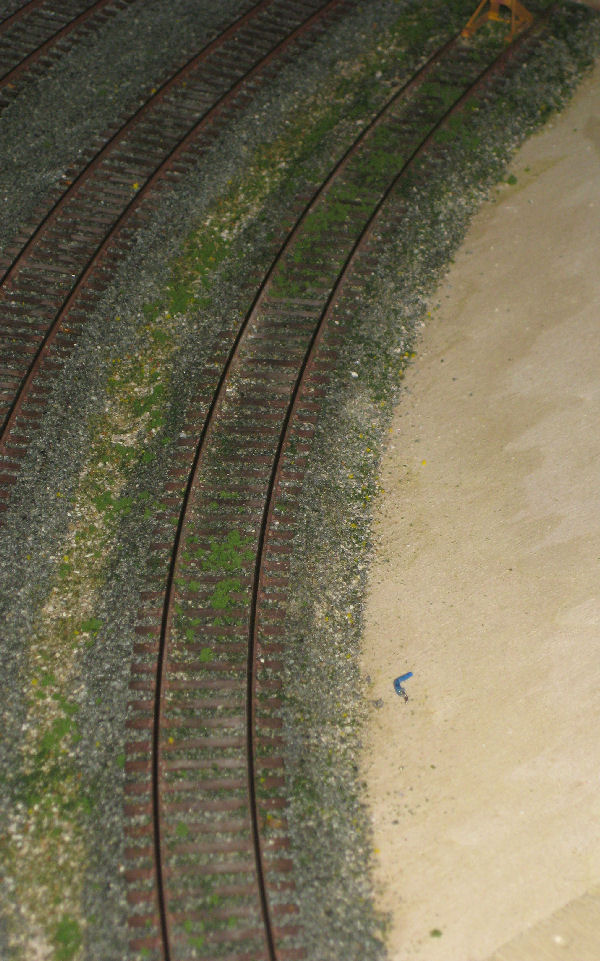
The second photo shows a close-up view.
The material used can be found under building instructions.
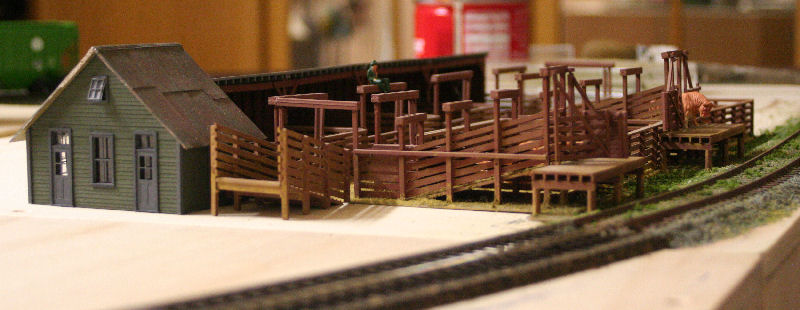

The track at the cattle loading. The "cattle" seems to like the green. And once closer to the later granary track.
 The first picture shows a completed track section in the right entrance to the sidings station. The "greening was created exclusively from material from Woodland and sand from the nature of the mountainous homeland.
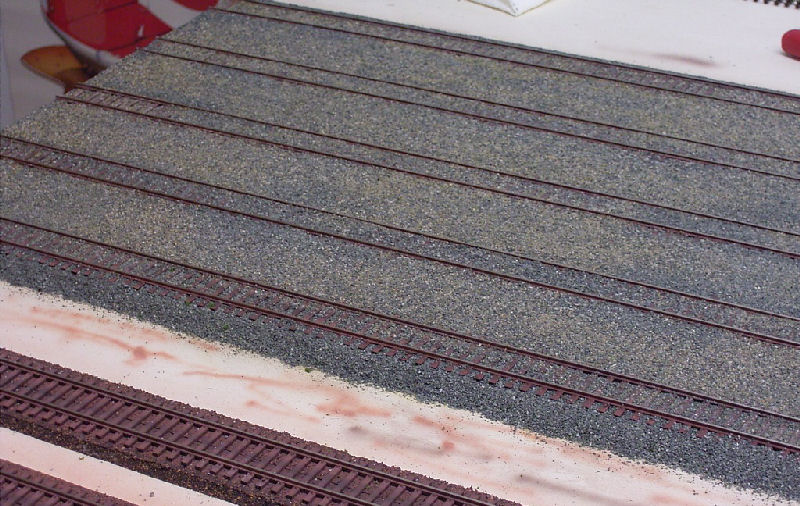
The second picture shows the ballasting of the stabling yard. The gaps between the tracks were filled up to about the upper edge of the sleepers with a Finn cardboard cut into suitable strips. Then they were filled with a mixture of basalt ballast/mineral concrete (Asoa) and finely sieved sand and glued in the manner already described. The next step is the weathering process.
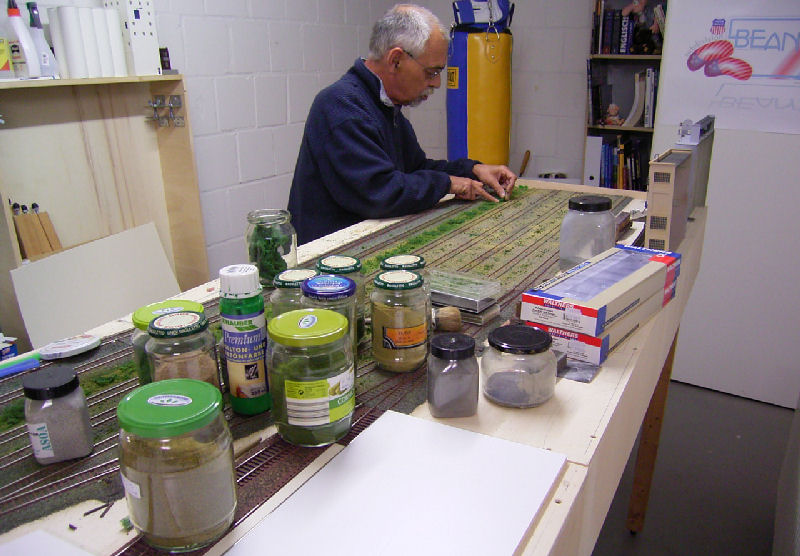
In the first picture, the green strip between the main tracks and the sidings is being made. Filigree bushes are still missing. Here we will use foliage/nonwovens from Heki.
In the second picture, this section is also completed between the sidings. We are not yet agreed on how to design the strip in the foreground. Probably flat and green. We are thinking about creating a connection for the train-safe system http://www.train-safe.de/ with a switch at the end of this side of the layout, so that complete train sets can be changed quickly.
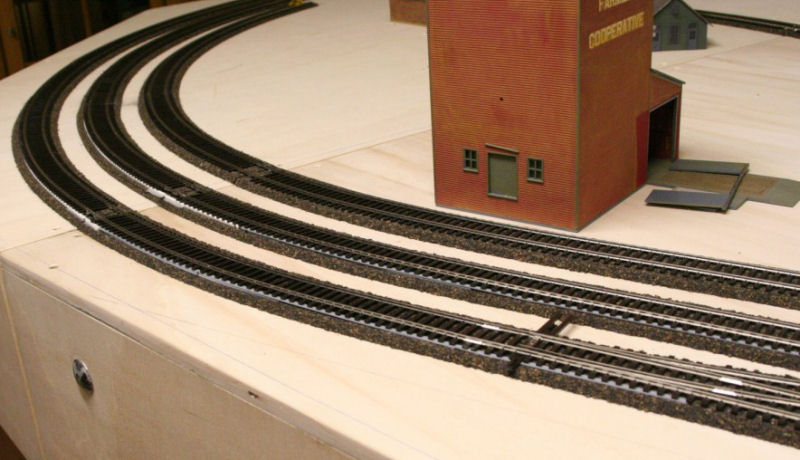
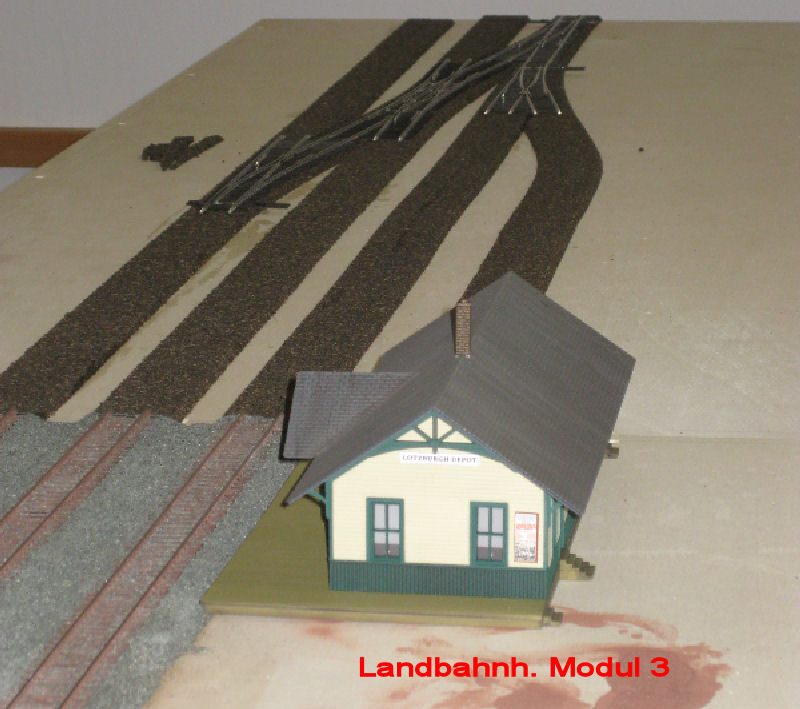
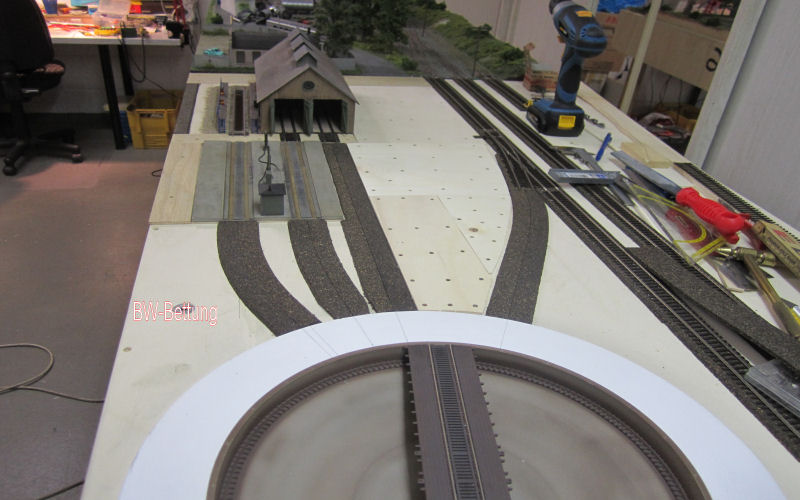
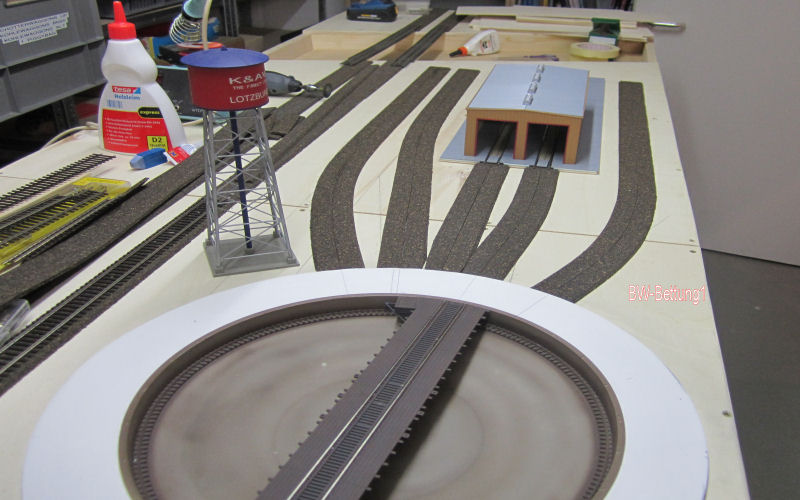
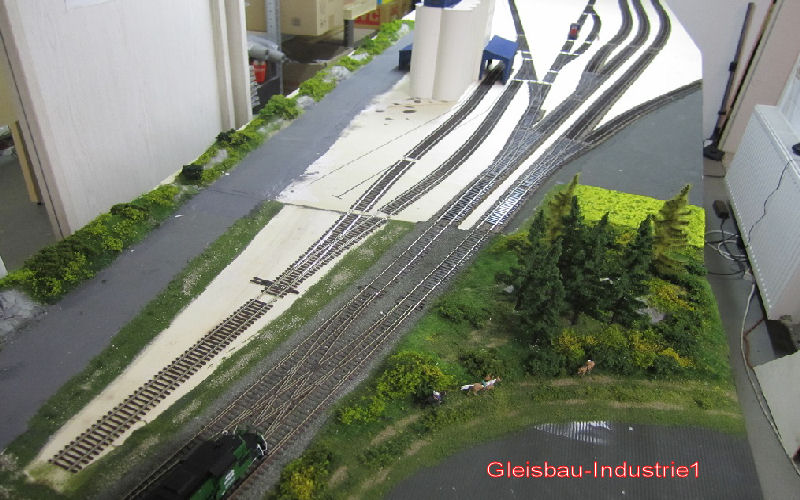
The tracks on the first standard module of the Lotzburgh land station are laid and ballasted. In the curve on the rear side of the module the station building with the platform will find its place. At the height of the last turnout the level crossing is installed.
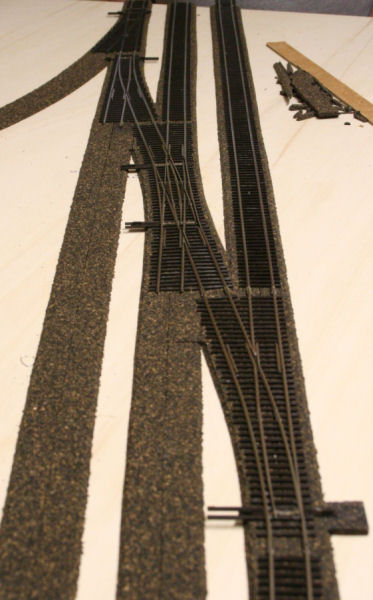
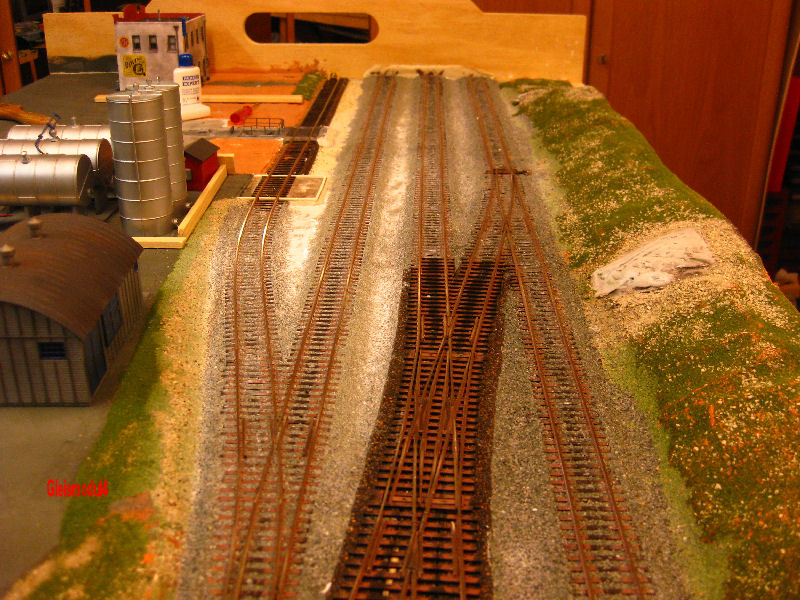
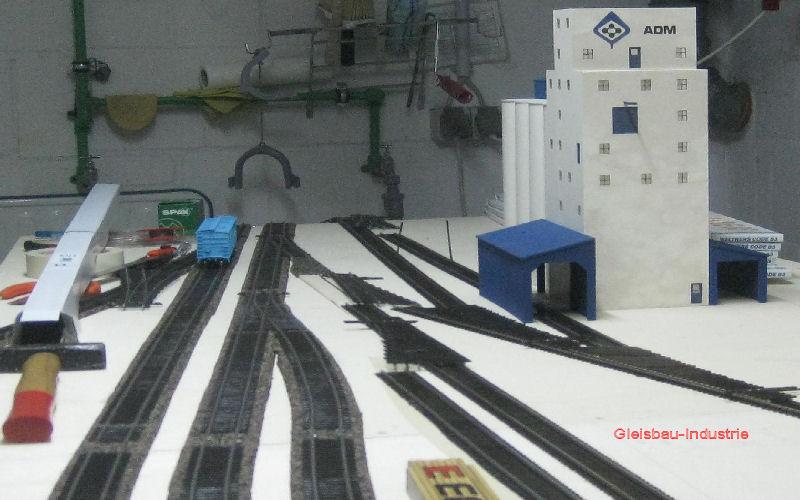
 The beddings are on the 2nd standard module of the land station. The turnouts have been laid out on a trial basis. The holes for the actuating rods of the turnout drives have already been drilled. This is the other end of the station. the original plan included only a simple turnout connection between tracks 2 and 3. we have now decided to build a complete turnout connection, again using a crossing turnout. Additionally, track 3 gets a short pull-out/storage track. Another loading track for the local fuel dealer (coal/mineral oil) branches off from track 1. The station building was first planned at the rear of the layout. Now it will move to the front of the layout. Besides the fuel dealer and 2 to 3 stores incl. gas station, the small supermarket and our agricultural machinery dealer will also find space here. For this the rear part of the modules will now, except for the access road to the grain store etc. and the loading ramp, only carry landscape.
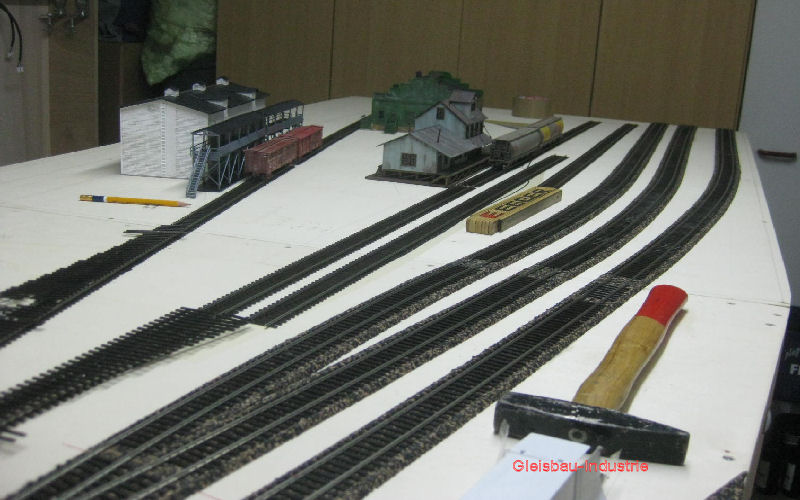
The finished tracks on this module. The right siding will possibly be extended a bit (unloading possibility for coal hoppers).
The right-hand loading track has been extended. The coal unloading system and the catch basin for the oil unloading have been installed. Likewise, the ballast is applied and glued....up to the crossing switch! In spite of all caution, a switch tongue got stuck during the ballast application. In addition, there was an obviously defective motor drive. During the last check of the freedom of movement of the tongues and setting sleepers before gluing, the drive did not stop and tore off a setting sleeper. Repair is not possible. The replacement has already been made. Who does something like that? My Andy, of course.

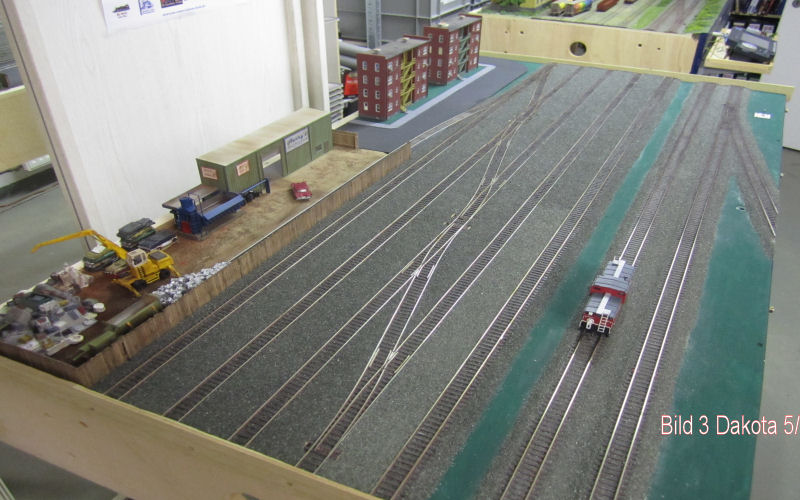
The new branch from the bypass track on the 4th module of the Dakota City sidings yard is rail-ready.
In order to even out the level from the bypass road (with cork bedding) to the loading road (without cork bedding), Andy had to build a small ramp out of Finnboard.
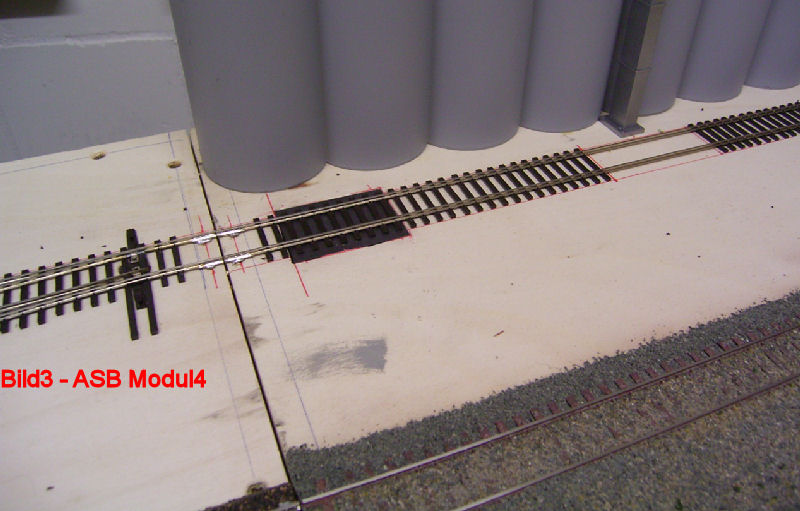
A decoupling magnet (dark part) has been installed in the loading lane in front of the grain silos. At the place where the sleepers are missing, a bottom flap for grain unloading is still installed.
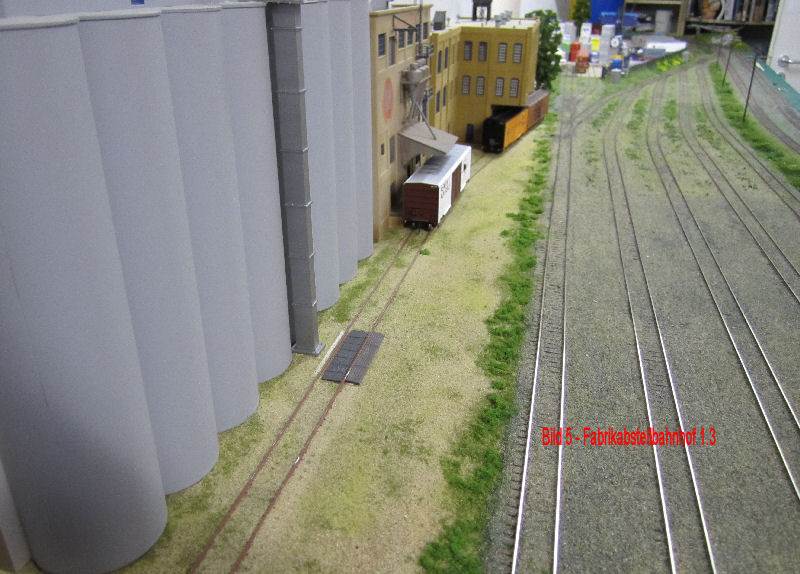
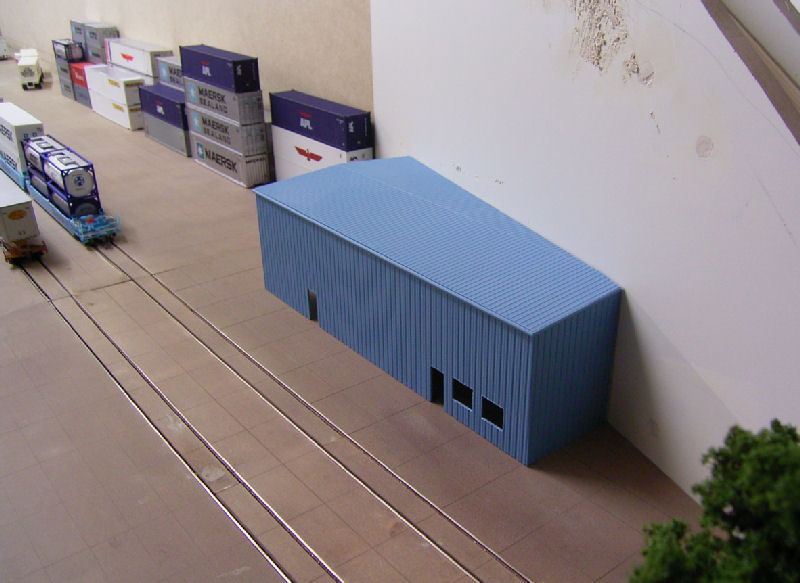
Instead of ballast, a sand bedding was used here. We show under Button Plant Construction/Landscape Construction the pictures of the construction of the factory area at the edge of the sidings station.
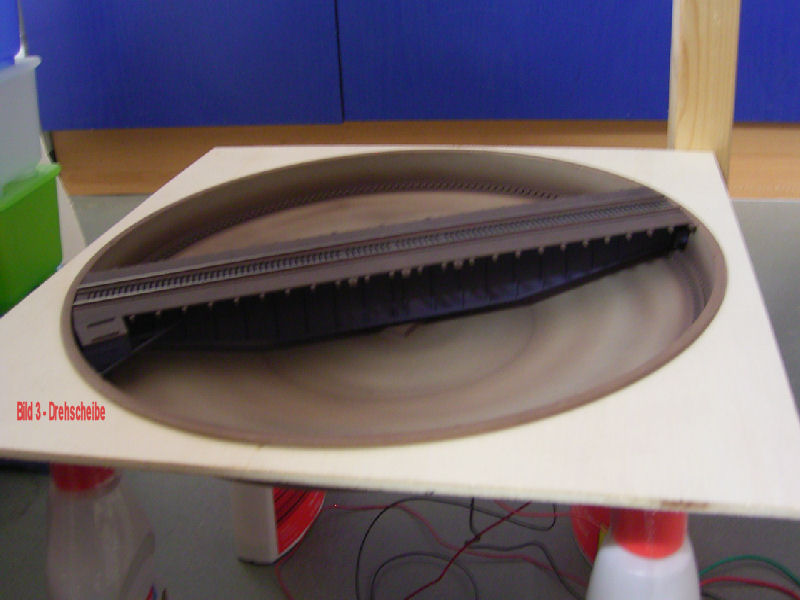
Turntable/Turntable Installation
Turntable for the K&AW Shop
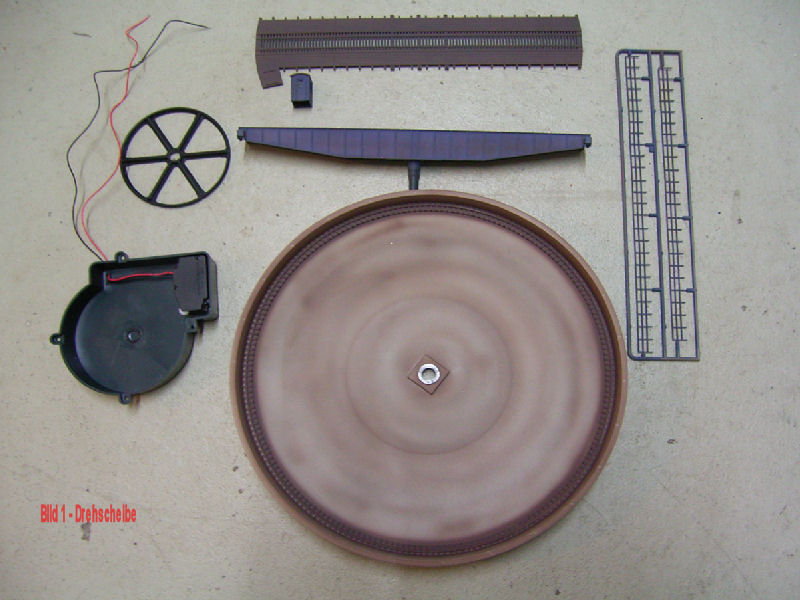
The turntable is made from a kit from the Cornerstone series by Walthers. The drive motor is also from Walthers. First Andy painted all parts of the turntable and then weathered them.
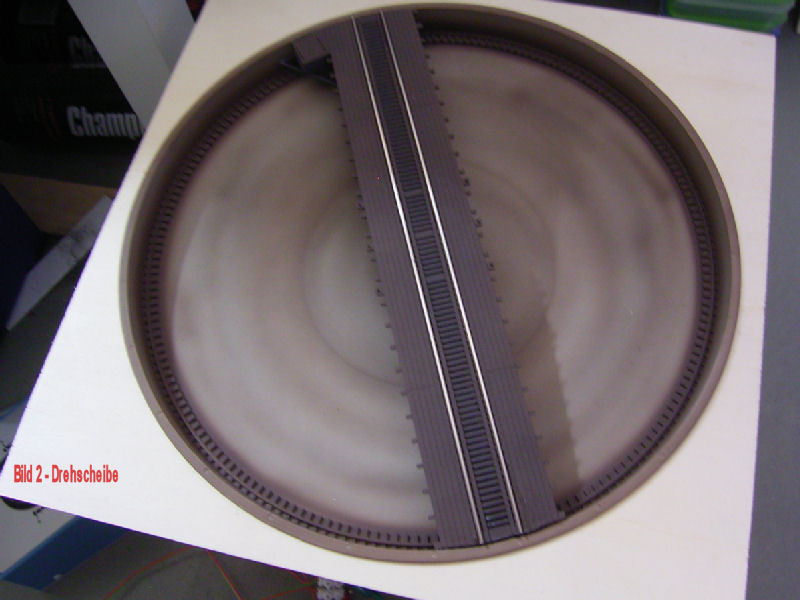
Andy sawed a hole in a board into which the turntable fits exactly.
This way he can support the disc evenly on 4 points to do some tests.
Unfortunately, the good piece is not yet running to Andy's full satisfaction.
But he is working on it.
The rail profiles have also been glued on.
The railings and the turntable attendant's house are still missing.
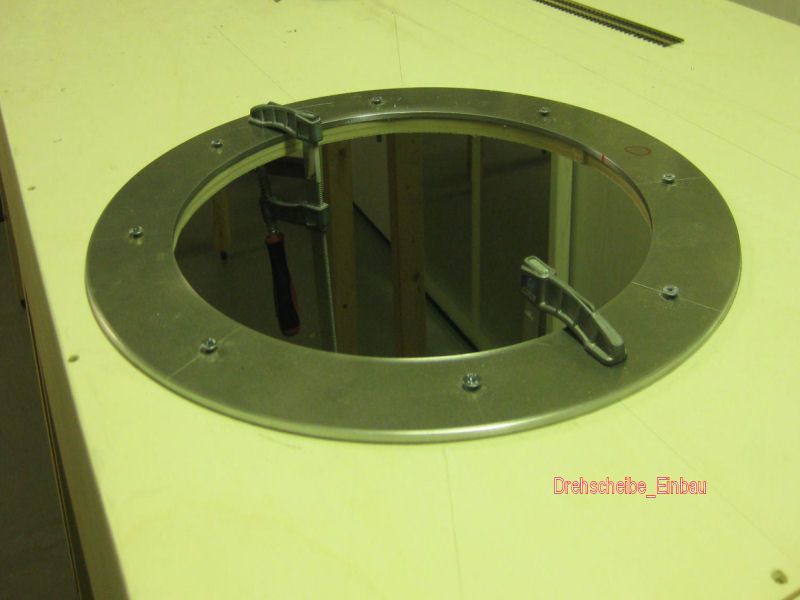
The installation: The very inexpensive Cornerstone turntable pit consists of a plastic drawing part. To give it stability and a really circular stable shape when installed in the base plate, Andy came up with the idea to have 2 aluminum rings of 4mm thickness turned. 4mm height corresponds to the Heki bedding we use.
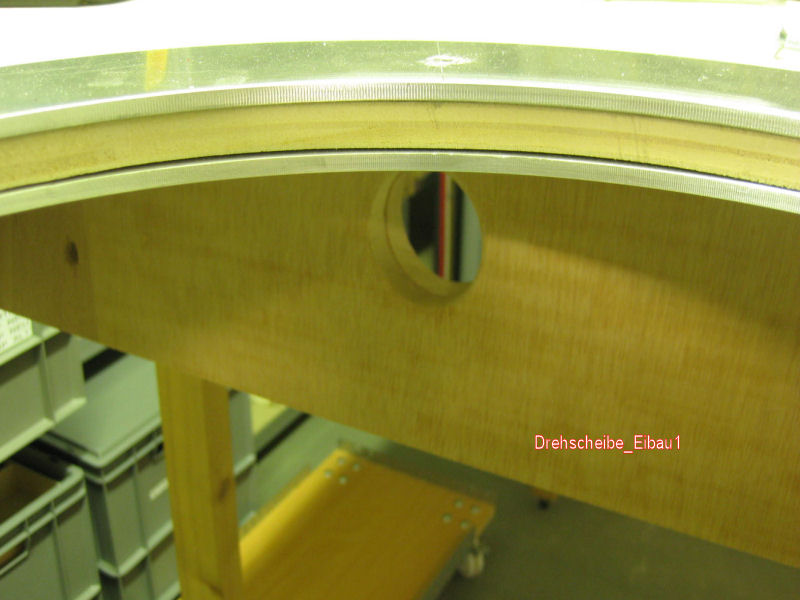
Here you can see the upper and lower ring.
The aluminum rings were drilled through in 8 places (5 metal drill bit) to accommodate the countersunk threaded screws with nuts. The screw holes in the upper ring were enlarged with a 10 drill bit so that the screw heads would be flat with the surface of the ring. Of course, the top plate also had to be drilled through. Then the screws were inserted and screwed tight with the nuts.

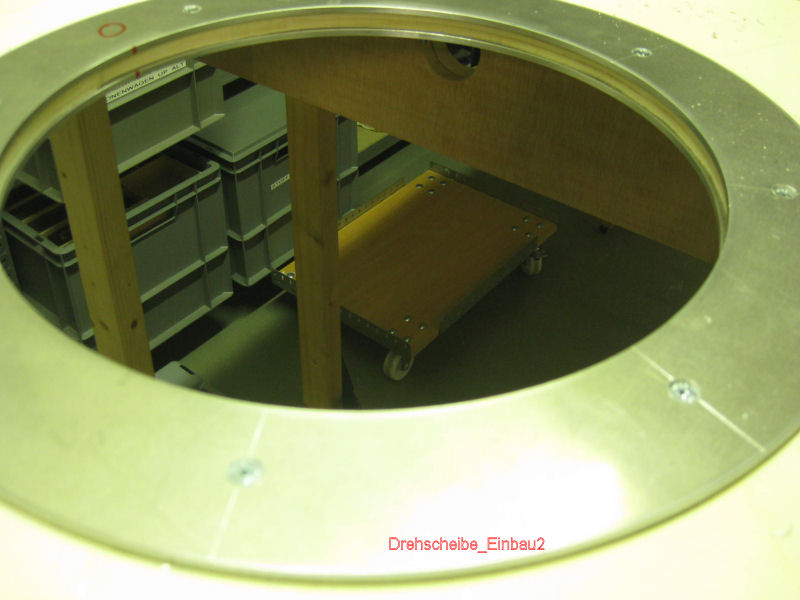
Now the turntable could be inserted. It sits tension-free, but already well fixed, in its frame. A test showed that it runs smoothly. It is controlled by a normal DC transformer. So it can be "driven" right and left around. The disc has no "stops" for exact stopping. But with the transformer this is possible without problems. We don't quite like the drive (motor from Cornerstone about 10 Euro. Plastic gears) yet. We will probably exchange the plastic gears for metal ones and install a better (quieter) motor. In addition, the disc, as we intended from the beginning, is again intercepted from below by a metal bracket.
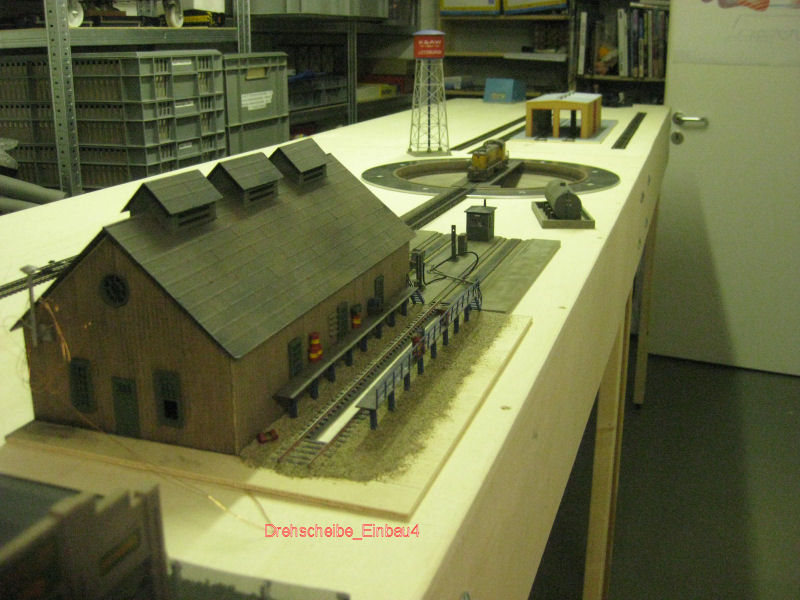
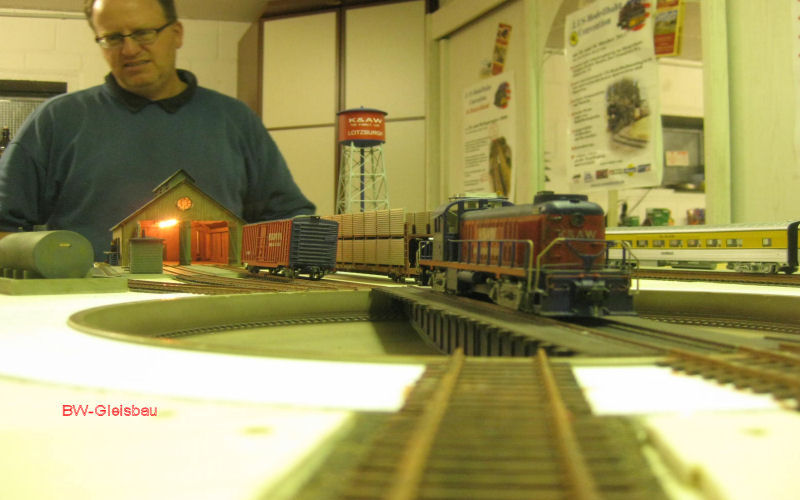
The depot will look something like this. In front the 2-storey locomotive shed with the pit track. In front of it, the refueling station. Then the turntable. Here you can see that the Heki track bedding is exactly the height of the aluminum ring. The track then matches the height of the bridge exactly. Behind the turntable is the 2-story workshop building. To the right of the workshop is the caboose track. To the left of the workshop are two sidings. Access is via the inner track at the level of the locomotive shed. The mainline tracks are behind the sidings. The BW has facilities for diesel locomotives only. Details on the construction of the buildings can be found under the button Plant Construction/Buildings.
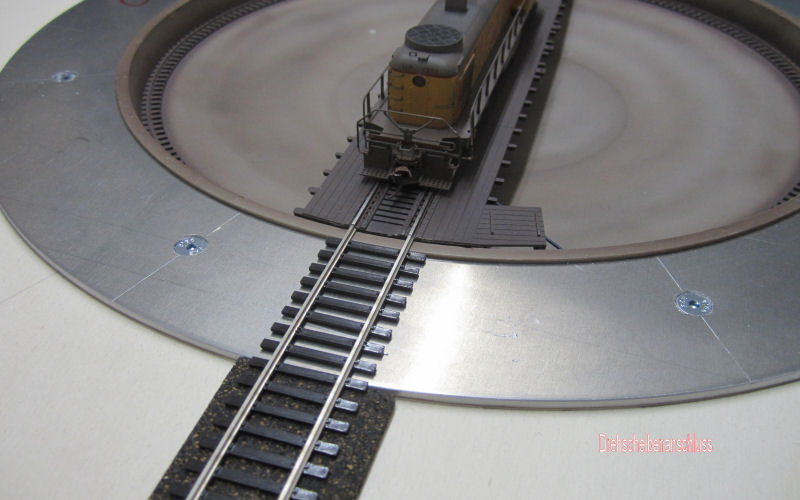
After creating the Heki bedding, the Walters Code 83 track fits perfectly in height to the turntable transition.
Installation of the ballast on the lock shed side. The turnout into the BW is installed in the already laid main tracks.
..and the other side with sidings and workshop
All tracks in the BW are lying. The Rio Grande express train with an Alco PA at the head just crosses the later level crossing.
Our club boss Stefan looks at the transfer critically. But, everything is fine!
October 2018: Despite several modifications, the Walthers turntable could not be persuaded to work flawlessly, so another solution was sought. After some searching, a turntable from Heljan was shortlisted.
This turntable comes with a control system. Unlike other turntables from German manufacturers, the turntable can be positioned as desired and the positions are stored.
The closer research showed that the turntable has the same dimensions as the Walthers. So ordered - but not in Germany; was only available from England.
Dimensions - puff: The diameter of the turntable is 4 mm larger than that of the Walthers. Consequence: The hole including the metal frame had to be milled out.
So first remove all tracks and bedding. Then remove the old turntable, mill it and install the new one.
In the meantime, it has been shown that the investment has paid off. The turntable can always be readjusted, even if DJ Sausage Finger Harry deletes the configuration can be restored within a few minutes.
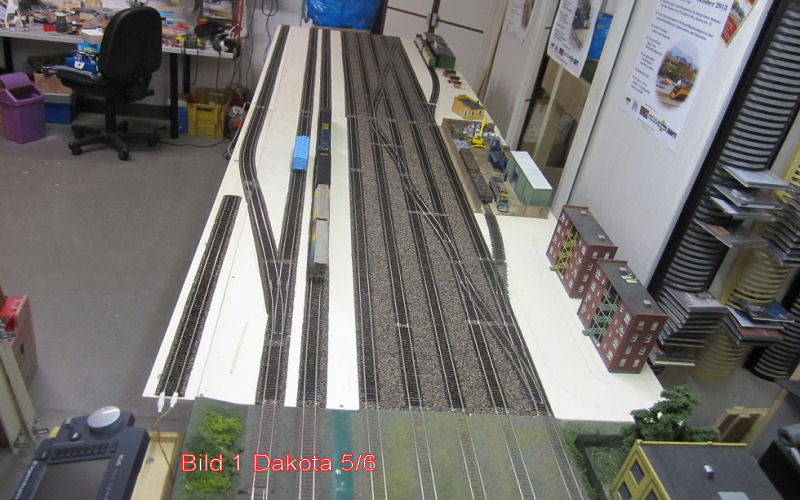
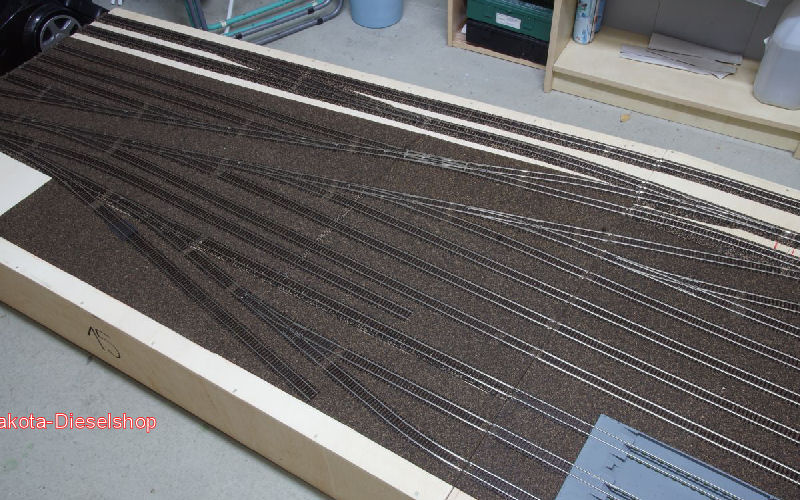
Things are also moving forward on the Dakota side! Track laying on modules 5 - 6 are finished. Switch connections between track 2 and 5 of the shunting group are installed. This allows for an "intermediate" approach. In the final stage, these tracks will be up to 10m long. Behind the shunting tracks, the shunting tracks for the companies working here have already been installed. In front of the shunting group are the two main tracks with a branch to a track outside the module boxes for rerailing whole trains. The turnout can be removed completely. Also to be seen next to the ECOS is the programming track. The next step is now the electrical wiring incl. installation of the points servos....and that are plenty!
One of the most beautiful works available at Beans. Rails painted with a coat of rust. Frank and Harry with small brush at work. With 2 dakota modules to brush really funny!
Also great! Ballast. Spread with old film can, then eimassieren with brush and expose sleepers and turnout rod. Fine mist entire track layout with relaxed water (Dish washing additive) and glue diluted white glue with very fine syringe or glue bottle. Be careful not to glue any moving parts on the points.
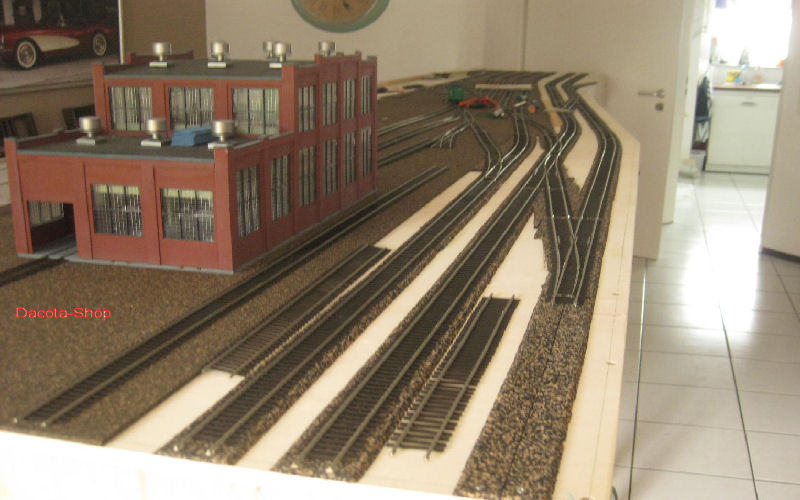
During Bernd`s one-week visit at Andy`s (19. - 26.6.2016) he could only be amazed. In the basement, in the laundry room and in the living room were modules. And everywhere the home troop was busy with the track construction on both layout sides! In the living room were the last 3 modules of the Dakota-City side (4.5 meters long), on which you can see the out-threading of the sidings with the attached store. Adjacent to these modules is the turning head. The store is connected via its own track yard. This way, the locomotive movements in the store do not interfere with the entries and exits from the stabling station. Now only one module is missing on this side of the layout. But "only" continuous tracks and 2 turnouts for loading tracks have to be laid on this.
The Shop! with its switches and tracks installed so far. The building is intended as a workshop building. On the right side you can see the base plate of the locomotive hall. In the meantime, the module plate for the base plate of the locomotive hall has been cut out. Now only one module is missing on the Dakota City side.

The opposite direction with the two track yards for the store and the sidings. On the right in the foreground the two continuous main tracks with the branch for the stabling track suspended separately in front of the modules and removable

The extension boards for the siding. The two upper ones are intended for the two modules described above. There are knurled screws in the frame into which the extension boards are hooked and screwed tight via metal brackets.
The finished tracks of the exit group and the diesel store. At the big locomotive shed the tracks are not yet complete, because the shed has to be taken out again for completion.
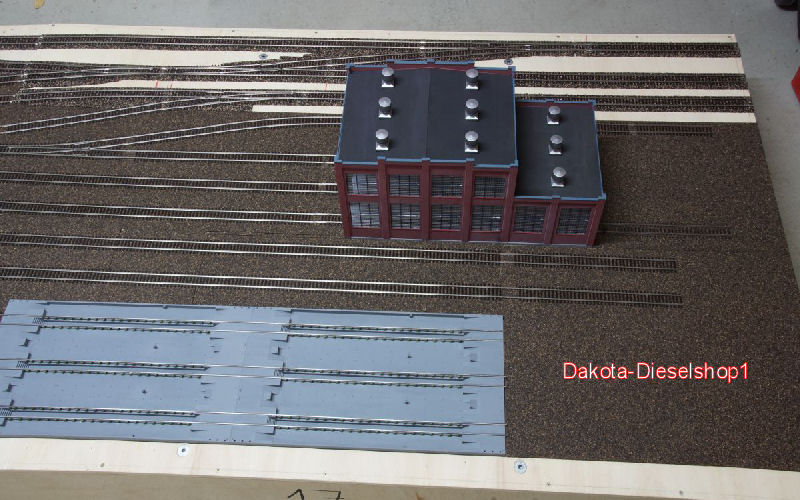
The workshop building. Here is still missing the interior inckl. Ceiling crane and behind the shed the electric power station. The refueling/shipping facility and a tank farm with excta siding follow. The main tracks (here 3-track) at the top of the module disappear in the tunnel of the reversing loop with indicated passenger station. A district of Dakota City will be built above the tunnel.
Again from the other direction.
On the Lotzburgh side, the track construction of the last modules by the "Rheinlandtruppe" is in progress. Between the modules seen in this picture and the next picture and the completed modules on the Lotzburgh side, a double-track module is still missing here that will accommodate the farm and the first fields. This module is ready and will be delivered with Frank's cab to the Baltic Sea this week.
The turning tracks are laid out as 3-rails. Here the Heki cork bedding is already glued.
The whole thing once again in Andy's living room! What do you need a dining table and x chairs for, if you can fit a model railroad in there! But Andy is not so convinced in the long run. The Corvette on the picture in the background would also fit well. 2 seats are there, trays can be hung.
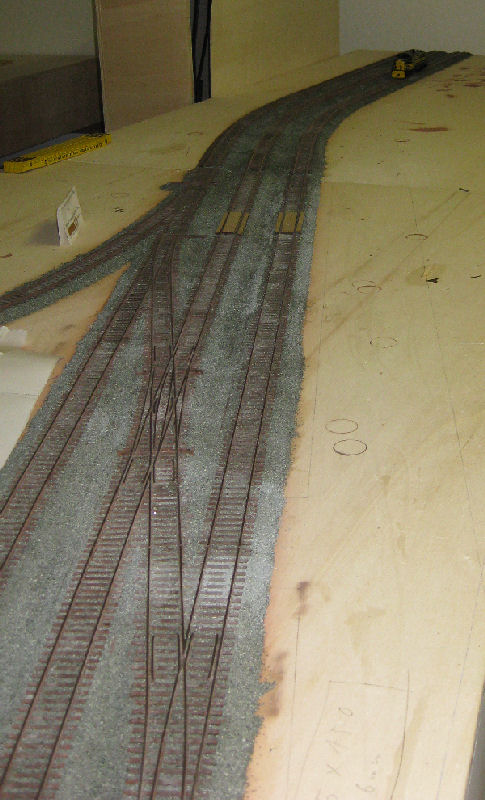
This picture shows the swing to the rear third of the modules to be able to connect to the existing track position of the Lotzburghmodules. The track change can also be seen. In front of it, in the rear track, is the switch to the industrial area. Next to it, a branch to the edge of the module...The path to the IOWA NOTHERN-RAILWAY? In front of it the branching out into the 3rd main track.
Again the whole debris. Length 5,50 m. Largest width 2 m.
The penultimate module on the Lotzburgh side. After that comes only the turning module. It is an intermediate module with the widening from 80 to 100 cm. It was planned to use a simple turnout connection (see the picture before). Now it was changed to a harness, because trains from the branch can change faster to the directional tracks. The next change would be at Lotzburgh station.
This will be followed by a 100 cm wide module that will accommodate a small industrial area with agricultural-based businesses (grain elevator, warehouse, ice house, and vegetable-fruit packing/storage. The track position is not yet final.
The other side of this module.
After the "AMIS" have now finally delivered the still needed switches, the provisorily laid tracks on the upper pictures could now be installed. Now we have to install the missing sleepers at the crossings and then soldering, servos, switch pilots and the complete cabling! We are very happy!
The continuation of the picture above.

The Golden Spike! The last track nail on the Lotzburgh side. Skippy had also arrived! Unfortunately, there was no Forsters for Him....Budweiser light! Baaaa.
Andy looks very strained. The rail joiner doesn't fit, despite being cut to size!
Andy and all of us have reason to rejoice. The floor of the locomotive shed is installed, the last rails of our layout are in place and the last nail is set. Two more cables to solder to this track and the electrics are also finished!
FINALLY!!!!!!!!!!!!!!!!!!!!!!!!!!!!!!!!!!!!!!!!!
February 2017 - Track construction is finished - Not realy
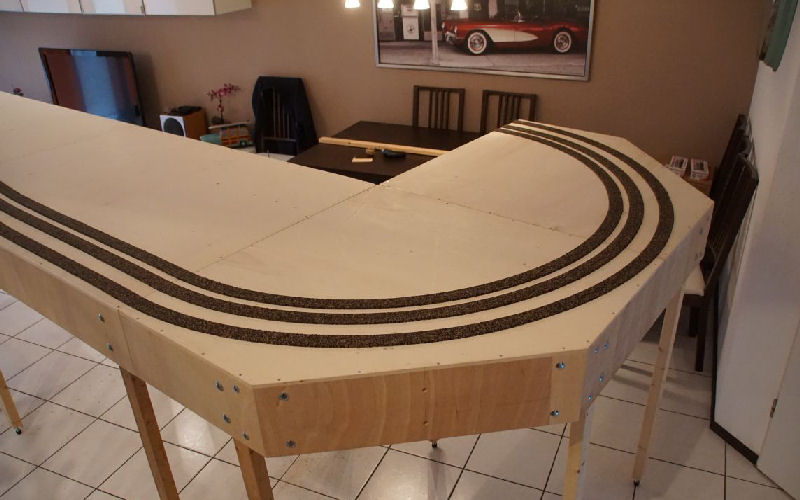
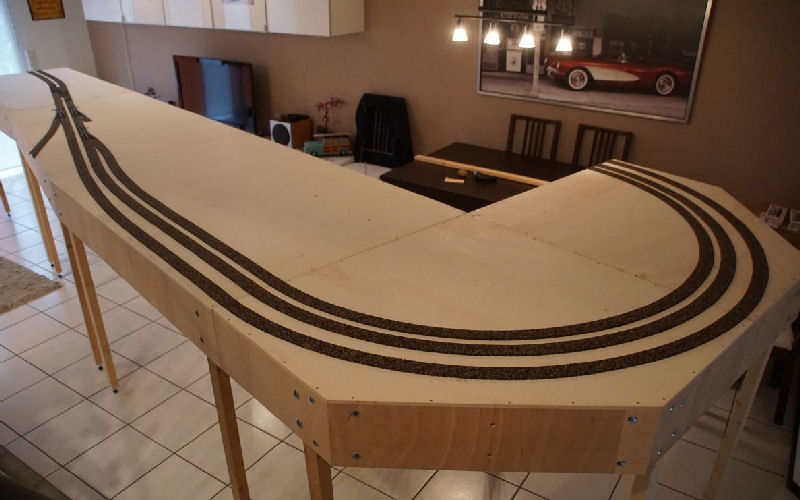
In our domicile in Wuppertal the layout does not fit in as it is planned for exhibitions (15.50m long / 2m wide). What to do ???? Ok, we can put in a 90° curve and set it up as an L. Still doesn't fit!!! So two 90° curves and now we have a U. Great - So build boxes again and get tracks and bedding
Damit To make the curves look good, a 90° curve (complete for the Lotzburg as well as the Dakota side) has 2m x 2m (We can't go small).
Wood is quickly procured and the boxes are also quickly built.
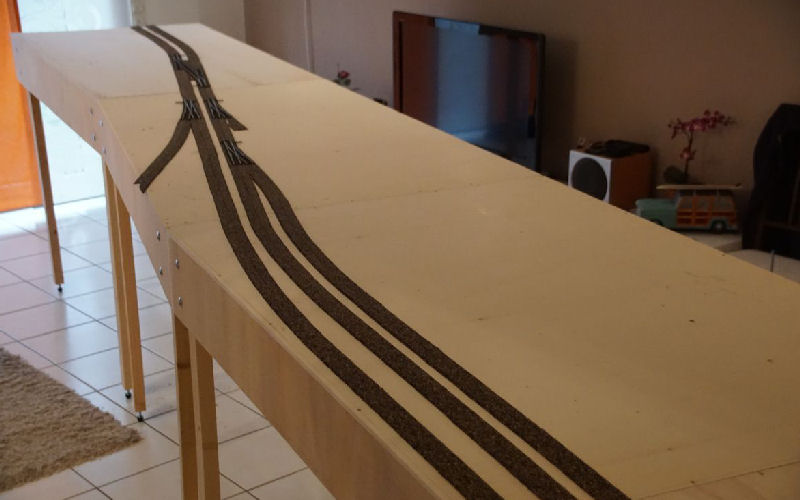
How many track is needed? - Hooops, that's 50m. All right, so Dakota City Yard grows considerably.
Before the US convention in October 2017, the curves will only be built ready to drive. Everything else later. The rest of the design is still work enough.
The first test drive on the new curve