
")
")
Container and trailer yard
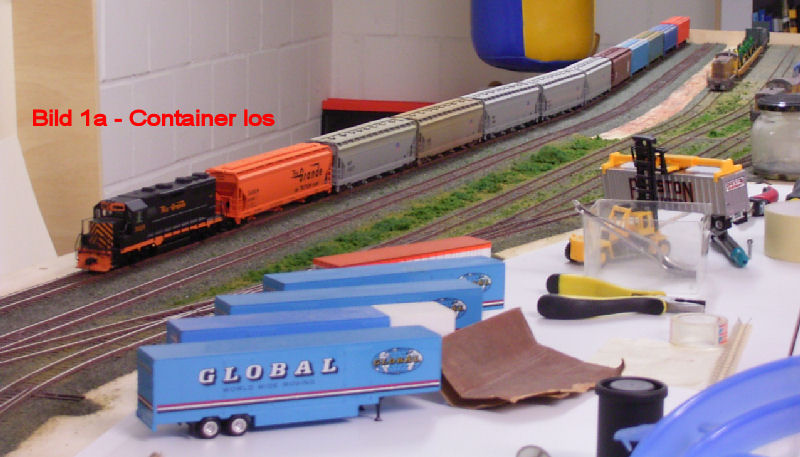
Fig. 1a - This part of Beans is in Andy`s basement. The picture shows a part of the future container and trailer yard filled with lots of stuff. In the background, finally, a locomotive from Bernd`s favorite Rio-Grande. For once not yellow! Locomotives and cars belong to Andy (except the Rio-Grande hopper). After Andy could be persuaded to clean up, we finally came to
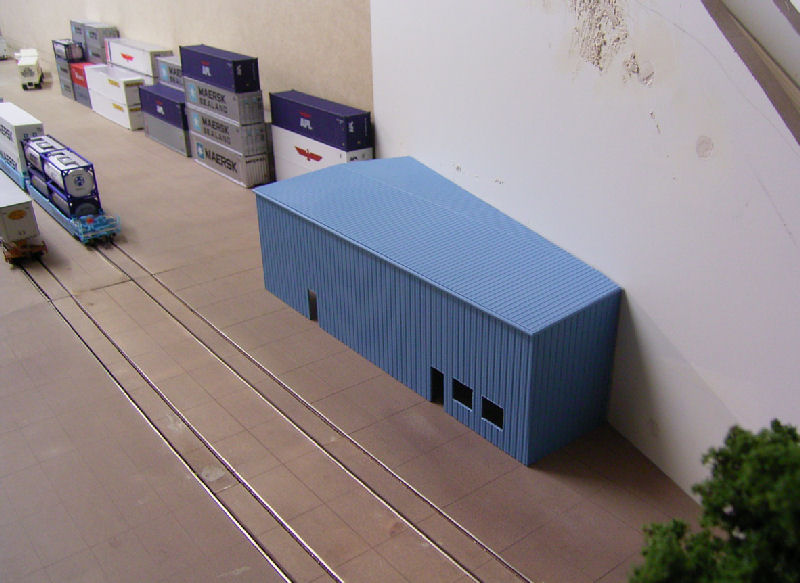
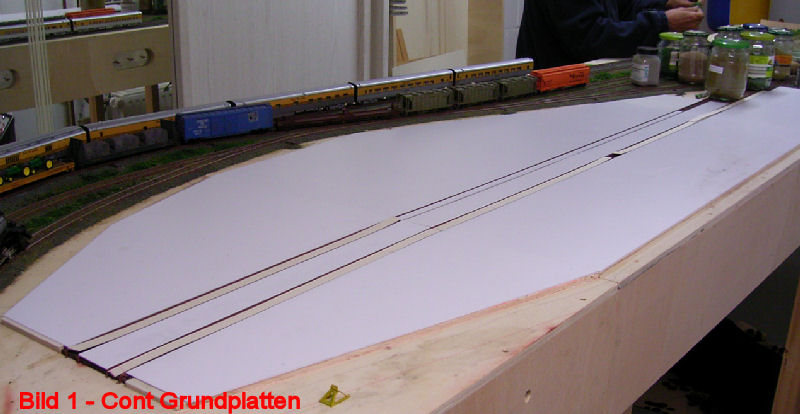 Fig. 1 - The structure of the surface was made as for the loading road. Only, of course, considerably larger and more elaborate, since the spaces between the rails of the two loading tracks also had to be filled (here, the plastic strip is still partially missing). In the foreground, containers will later be placed at the background scenery. On the far right will be a workshop. On the other side there will be space for the trailers. Loading will be done with large forklifts (on picture 1a, if cleaned up, one would be clearly visible). We will not install a loading bridge. At the right front end will be road access with a covered terminal building. We are not pregnant, by the way! There is grit material etc in the pickle jars.
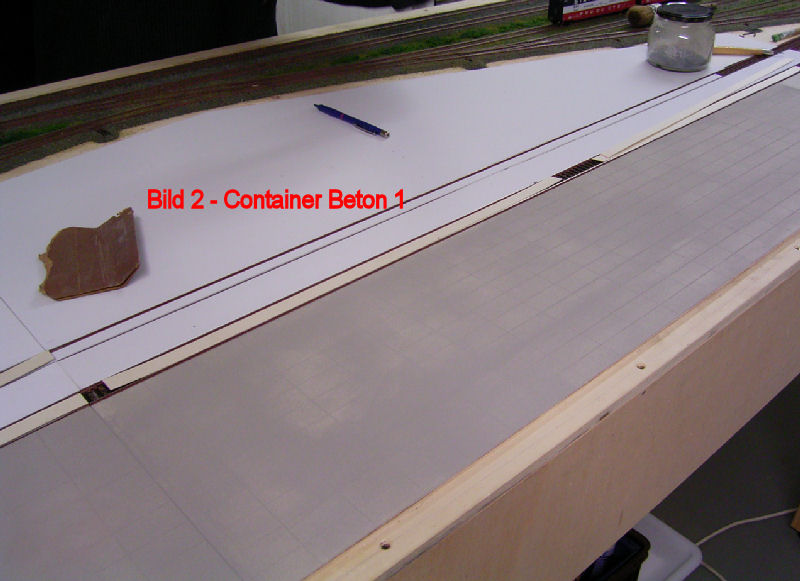
Fig. 2- Part of the concrete slab coating has been scratched into the plastic slab. The paint has been applied.

Fig. 3 - Andy has been really busy! The entire coating is engraved and painted. Now follows the aging with artist's chalk. Then the concrete fields become visible. The later users are also already there.
Construction of the container yard fence (Andy)
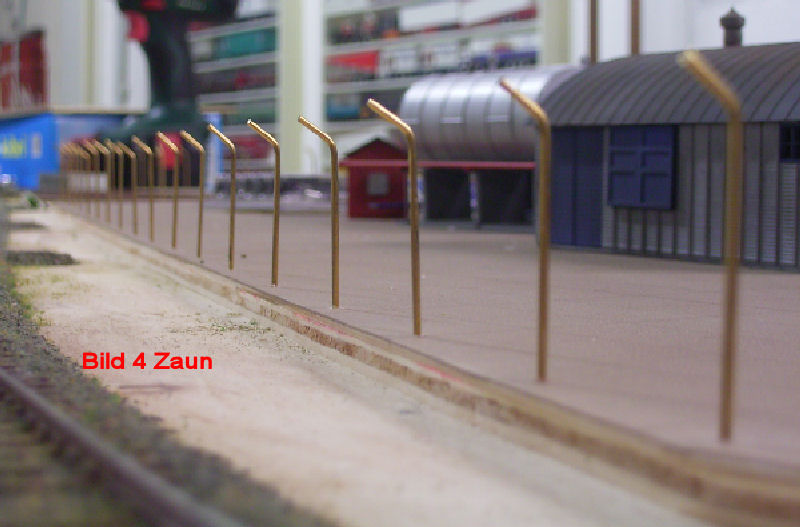
Fig. 4 - First, I cut 1.2mm thick brass wire into 5cm long pieces, and bent the upper ends, about 6mm long at about 45° angle. This will be the posts for our industrial fence with barbed wire bracing.
Now I drilled holes at a distance of 5cm all around the terrain. This corresponds to a distance of 4.7m in the original. Now all posts were "planted".
About 60 posts later the whole thing looked like this

Fig. 6 - After setting the posts, 2 clear-coated copper wires with a thickness of 0.15mm were soldered onto the slope. These were later still painted iron colors.
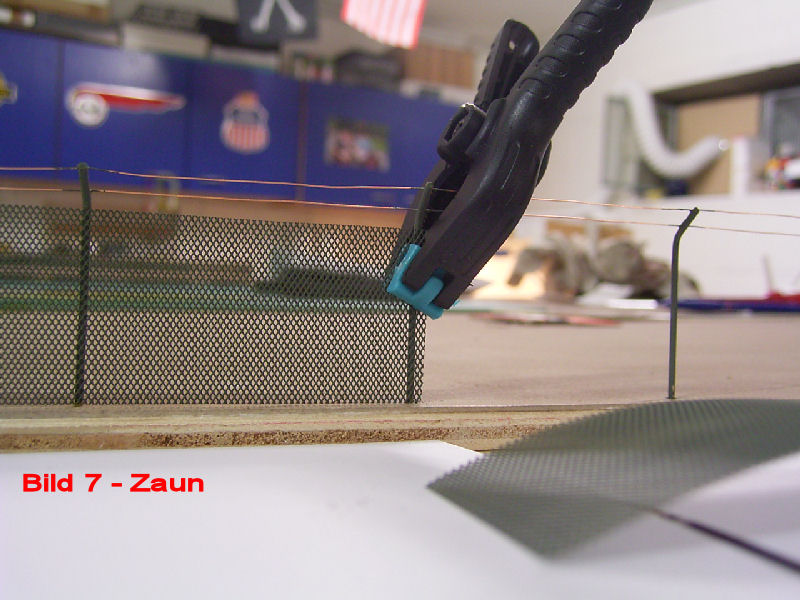
Fig. 7 - Then I cut 3cm wide strips from a DIN A4 sized, very fine wire mesh (available at ART-Service). These were then painted, just like the posts, with green-gray No.67 from Revell.
After drying, the strips were attached to the posts with super glue, and fixed with staples.
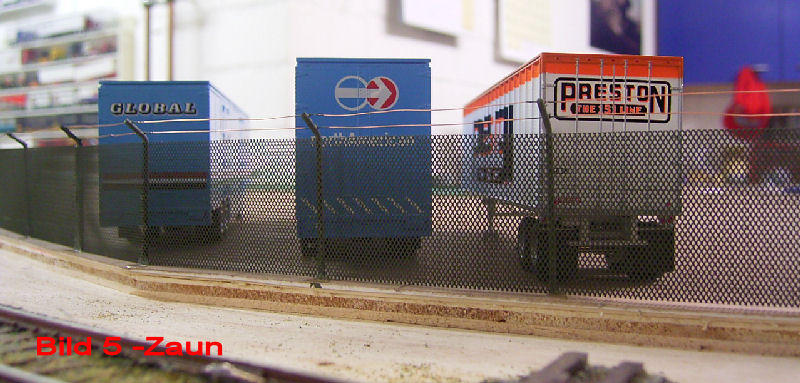
Fig. 5 - Painted and with barbed wire, the whole thing doesn't look so bad, does it ?
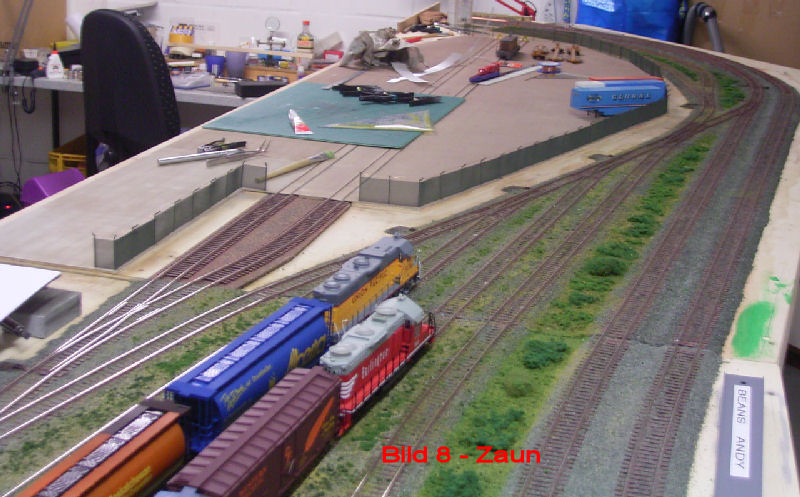
Fig. 8 - This is how the whole area looks fenced.
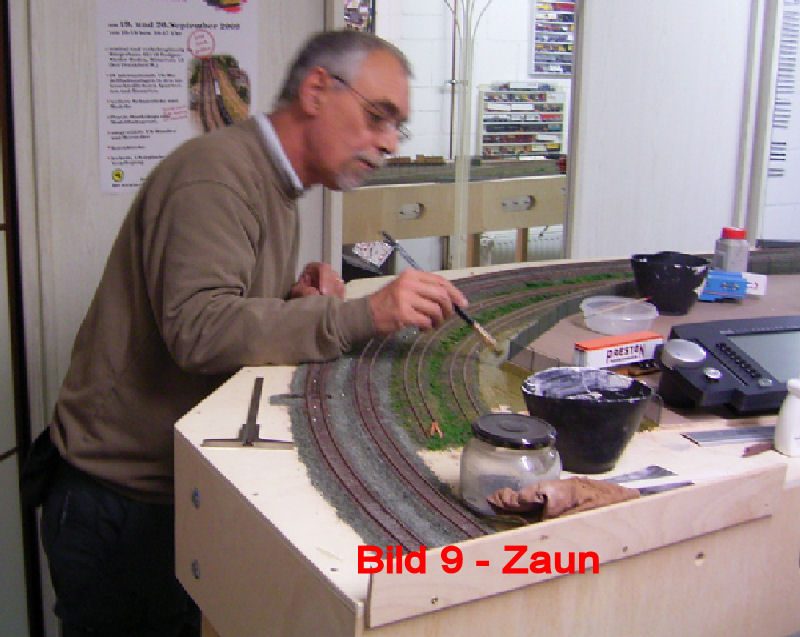
Fig. 9 - After the fence was finished, Bernd came over and filled the embankment. Then he painted everything with a matte green primer. On this comes then later still the green stuff and bushes.
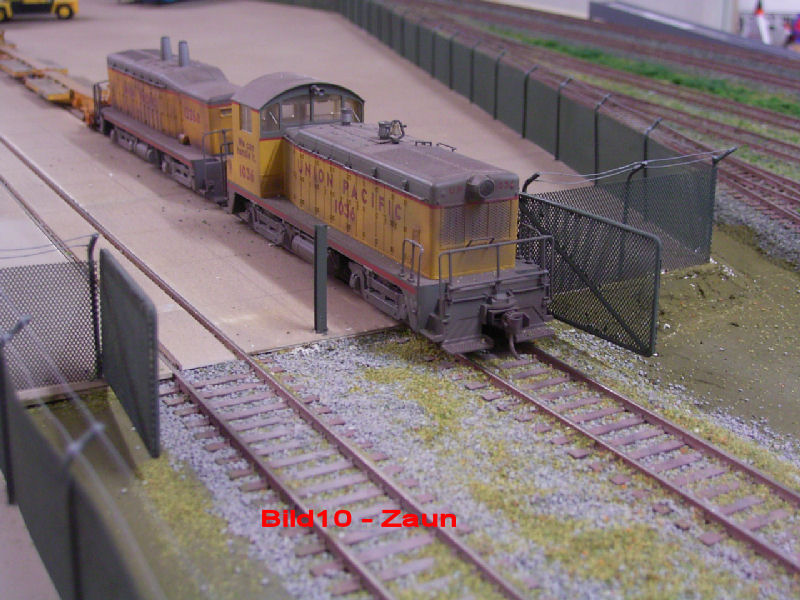
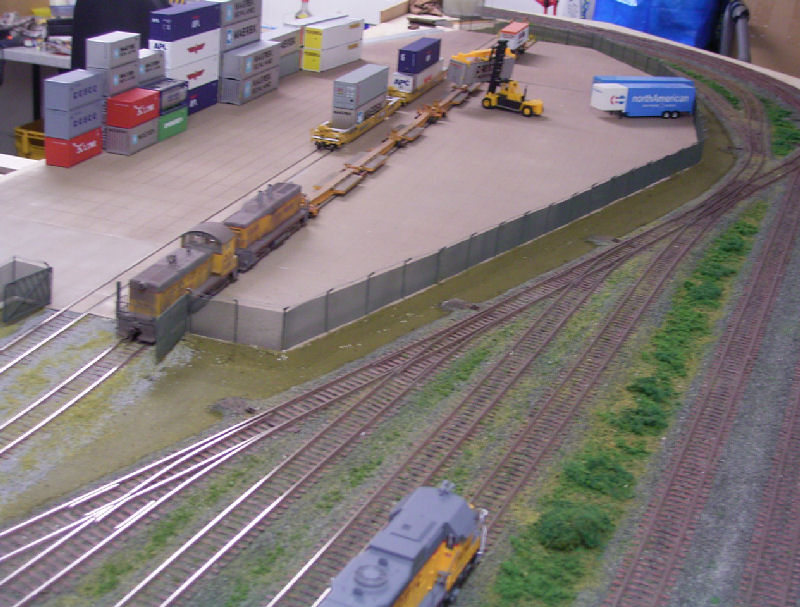
Fig. 10 and 11 - Now the fence was missing only a few gates.
These were again bent from the 1.2mm brass wire and fitted with the wire mesh. Then everything was painted again with green-gray and installed.
The stop post in the middle of the gates, was made from a double T-beam.
Now the whole thing looks quite realistic.
The truck entrance is still under construction. More about that later.
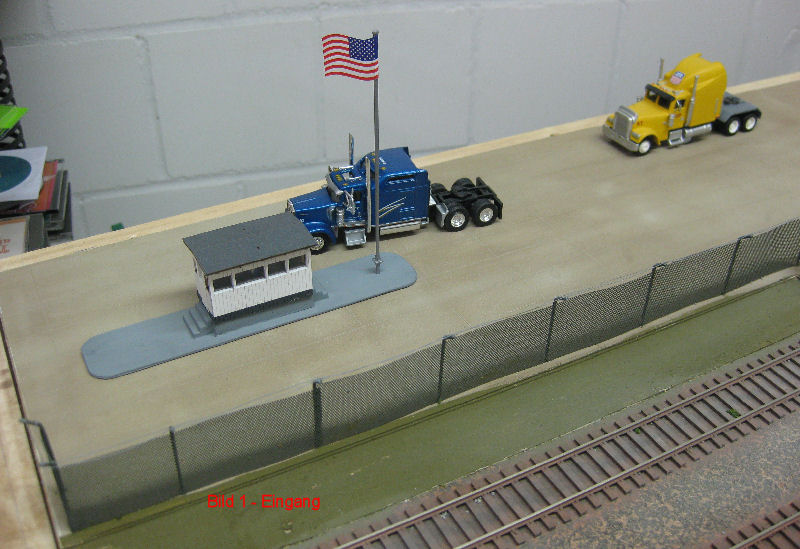
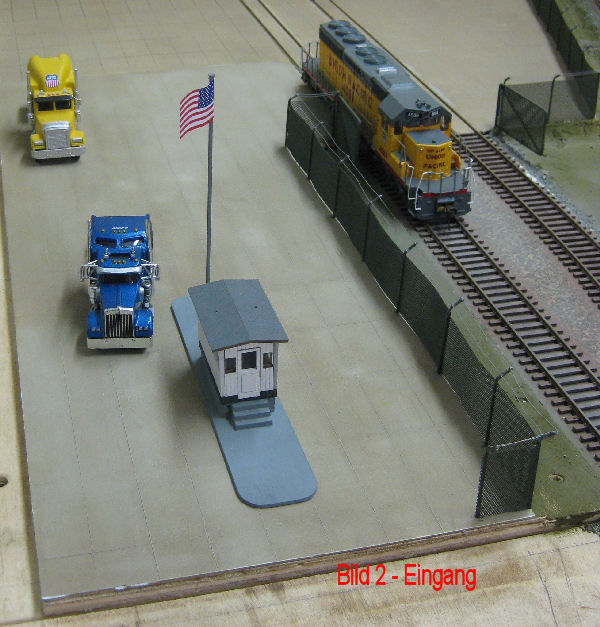
The truck entrance with the terminal building created from a Busch kit /Checkpoint Charly. Andy put the building on a base to match the window height of American monster trucks. He added stairs in front of the entrance doors of the building. The handler is also already sitting in his chair. Behind it is the inescapable U.S. flag. Strong west wind! A company sign is still being added to the building. "DCT" Dakota -Container-Terminal - This is also the name of the city in which this terminal is located! - DAKOTA-CITY- The entrance is now completed with fence, entrance and exit barriers and yellow road markings.
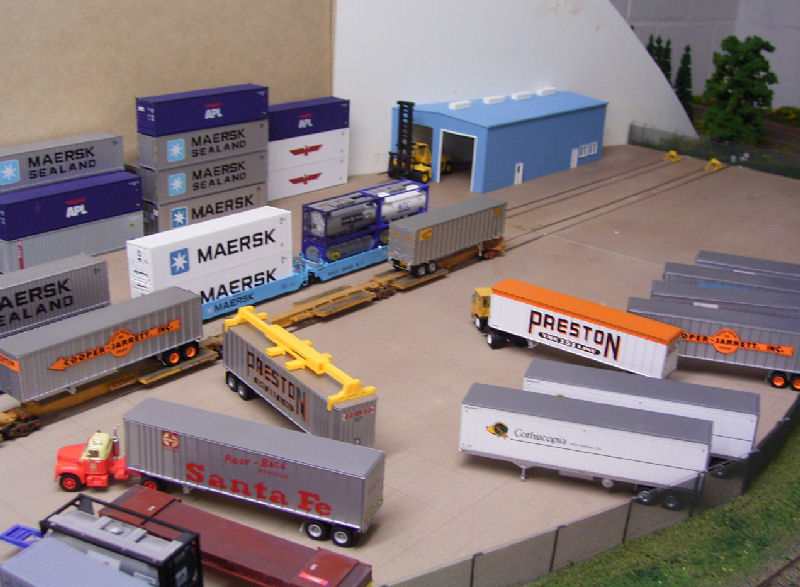
Andy has completed the shell of the workshop building (for a description, see the Plant Construction/Buildings button). Here, after completion of the building, the operating vehicles of the operator, but also trailers etc. of forwarders, repaired or maintained. The refueling of vehicles can also take place here later. The building is located directly on the sloping backdrop on this module. Therefore, the building was beveled.
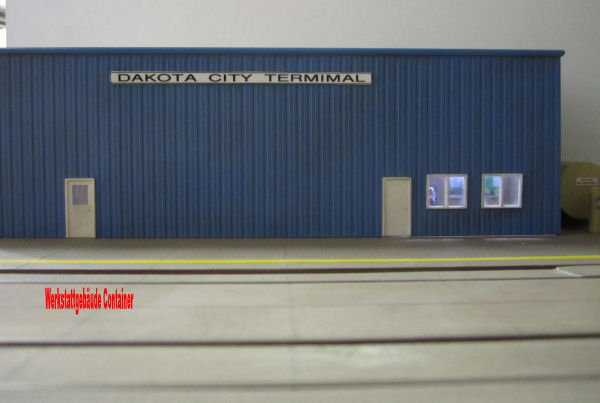
Andy added a lounge for the employees in the right part of the workshop and gave the hall its name. In addition, the building was slightly aged. To the right of the hall, the fuel tank still "peeks out".
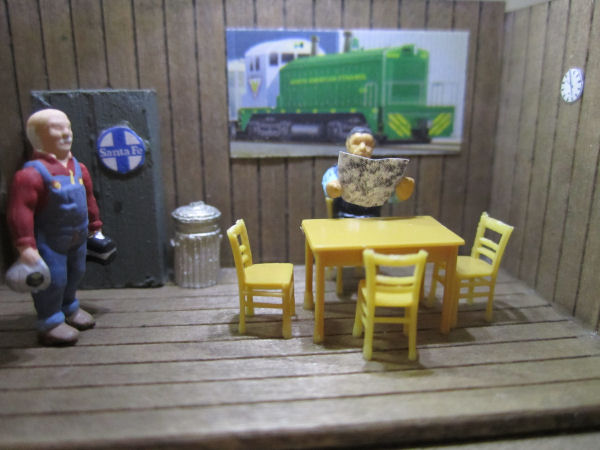
...there it is very cozy

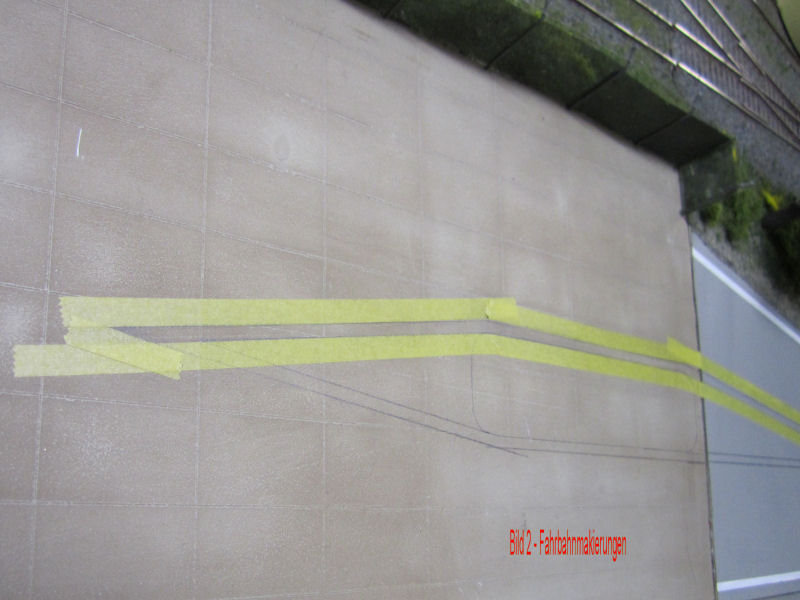
Fig. 1 - First Andy drew the road markings with pencil. Line thickness approx. 2mm.
Fig. 2 - Then mask off the first line with 6mm masking tape from Tamiya, along the pencil line.
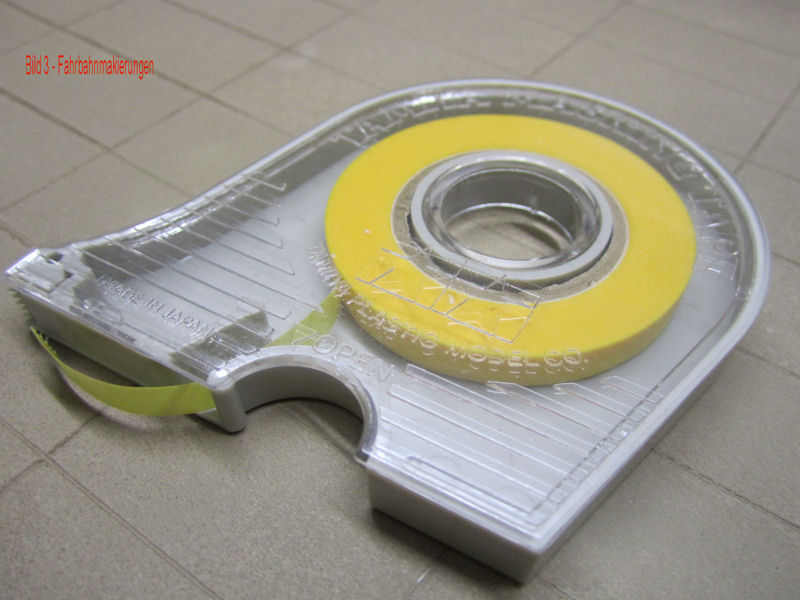
Fig. 3 - The masking tape from Tamiya comes in different thicknesses: 6,8,10 and 12 mm. Andy has fallen in love with the 6mm thin tape. It sticks so strong that no paint can run under it, but nothing sticks to it when you peel it off. You can also use the thin tape to glue curves. Andy also uses it to mask models for airbrushing.
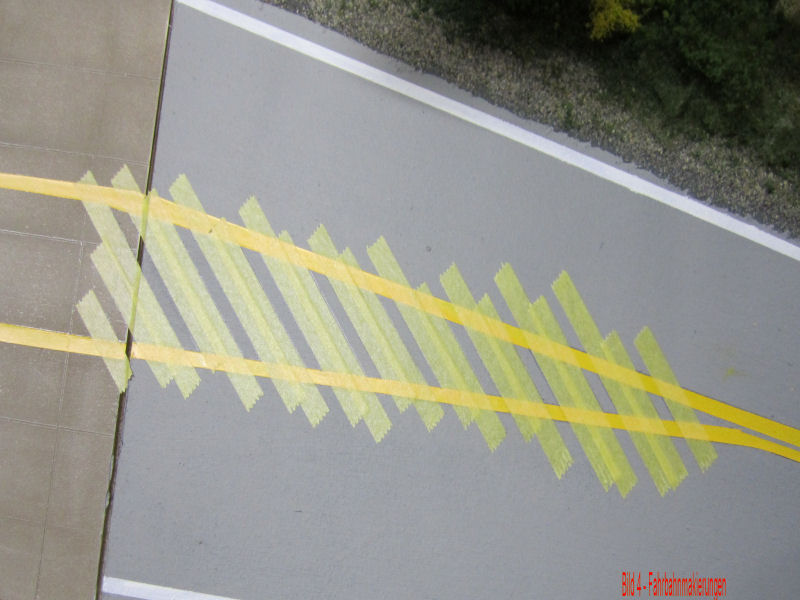
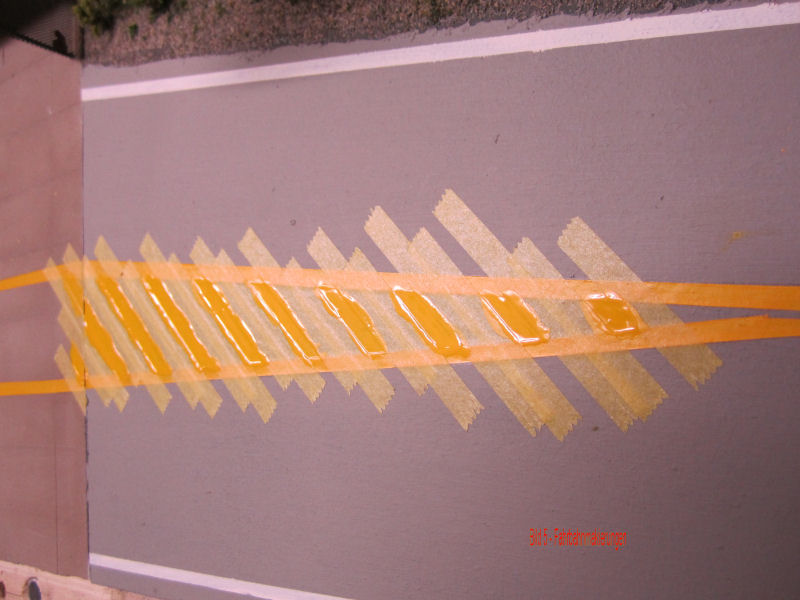
Fig. 4 and 5 - After creating the second outer line in the same way, Andy tapes off the cross lines and then paints the spaces in between with " Flat yellow" from Model Master.
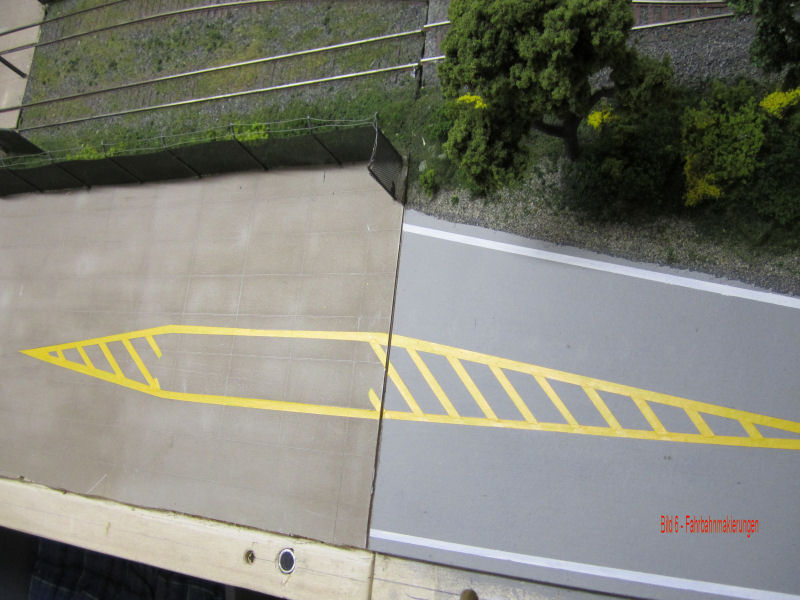
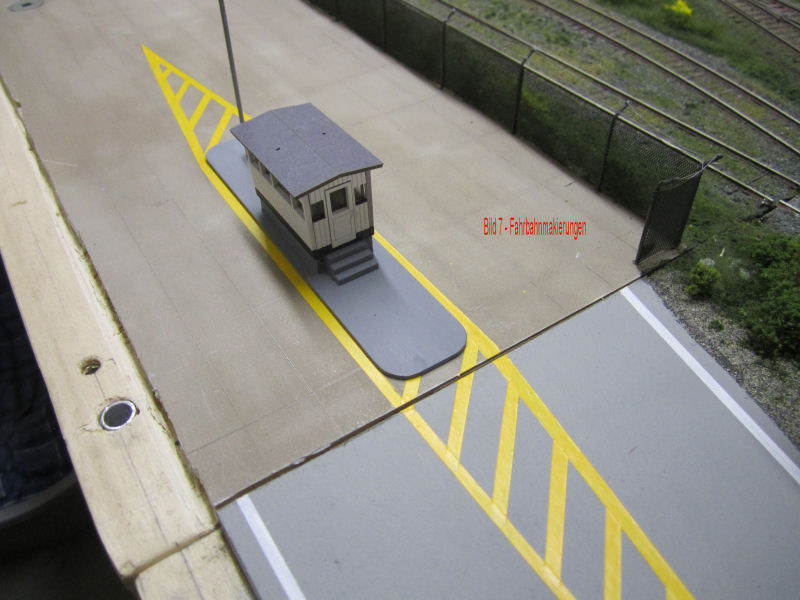
Fig. 6 - After drying and removing the masking tape, the whole thing looks like this.
Fig. 7 - This is how it looks with the gatehouse. The two white outer lines are also extended.
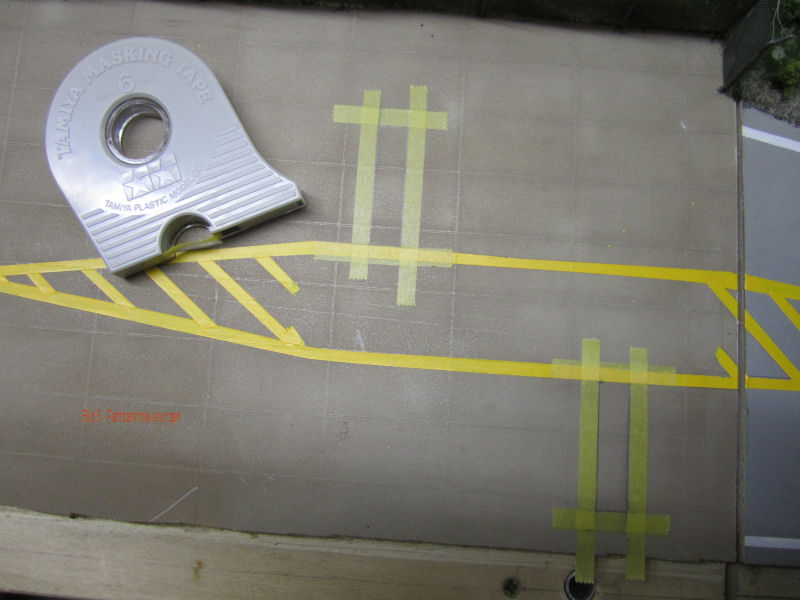
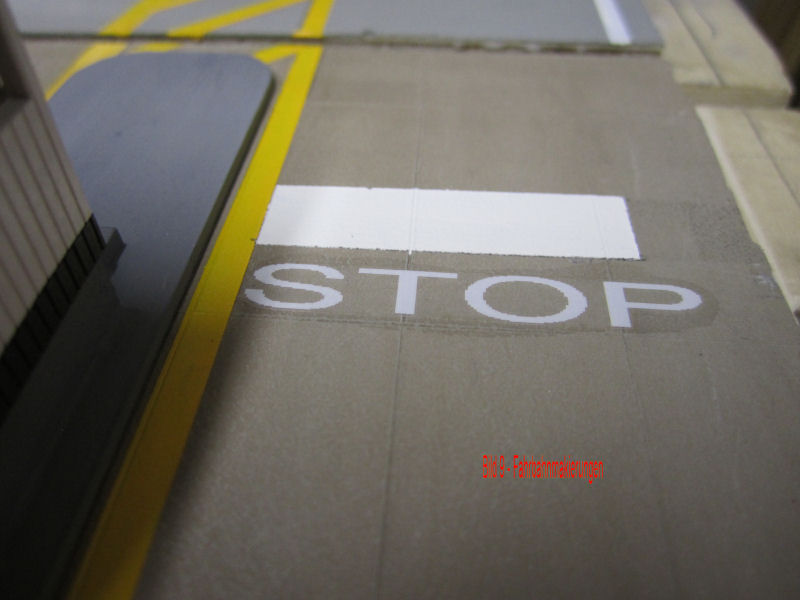
Fig. 8 - The trucks also get a white stop line. It is created in the same way as the yellow lines.
Fig. 9 - After coloring with white matte from Revell, Andy added the lettering "STOP".
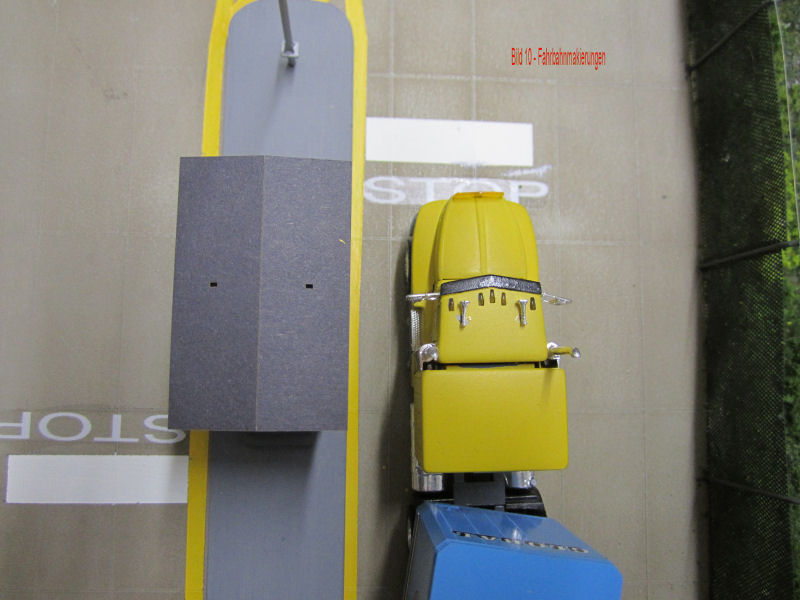
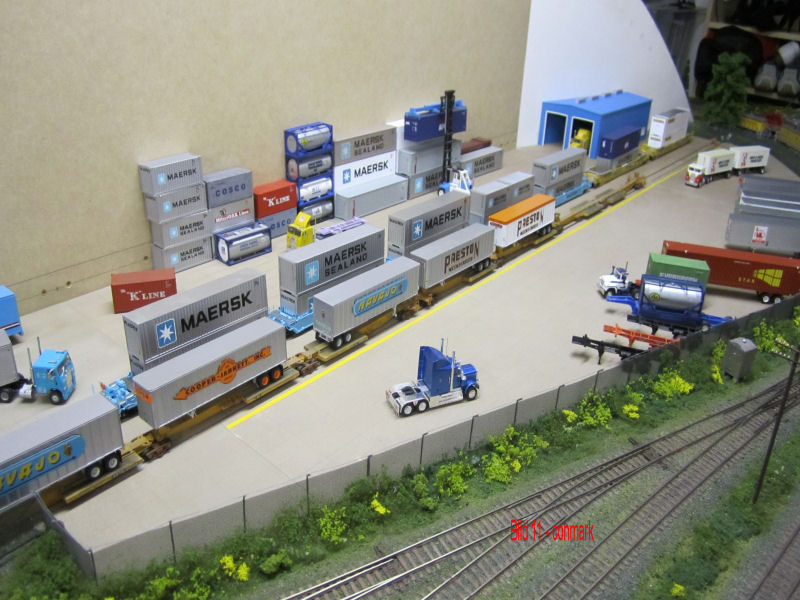
Fig. 10 - Almost finished it looks like this. Now only a few matching barriers are missing.
Fig. 11- Action! A train with containers and trailers has arrived! In front of the wagons with the trailers, you can also see the yellow boundary line for the rail clearance area.