
")
")
Lotzburgh
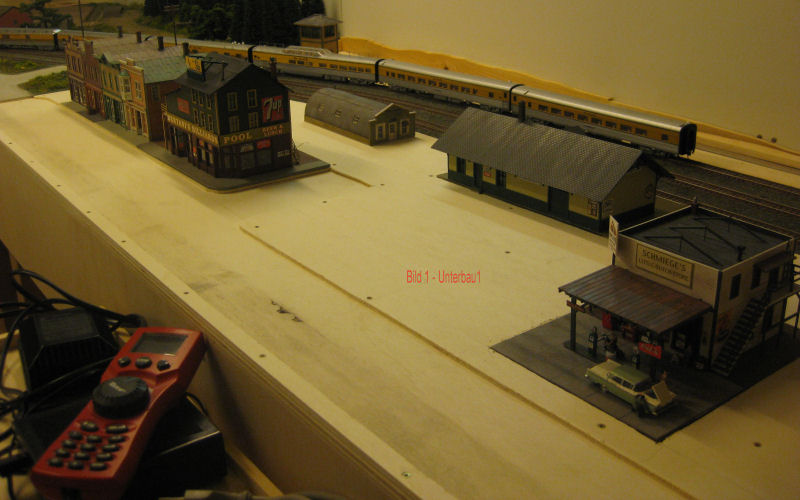
Fig. 1 - On module 3, the first standard module on the landscape side, the construction of the small town Lotzburgh begins. First, a 4mm poplar plywood plate was cut to size and screwed on, in order to come to the height level of 8mm of the street of the pre-module. After that, the course of the street was cut out of a second 4 mm plate (street width approx. 10cm plus 2.5 cm parking strip in front of the houses). The streets will be cast from plaster in the next work step.
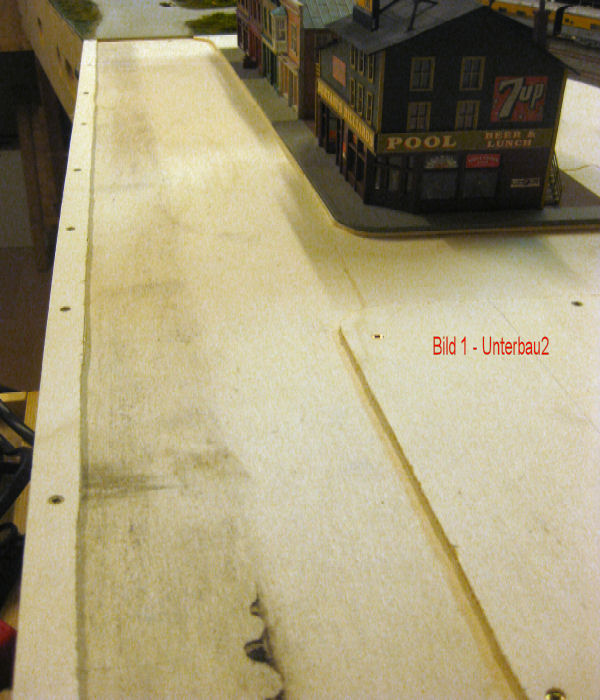
Fig. 2 - A close-up view of the street cutout. The pool building has already been provided with a 4mm thick base plate by Andi. The edge of the slab already has carved curbs. The slab underneath was adjusted to match the curb. The stores behind it will be brought to the same height level.
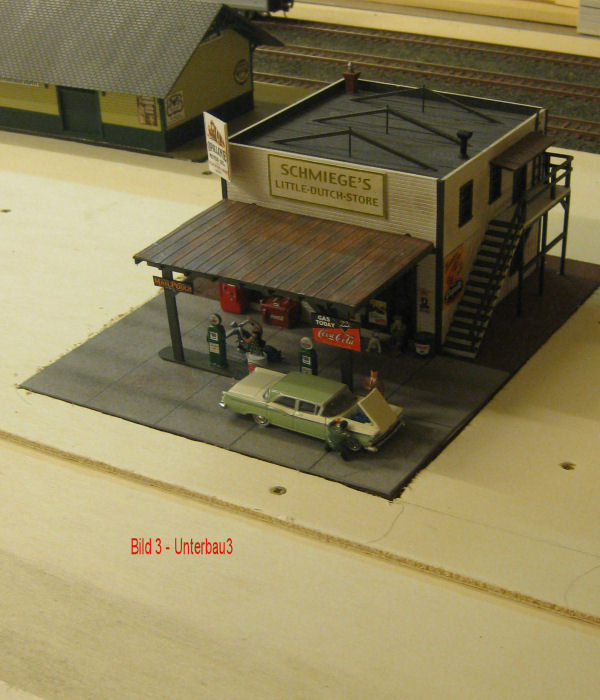
Fig. 3 - The 4mm thick base plate of the gas station was recessed into the base plate. The same thing happened at Lotzburgh depot (station building)
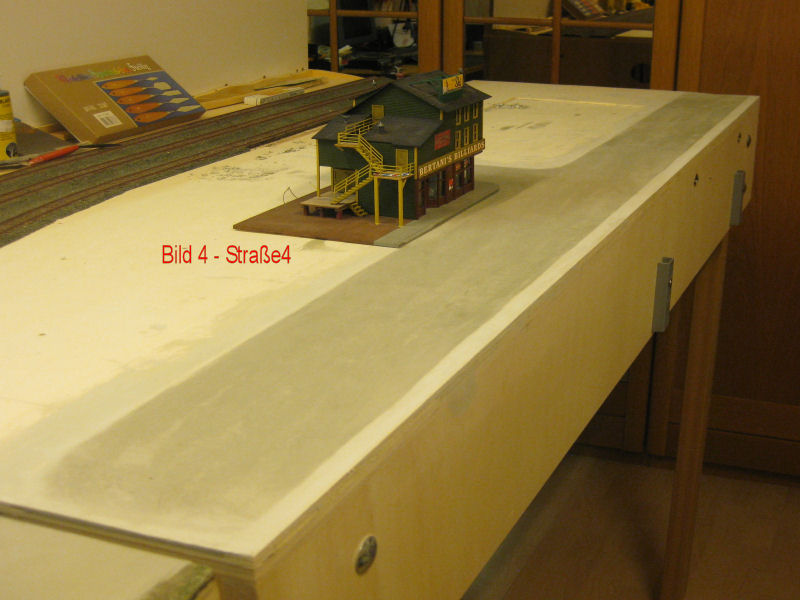
Fig. 4 - Now you can start paving the road. The plaster-like mass is poured in two steps. The first layer, about 3mm, consists of a slightly thicker and already colored slurry, which is spread with Japanspartel and palette knives and smoothed with a plastic template. After this first layer has dried, but is not yet completely dry, a second, much more watery layer (yougurt consistency!), is applied and again smoothed with the plastic stencil. This creates a level with the wood panels. The "mush" can be worked on for a very long time. Drying time about 48 hours. For materials and tools, see the Building Instructions button. If you want to know more, we highly recommend Pelle S Soeberg`s (Dane!) booklet from the Model Railroader series (Kalmbach Books) Scenery Techniques. ISBN 978-0-89024-735-5 priced at $21.95.
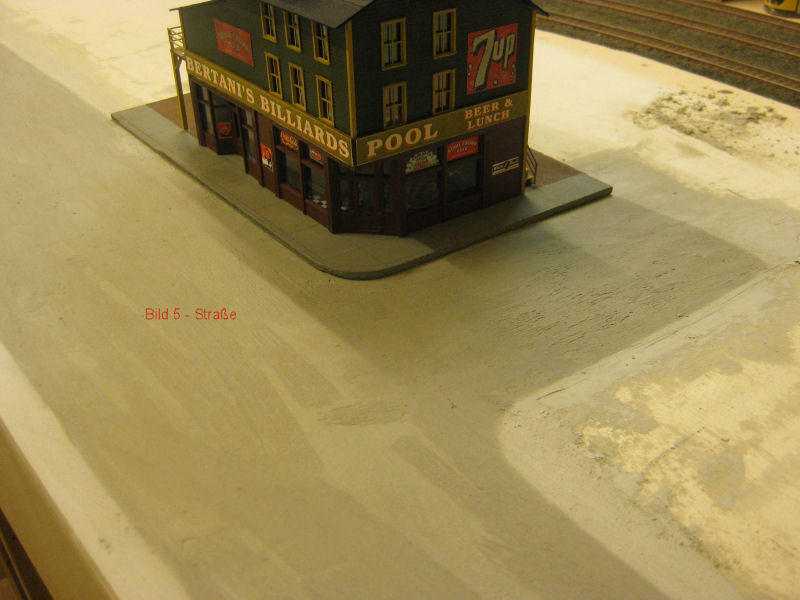
Fig. 5 - A close-up view that shows very nicely how flat the placed layer becomes. Further steps follow!
Fig.6 - The road has received its final coat. A mixture of an asphalt color from Woodland, mixed with gray and white, because the original asphalt color seemed too dark to us. After the paint dried, the pavement was stripped with fine sandpaper. This creates a rougher surface, as well as streaks and shading. For materials and instructions, see Button - Building Instructions.
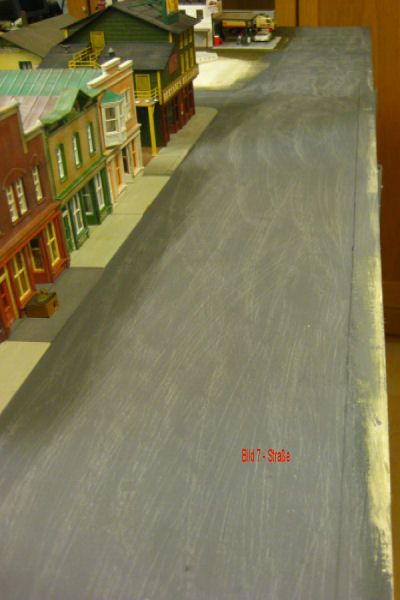
Fig. 7 - A close-up view. Now the landscaping begins.

Fig. 8 - Around the service station, the first layer of green and sand was applied. The sand mixture consists of sand from Fuerteventura and fine mixtures from ASOA.
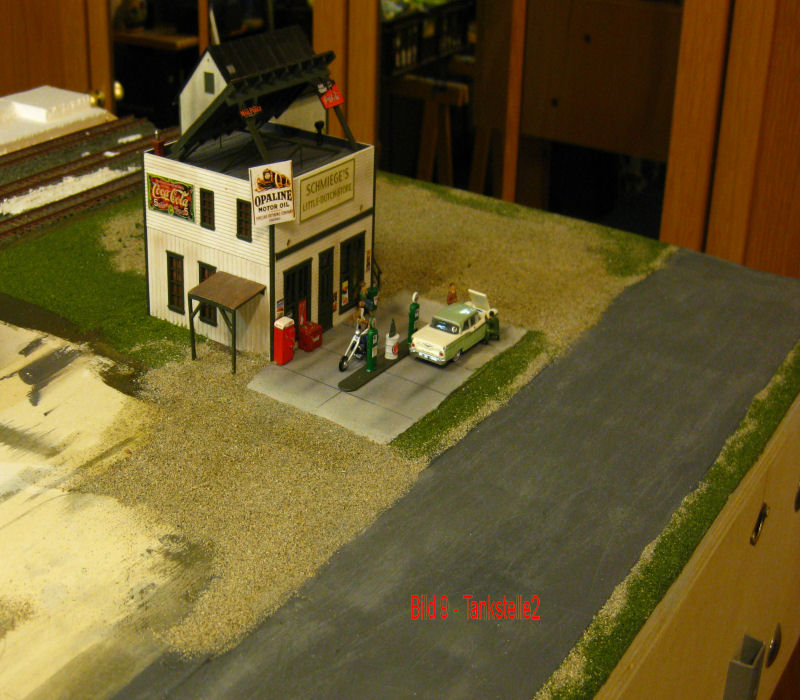
Fig. 9 - An overall picture of the gas station site. The gas station canopy has been removed and is on top of the building.
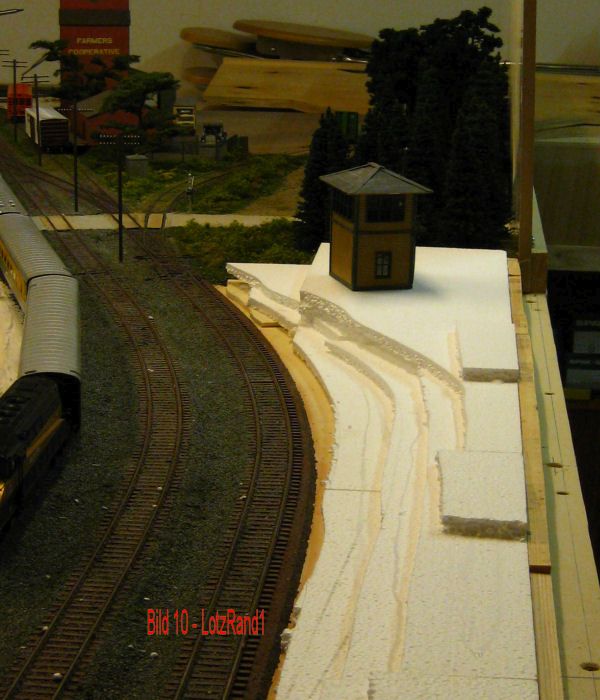
Fig. 10 - The edge behind the tracks is created. Here, too, a wooden strip sawed in the desired terrain profile was glued on first. Then the space between the track body and the strip was filled with roughly cut Styrofoam plates. The plates were glued with white glue. The "Interlookingtower" is still being worked into this terrain structure.
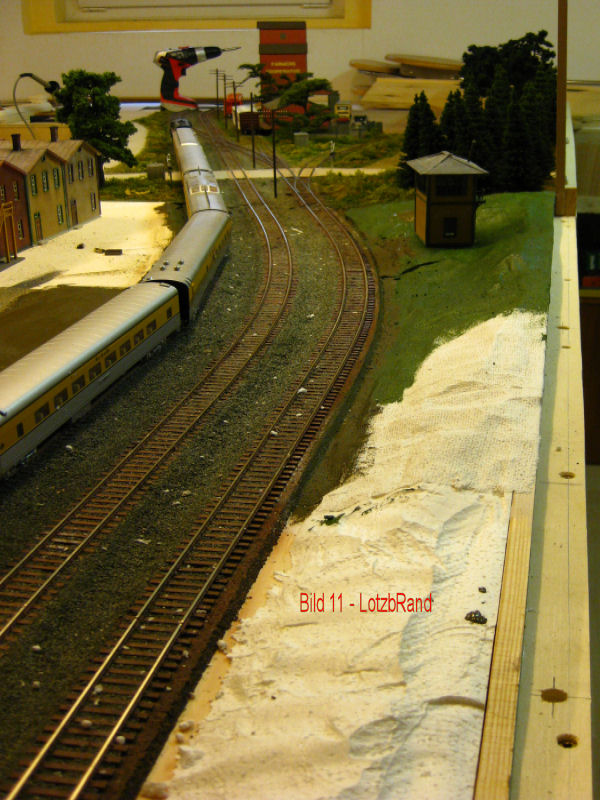
Fig. 11 - The styrofoam was cut into the desired terrain shape with the hot cutter. The space for the signal box was roughly cut out. Then the edges and the signal box were filled with model plaster and the plaster bandages were applied. The part finished in the shell was already painted here with a green-brown mixed binder paint. The remaining part still needs to be finished....Gypsum bandages were all! Of course Saturday at 6:00 pm when all is closed in Germany!
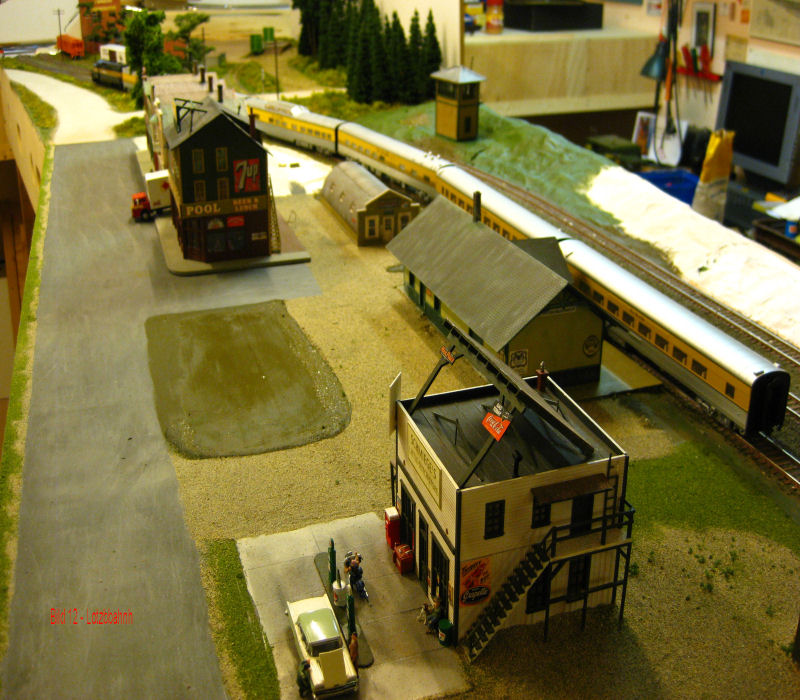
Fig. 12 - After the station building was set in place with a layer of plaster as a base, the station forecourt could also be provided with the first layer of sand. In front of the station facing the street, a small green area with a monument will be created. Andi is already working on the monument.
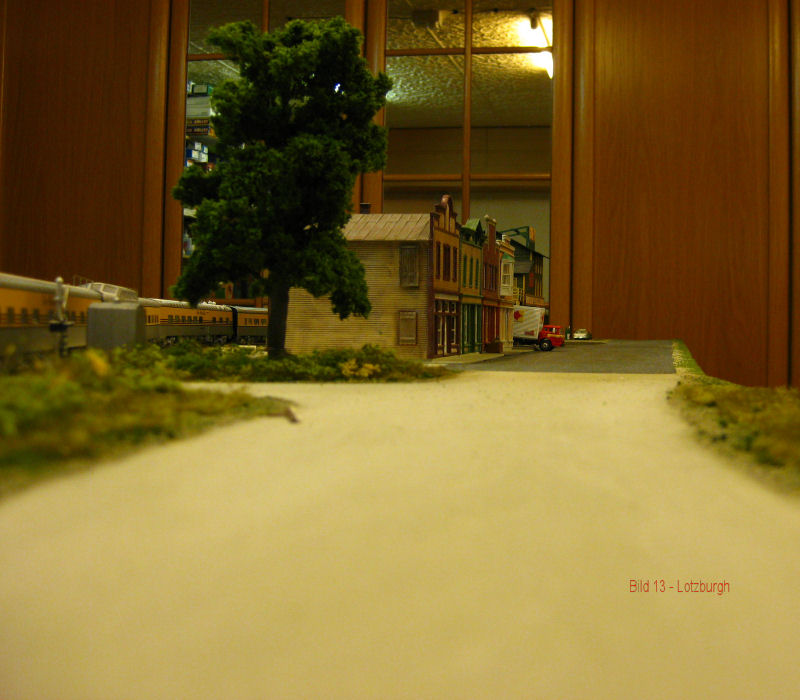
Fig. 13 - The entrance to Lotzburgh

Fig. 14 - Even behind the houses grows the first green
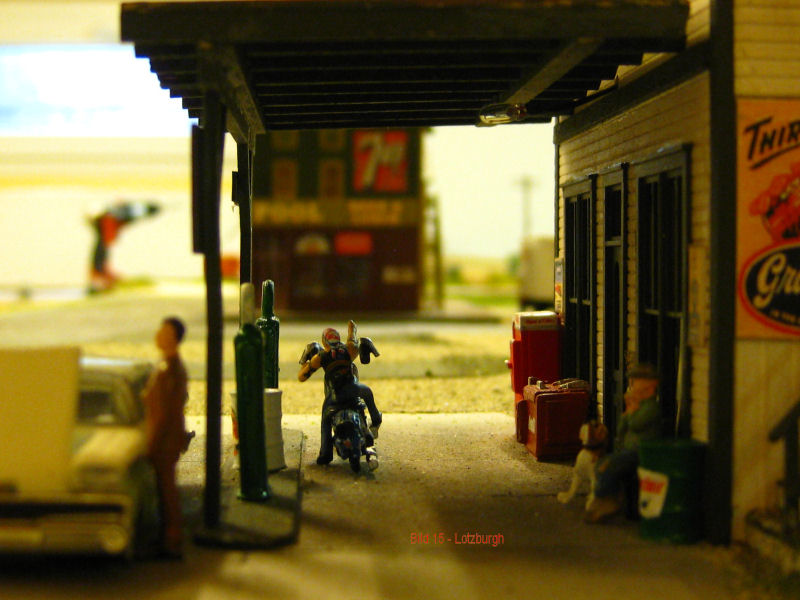
Fig. 15 - There is a cheap refueling! Whether the car but runs with it??? Always these Tie carrier (Manager)! This hidden humor has also only my Andi!
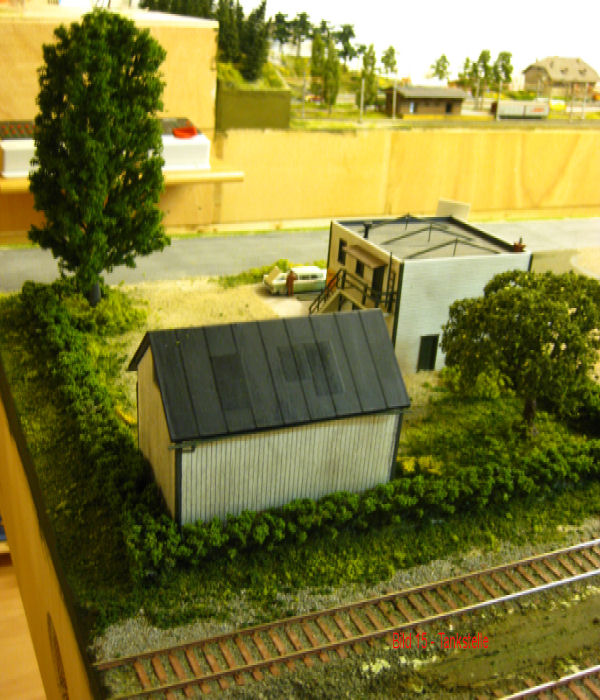
Fig. 16 - Gas station and workshop area have been fenced with a hedge (Faller). Two trees have been planted. In addition, the 2nd green application was brought in. a mixture of mehrene Woodland turf and Heki flakes and Heki foliage. The gravel soil received a loosening by Asoa gravel fine (dusty).
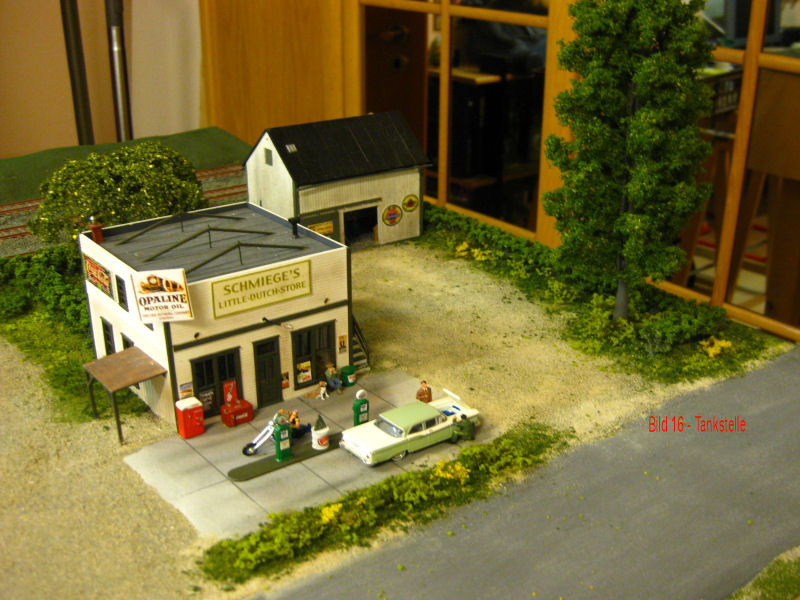
Fig. 17 - The site from the street side.
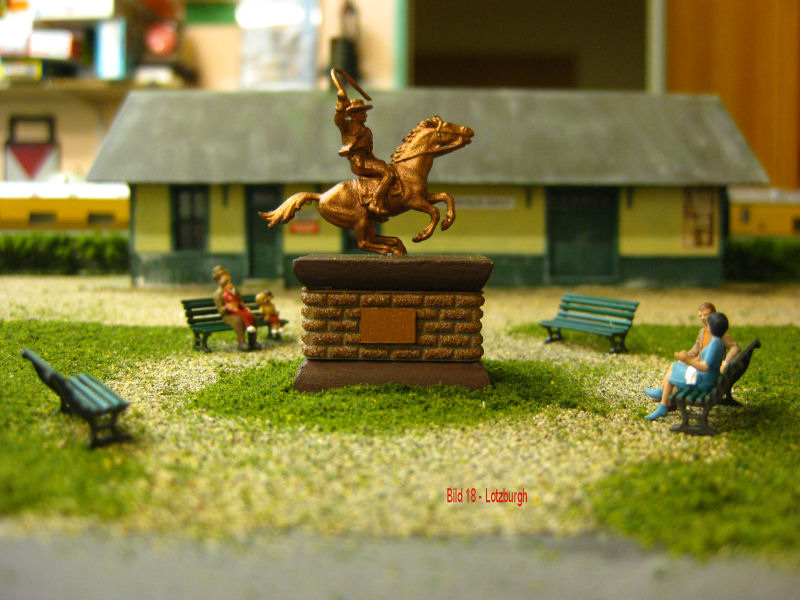
Fig. 18 - The lawn in front of the station building should definitely decorate a monument. So! Andy do it! He did. The monument is a reminder of the days when there were no Union Pacific rails in Lotzburgh, but there were mail riders and carriages. The square has its first green. More orders and trees will follow. The monument will still be secured by a chain..and of course the American flag will fly. Andy go for it!

Fig. 19 - The view across the site. The part from the monument still shines everywhere in its first green. A Rio Grande Express is parked in front of the station. The platform will be built between the two front main tracks.
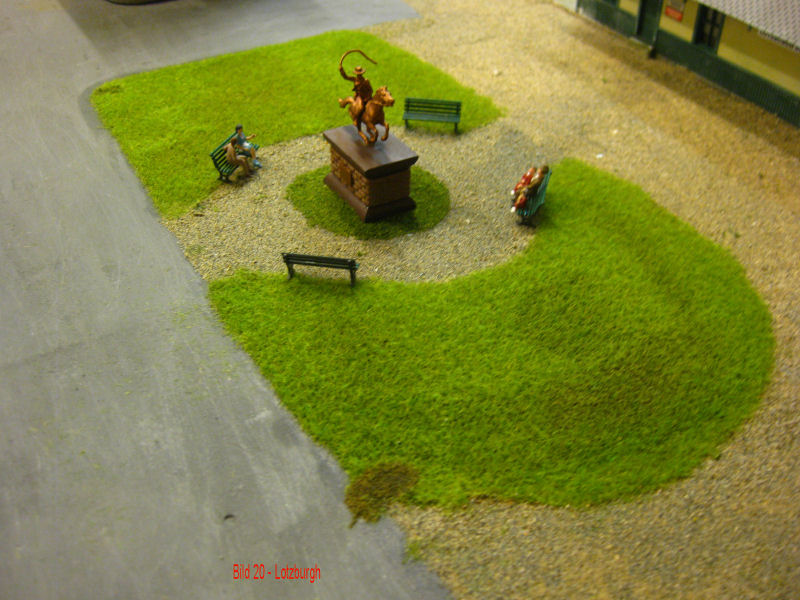
Fig. 20 - Short-necked turf was applied with an electrostat. Before that, Woodland Earth was applied with a sieve to shade the area. For more information on the electrostat and how it works, see the "Construction instructions" button.
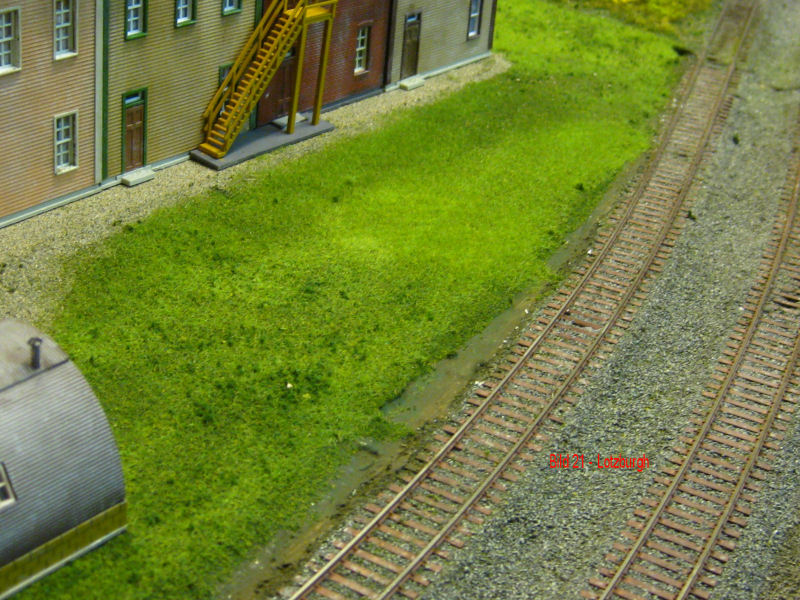
Fig. 21 - The grass was also applied behind the houses with the electrostat. Here, too, a mixture of several Woodland -Turfs and Heki leaf flakes was finely distributed with the sieve beforehand. The buildings are not yet firmly installed. They still have to be brought to "sidewalk height". Then, on the garden side, the bases will be worked into the landscape. The edges to the railroad are not yet finished. The hedges will be planted here first.
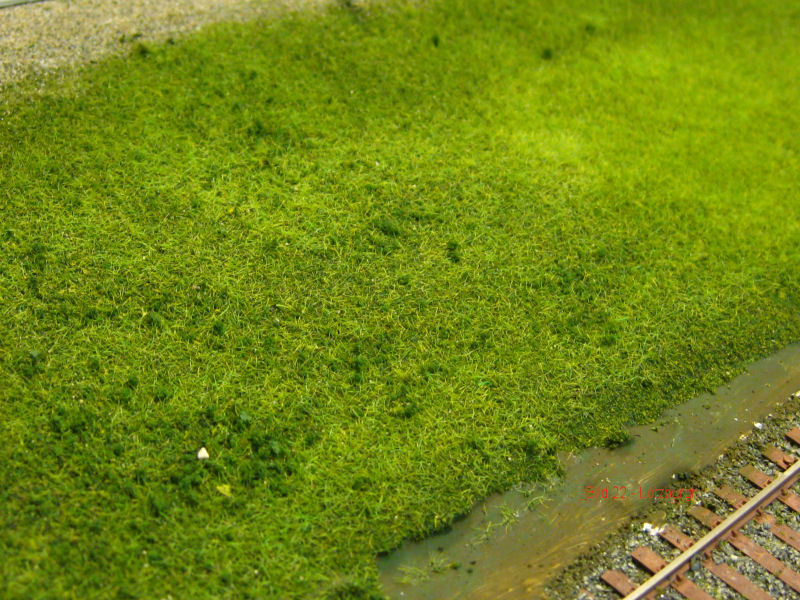
Fig. 22 - Once closer.
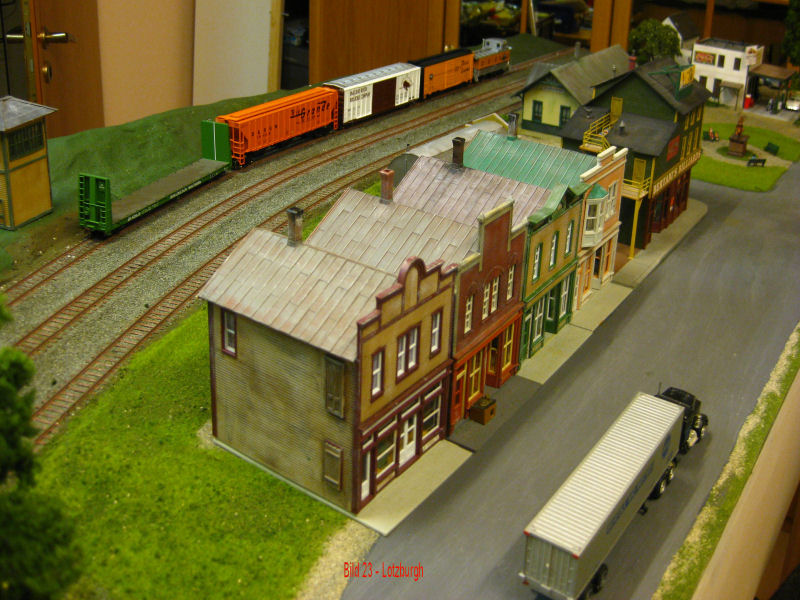
Fig. 23 - A view over Lotzburgh in its current state of construction.
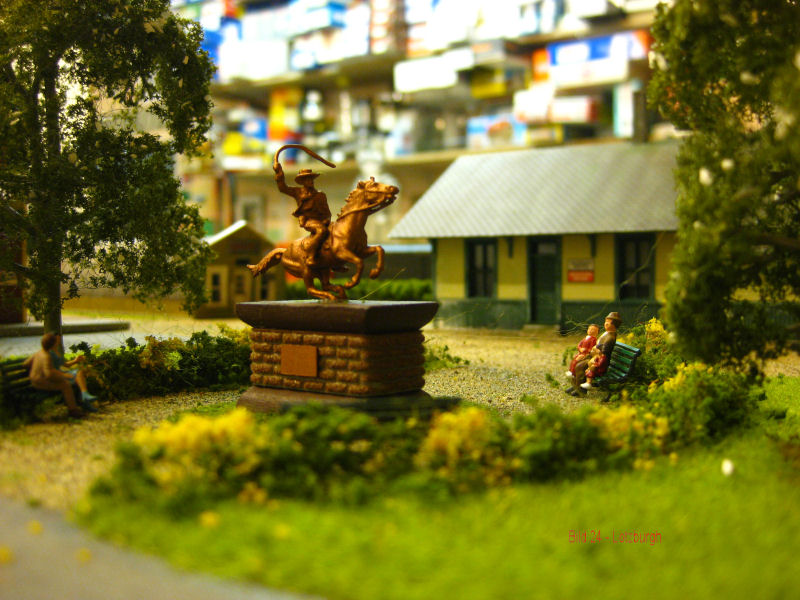
Fig. 24 - The square around the monument is ready, except for the flag.
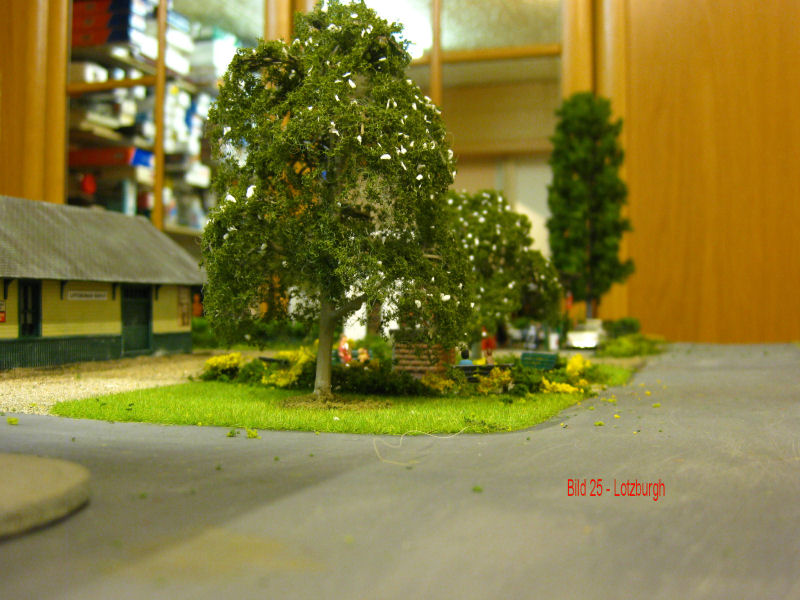
Fig. 25 - Again the square. Mulberry trees from Faller were planted. The sidewalk was framed with bushes.

Fig. 26 - On the backyard workshop is also quite quiet life. Used cars in the truest sense of the word are on offer. The boss is currently extolling the virtues of an ancient delivery van. His best employees play mill. The yard dog is not interested at all. Too warm! Otherwise the crew keeps it like we from BEANS! Why clean up. Is needed again sometime anyway.
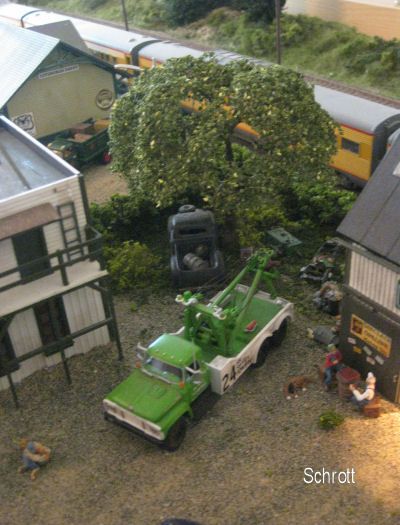
Fig. 26 a - The car dealer is richer by some scrap!
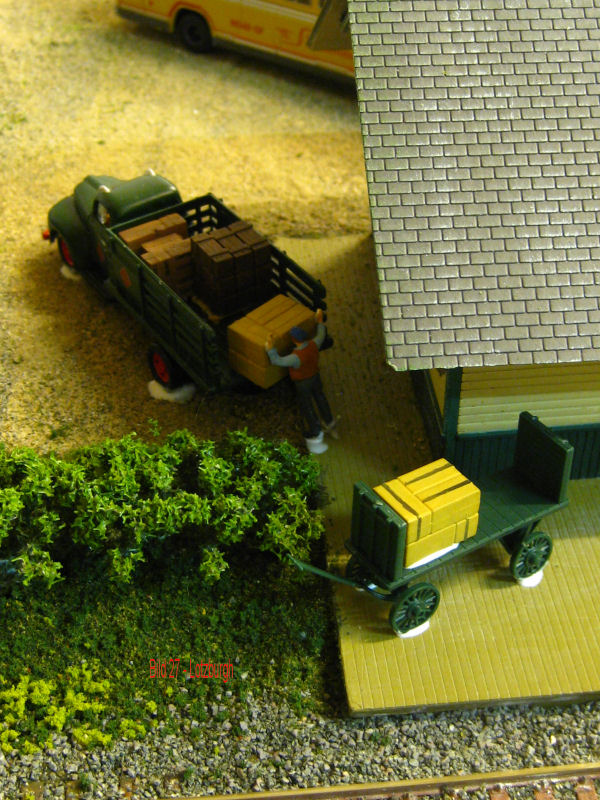
Fig. 27 - The driver of the "official freight" toils with heavy boxes that arrived as express freight on the passenger train. The glue residues on his feet are still disappearing.

Fig. 28 - Northern Pacific's Budd railcar from Dacota City has brought passengers to Lotzburgh. Continue by cab or by Union-Pacific bus, which is about to arrive.

Fig. 29 - The cab driver's break on the bench in the shadow of the station building will end now. The customers threaten to work.
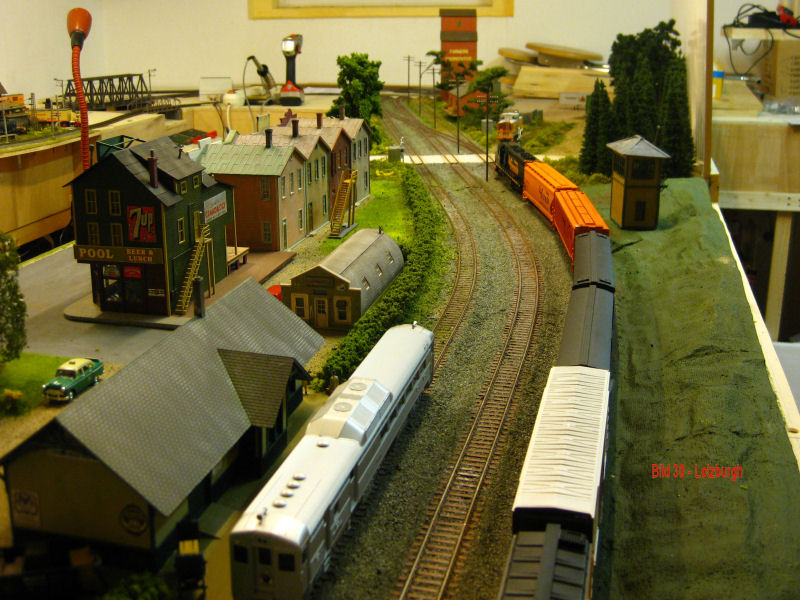
Fig. 30 - The house plots along the railroad embankment are bordered with hedges. With the installation of the row of houses and the design of the garden area now continues.
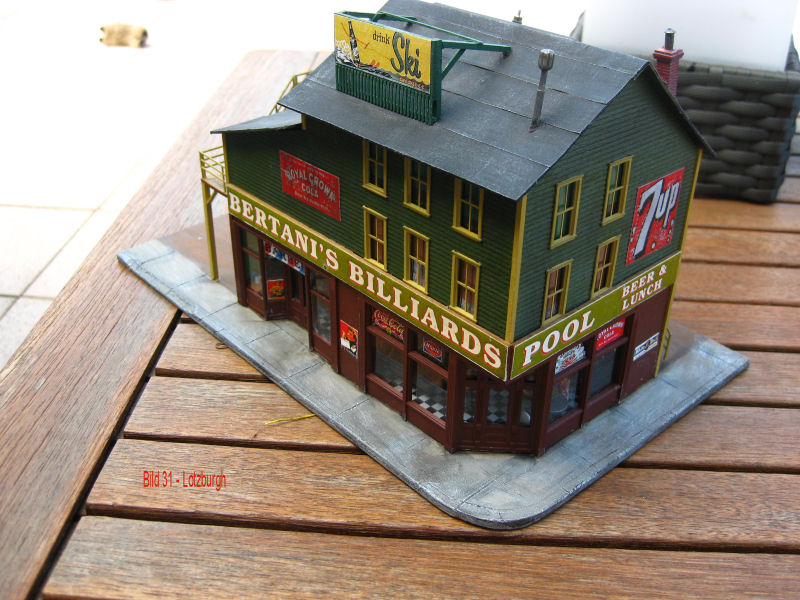
Fig. 31 - The building has already been provided with a 4 mm thick base plate by Andy. The sidewalk has already been formed by Andy. The sidewalk was now painted over with Heki concrete paint. Then the joints were highlighted with black wood stain. The next step was to apply Raw Umber acrylic paint, which was immediately wiped off again, leaving only traces of paint (dirt/dust). In the final step, Acrylic White was applied with a dry-wiped brush. This creates the "highlights".

Fig. 32 - The curbs for the following houses were made from a 4x2 mm plastic strip from Plastrukt. The joints were scored with a tinker's knife. The color treatment was the same as for Fig. 31.
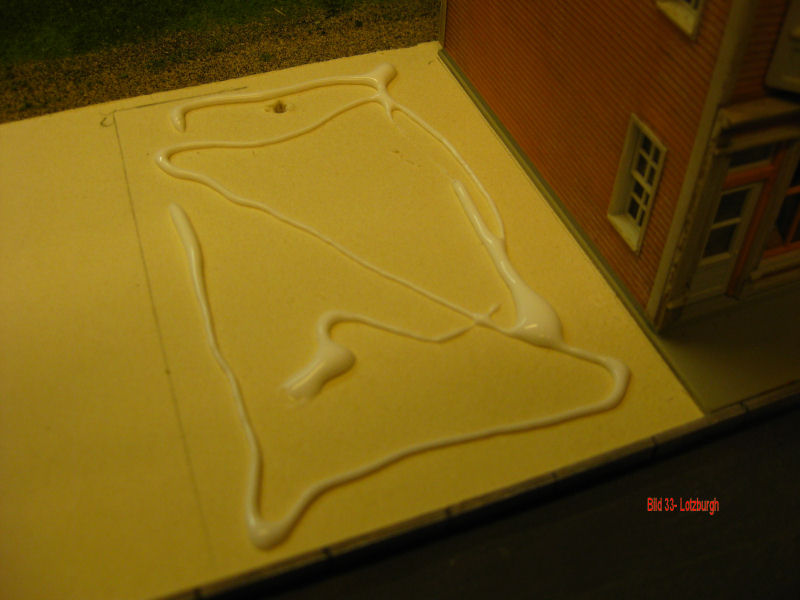
Fig. 33 - To bring the following four houses to the height level of the barbershop, 2 1mm pieces of Finn cardboard were glued on top of each other behind the already glued curbs. Then the hole for the cable feed for the interior lighting of the houses was drilled, the cables were fed through and the houses with their 2mm thick base plates were glued on.
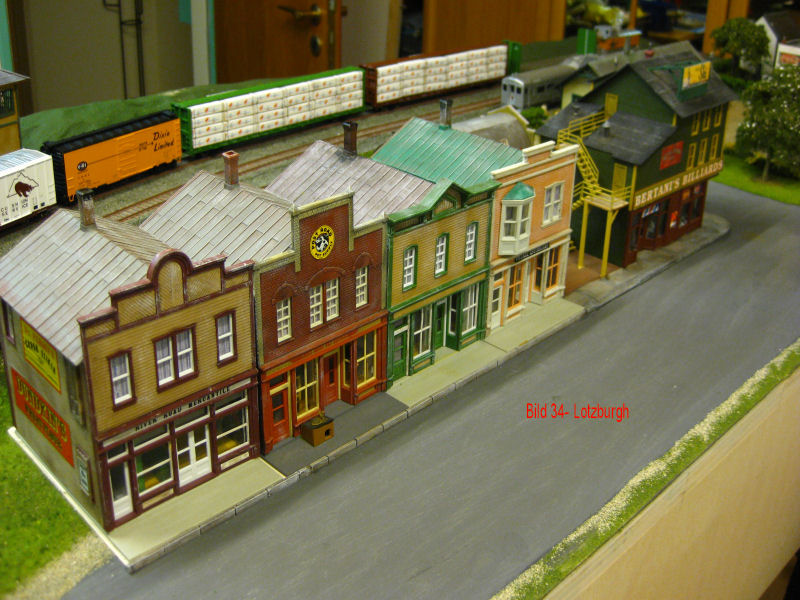
Fig. 34 - All houses are installed. Before the installation, lettering and advertising (wet sliding pictures) were applied. The next step is now the filling of the spaces between the house floor slabs and then the "aging" of the sidewalk.
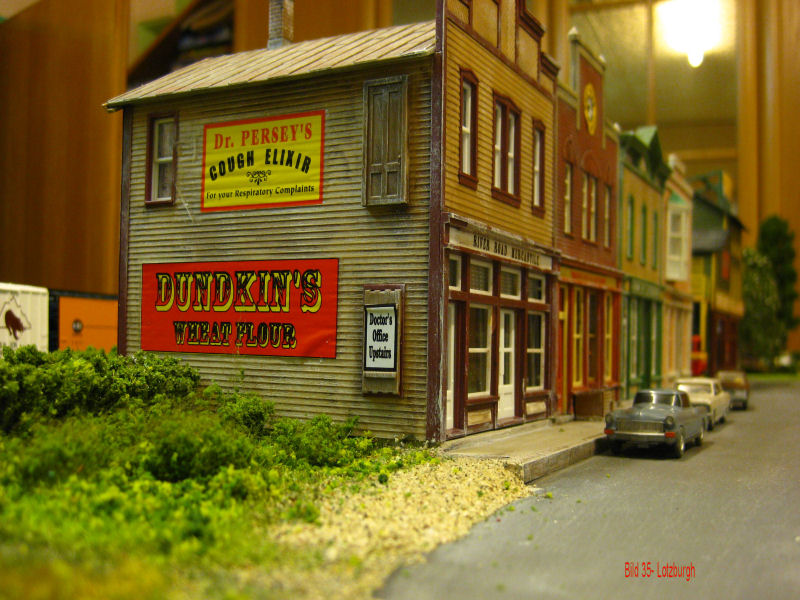
Fig. 35 - The finished street. The sidewalk design is still missing. It will come as soon as our budget allows it. The small parts are expensive.
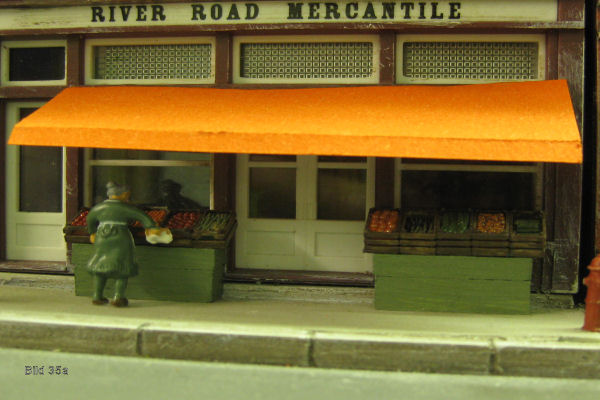
Fig. 35a - Finally, awning and vegetable stands for the citizens of Lotzburgh.
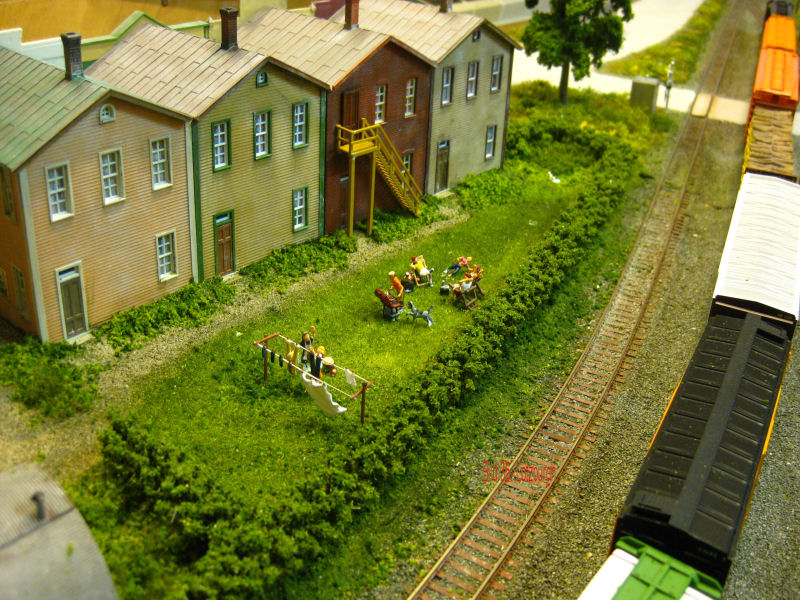
Fig. 36 - The back of the row of houses. In the green Midwest, the summer was just great this year!
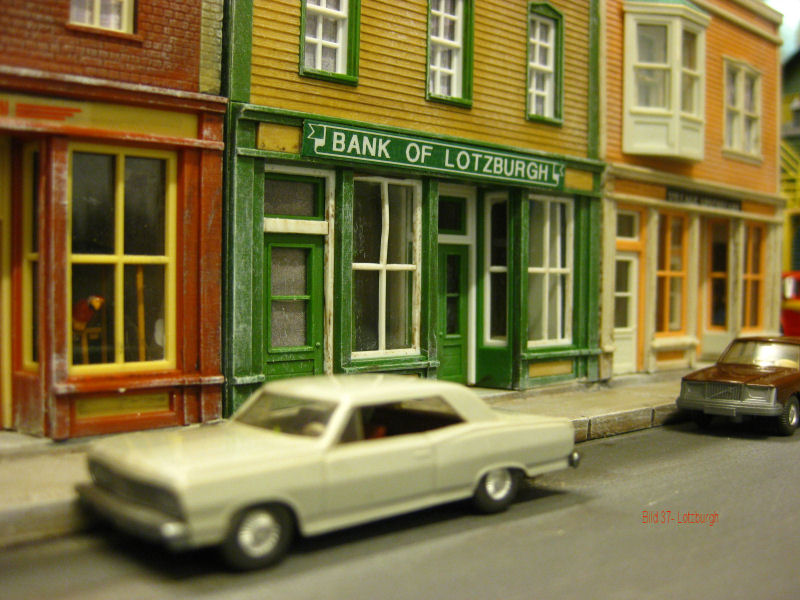
Fig. 37 - The small village of course also has its own bank! Unfortunately not for us. Account opening and founder credit were rejected immediately.
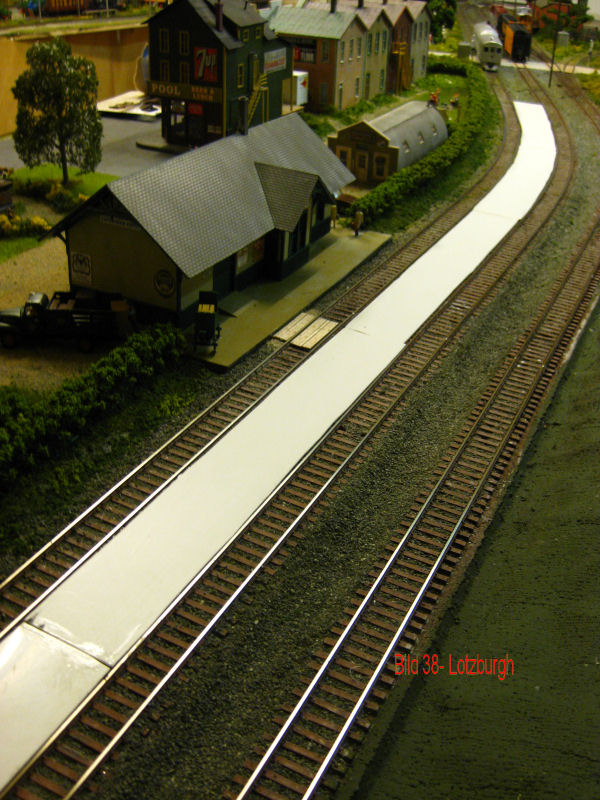
Fig. 38 - The next step is the platform. According to the initial plans, the platform was to be built on the 3rd track (passing/shunting track). The station building would then also have been built on the other side of Lotzburgh. In the end, however, we thought the building in the village was better. So the platform had to be built between the two main tracks. Now, however, relatively narrow. This corresponds, according to many seen videos about American railroads, quite the reality. In Lotzburgh, only regional passenger trains (commuter trains or railcars) will stop. The platform is again based on 1 mm thick plastic plates, which were cut to size accordingly. The plates were glued to the sleepers with super glue. To get enough "height" for the later pavement, each behind the small iron. The ends were tiled. The wooden plank transition has also already been installed.
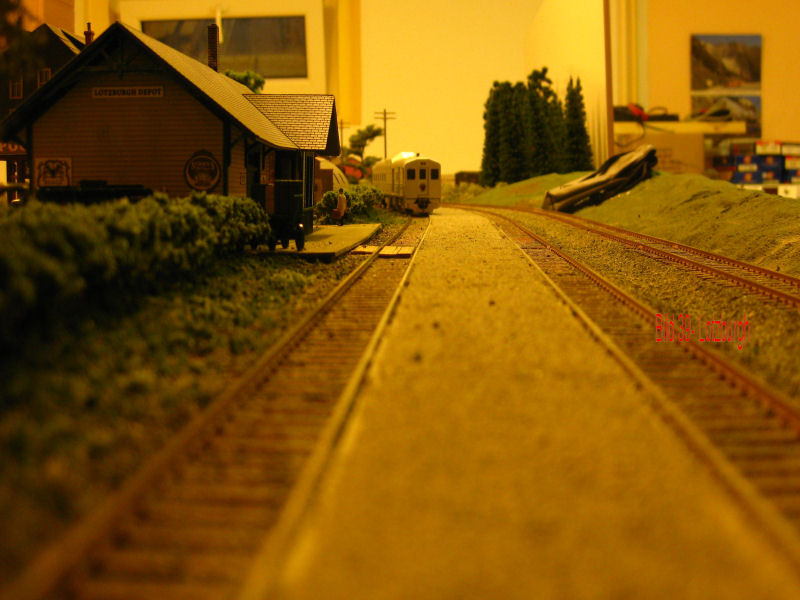
Fig. 39 - The plastic plate was coated with slightly liquid white glue. Then a sand mixture of Asoa varieties and original sand from Gran Canaria! was applied thinly. After drying, the "cracks" still visible here were filled with the sand mixture. In addition, green Woodland Turf was spread in some places.
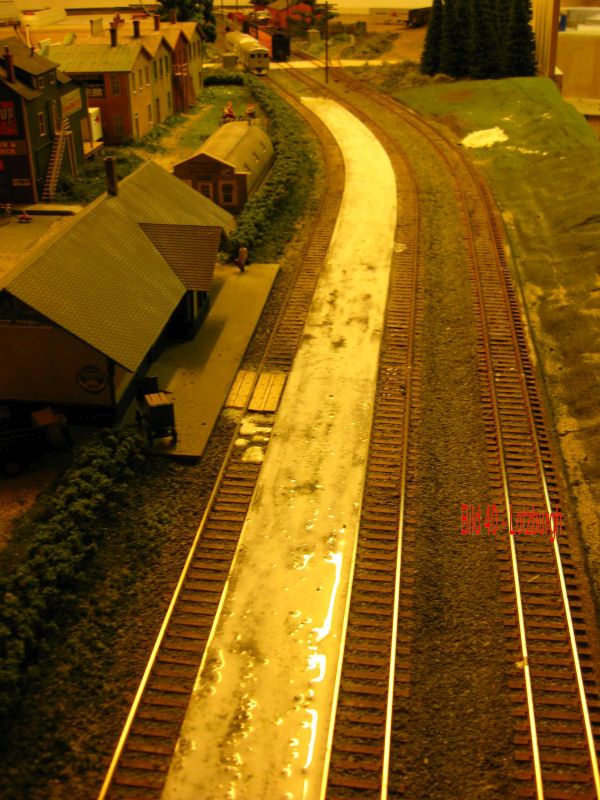
Fig. 40 - No smooth ice, but the surface was eigesprüht with relaxed water and then applied thin white glue. Drying now takes about 24 hours.
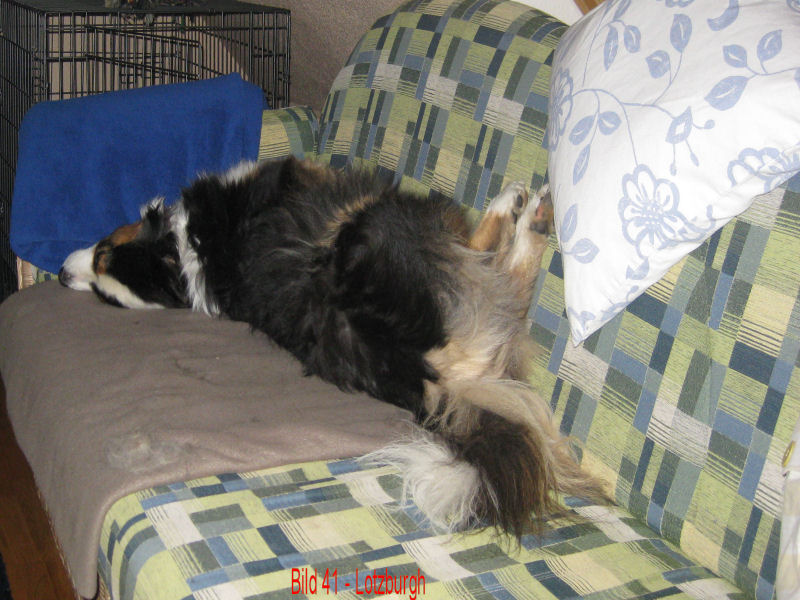
Fig. 41 - Now we are sooooo exhausted that a nap on the sofa is due (Indi). Dog on the sofa? With us but not!
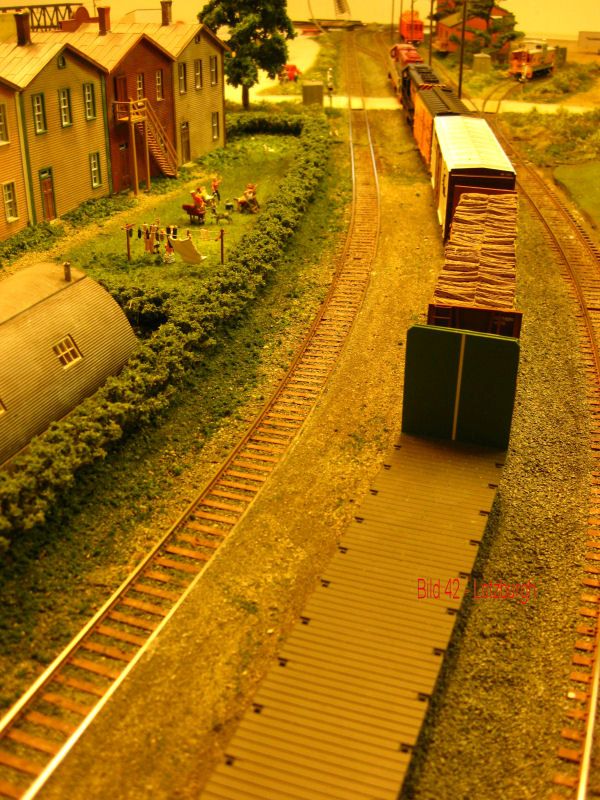
Fig. 42 - The platform on this module is finished.
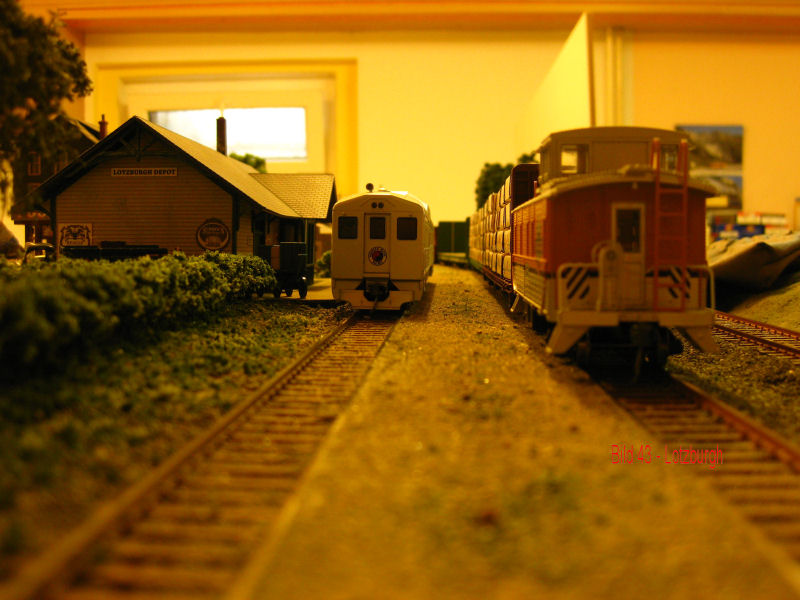
Fig. 43 - The railcar has a place at the house platform. The platform is already crowded. But this corresponds to many original platforms for secondary stations
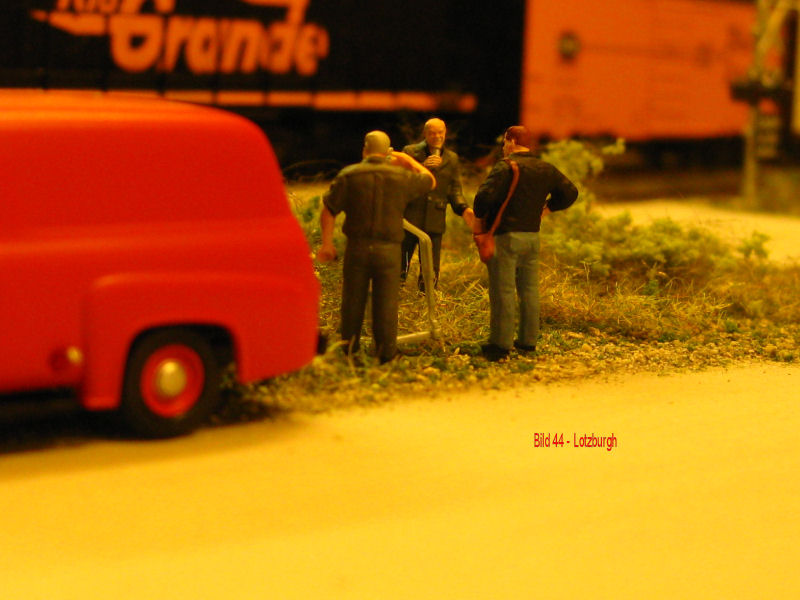
Fig. 44 - Mister Railroad from Germany can not miss when there is something interesting to see. His work for our hobby is super.
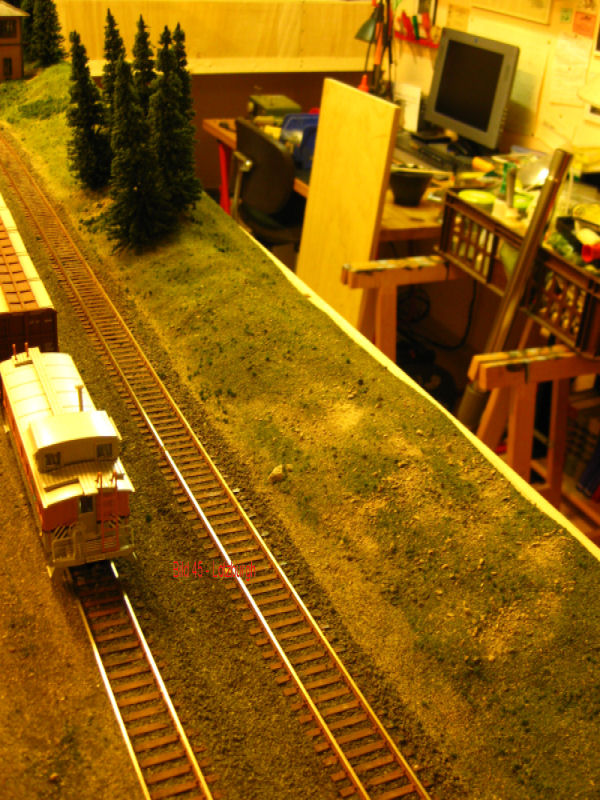
Fig. 45 - The rear margin prepared in Fig. 11 is now completed. The first overlay is created from several Wodland turf, Asoa sand/gravel and Woodland/Heki flakes. The firs are only provisionally set up.

Fig. 46 - The second order. Again various turfs (earth, grass mixture, flakes and sands). The re-spread areas were previously coated with highly diluted glue. The remaining spaces were filled with long-pile grass using elecrostats.
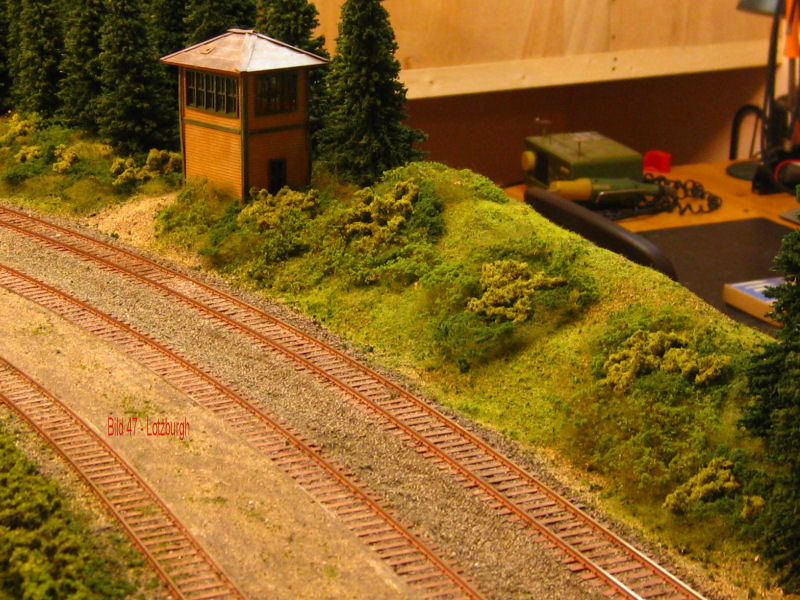
Fig. 47 - The last order. Foliage from Woodland and Heki, Clumbs from Woodland on the Woodland mesh as background. Glued wet in wet. Now missing on this module are the telegraph poles, street maculation (Andy) and the population, cars on the street. Continuing now with the last Lotzburgh module.
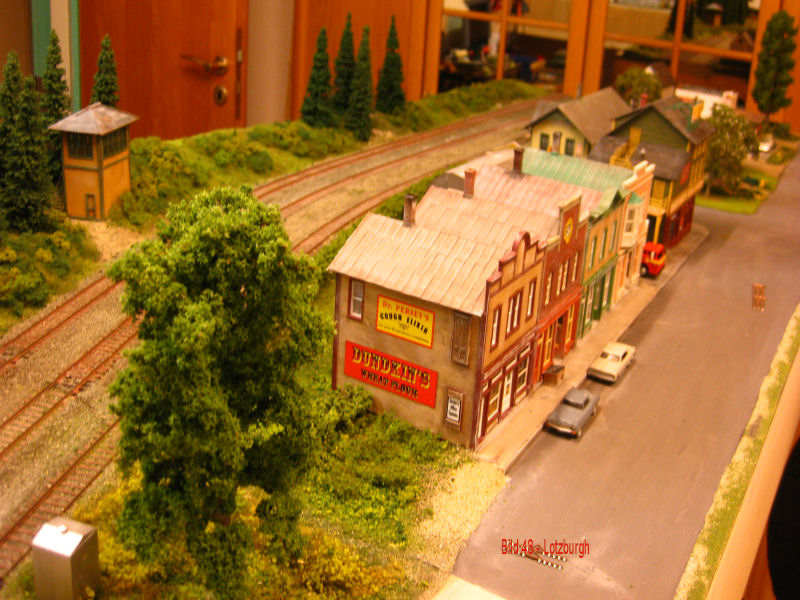
Fig. 48 - View of the (almost) finished module.
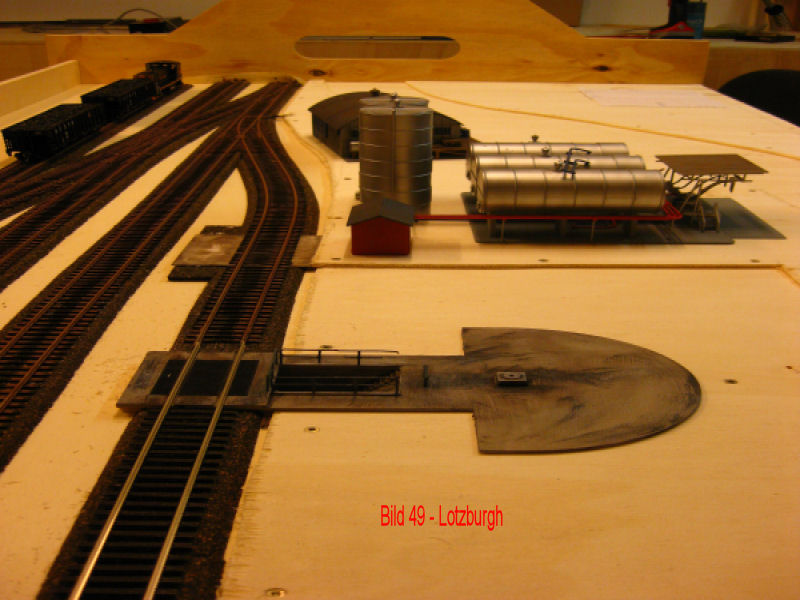
Fig. 49 - The expansion of the fourth module of Lotzburgh begins. Here, in addition to another store, the fuel dealer (heating oil, oils, fats, coal) and the agricultural machinery dealer (John Deere) will find its place. The course of the road can already be seen. The road is built as on the pre-module. In the foreground you can see the coal unloading for the hoppers. The conveyor belts are not yet installed.
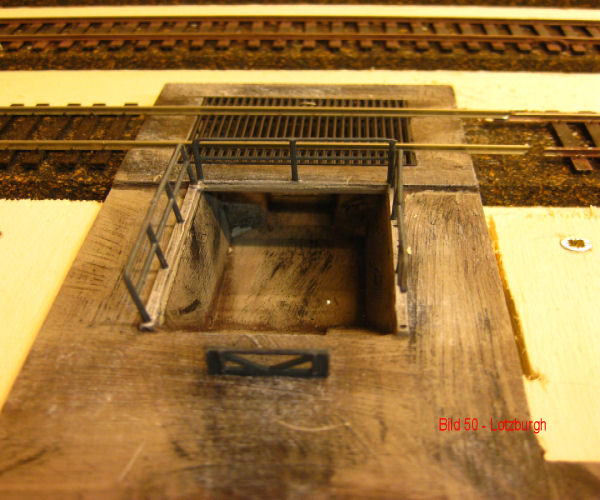
Fig. 50 - The coal unloader from Walthers Cornerstone series (#933-3519 - Bulk Transfer Conveyor) is originally intended for sand loading. Bernd has aged it. The base plate was pre-painted with Heki's concrete paint and aged using a wiping technique with Heki's glaze. After that, lights were set with white acrylic paint. As a final step, black (charcoal) was also applied using the wiping technique. A conveyor belt is still to be installed in the pit.
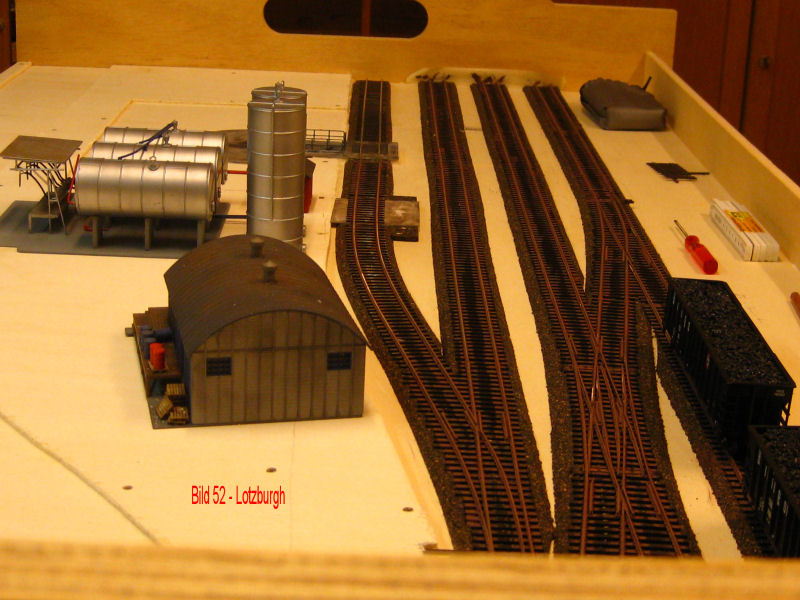
Fig. 51 - The tanker unloading system is installed in front of the elevated tanks. Here you can already see the base plate of the spill tray. Built from one piece of 1 mm thick plastic plate. The edging still follows.
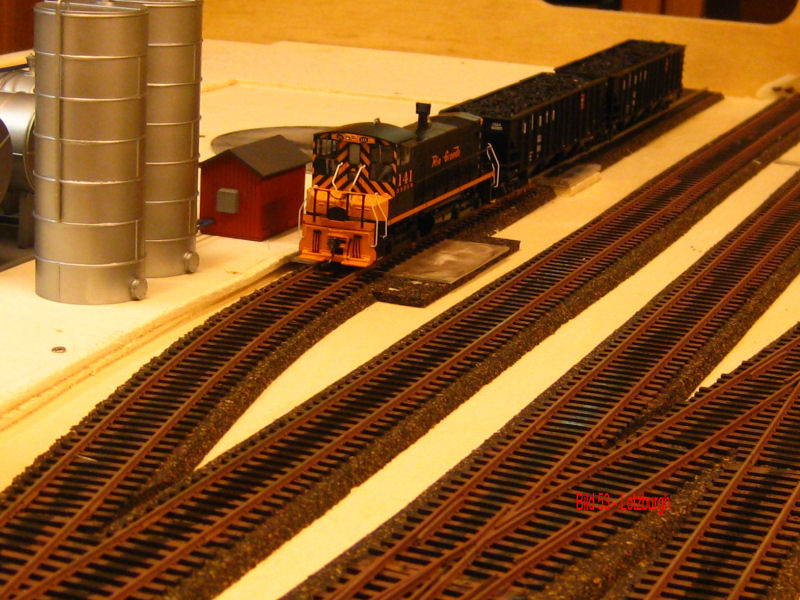
Fig. 52 - Der erste Probezug auf den nun auch fertig verlegten Gleisen.

Fig. 53 - Here the street course at the other end of the module can be seen better. The white sheet of paper on the right shows the location and size of the machine shop building. This building is in progress at Andy. Bernd still has in mind the addition of a roof, under which there is room for a working pit/ramp for tractors.
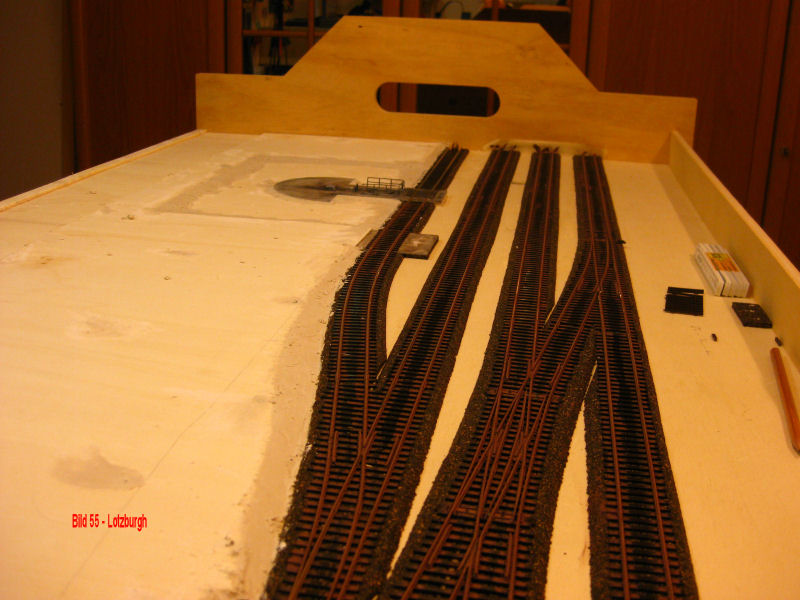
Fig. 54 - The coal unloader and the "plate edges" have been fitted with model plaster. The rear terrain border is also glued in place. This strip is still being given the desired terrain structure with the jigsaw. The next steps will be the rough construction of the rear terrain strip with styrofoam and plaster bandages, the installation of the road surface and the ballasting of the track body with subsequent spray painting in dusty brown.

Fig. 55 - Here will be the last house of Lotzburgh (feed trade). Adjacent to it will be the coal and tank farm. The first layer of plaster (see under Construction Instructions) has been poured into the street cutout. The second layer now follows.
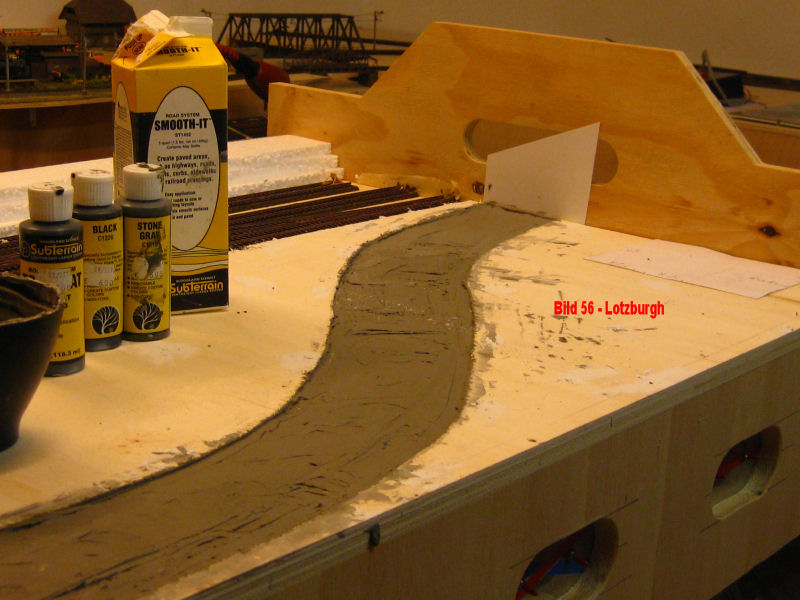
Fig. 56 - The other side of the module with the first application of plaster in the road. In the background, you can also see the styrofoam strips for the edge strip. A finishing wood edge is still missing here.
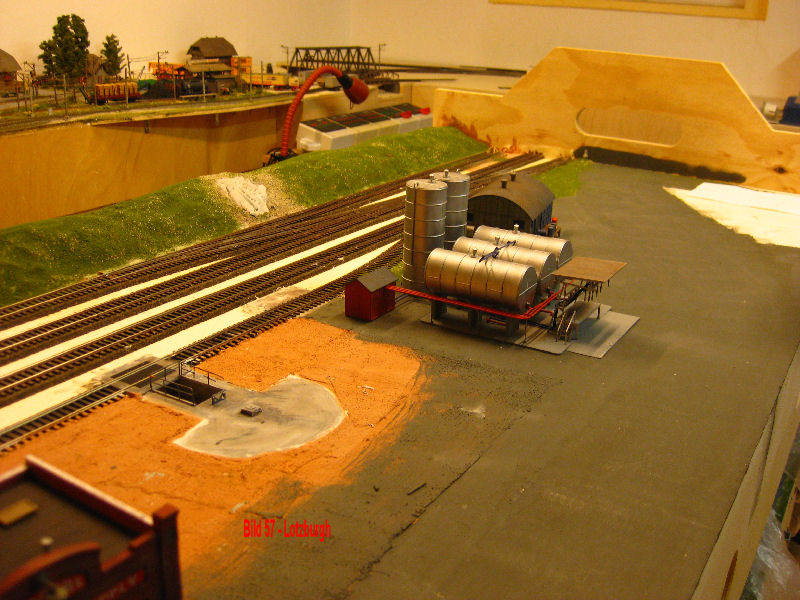
Fig. 57 - The road has its "fine pavement" and painting (construction method was described earlier in this chapter). The area around the tank facility has also been tarred. The shoulder at the rear of the module has been completed and given its first coat of green. The next step is now the ballasting of the track field. In addition, the tank farm and the coal loading area will receive a concrete wall enclosure.
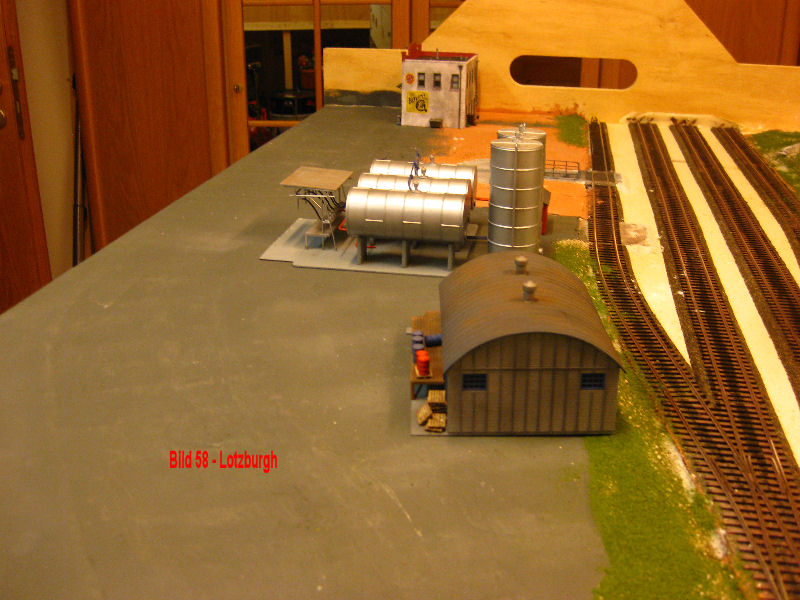
Fig. 58 - A view from the other side.
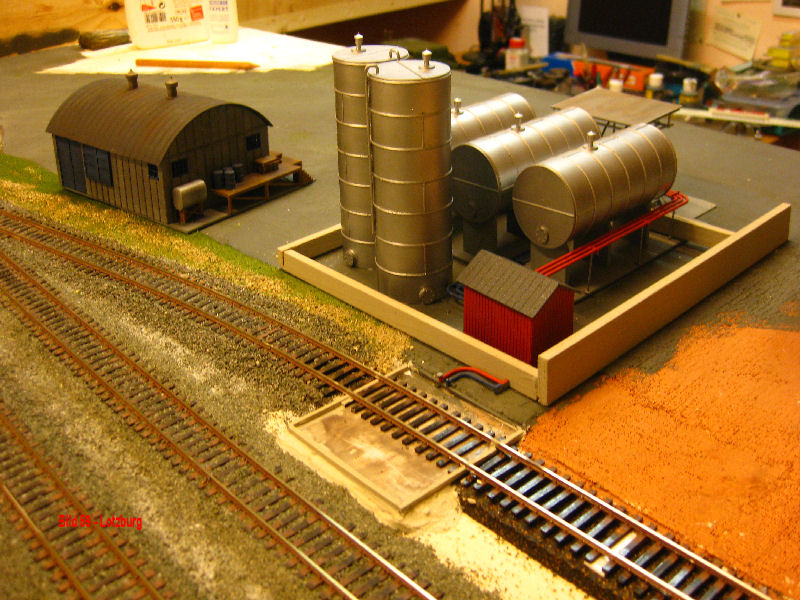
Fig. 59 - Tank plant has got its oil protection wall (wooden slats/concrete gray painted). In front of it is the tanker unloading with the oil catch basin. The unloading nozzles are still loose in front of it. The walls are still being worked into the terrain and aged.
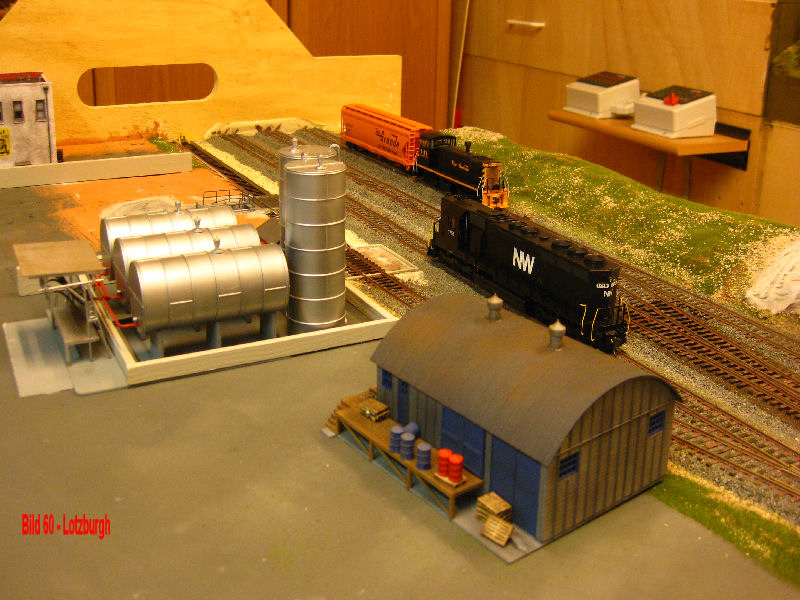
Fig. 60 - View from the front module edge also on Bernd's new one! A SD 45 of the Norfolk & Western Railway (today NS - Norfolk Southern). This machine was still in service in the late 90` years under its old lettering and number.
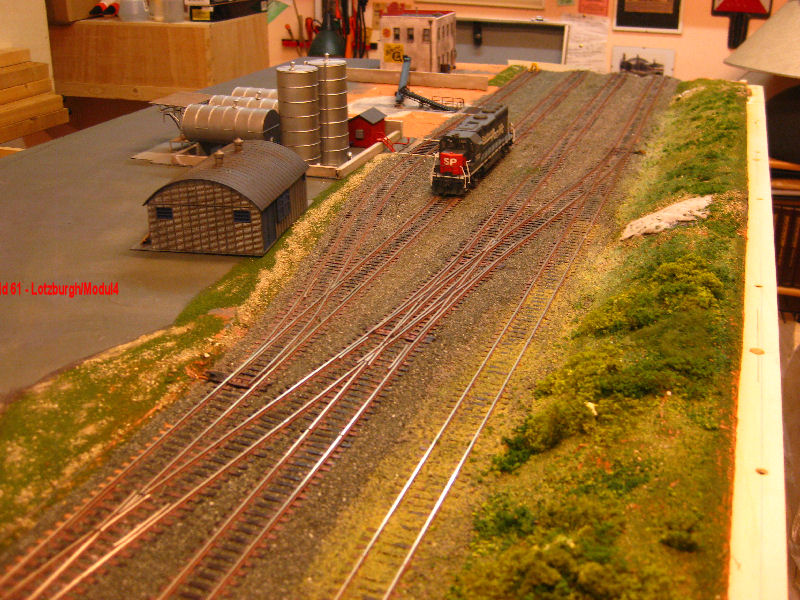
Fig. 61 - The track field is finished ballasted. The edge has its 2nd green. A GP 40 of the Southern Pacific is waiting for further tasks.
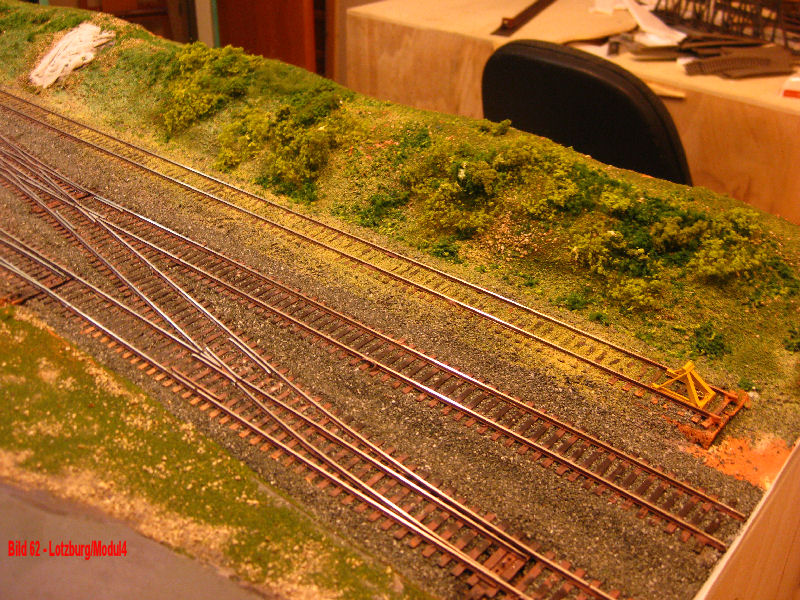
Fig. 62 - Track field and edge closer look. Several types of Turfs, sand, flakes and foliage from Woodland and Heki as well as from the roadside.
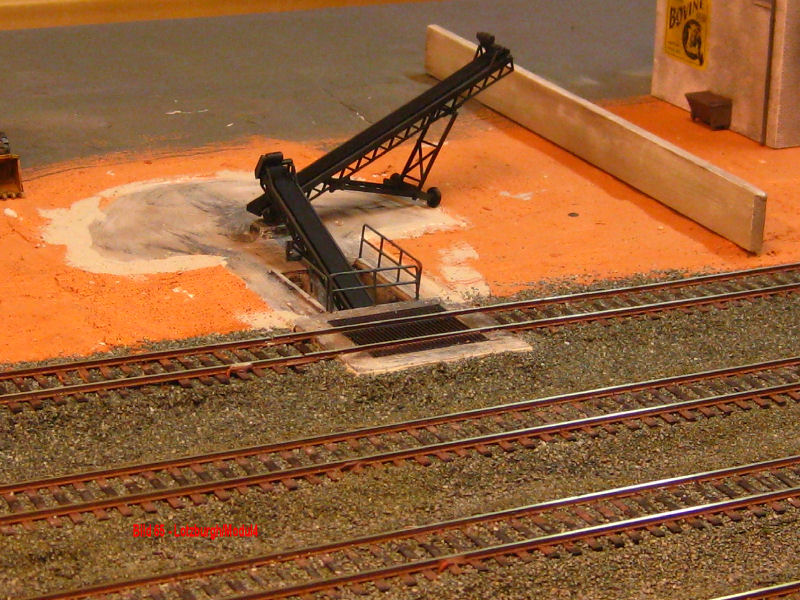
Fig. 63 - The coal unloading station has received its conveyor belts painted and aged by Andy.
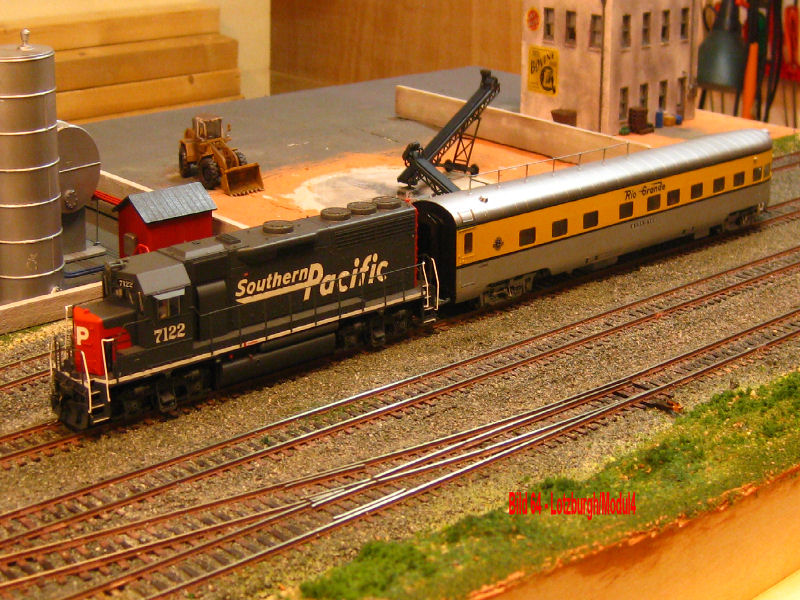
Fig. 64 - The GP 40 has found a job! She transfers a freshly renovated end car of the Rio Grande! More under the button "Building instructions".
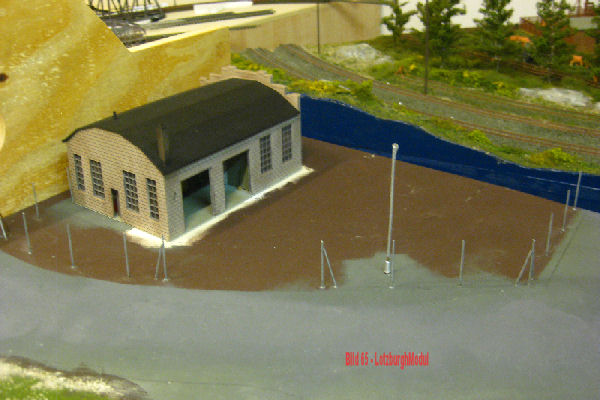
Fig. 65 - Also "above" it goes on! The agricultural machinery dealer got his fence posts concreted in. They are 4 cm long brass rods, which were hammered into a drilled hole with a blank at a height of 3 cm. After that they were painted. Sparse lighting for the yard was also provided.
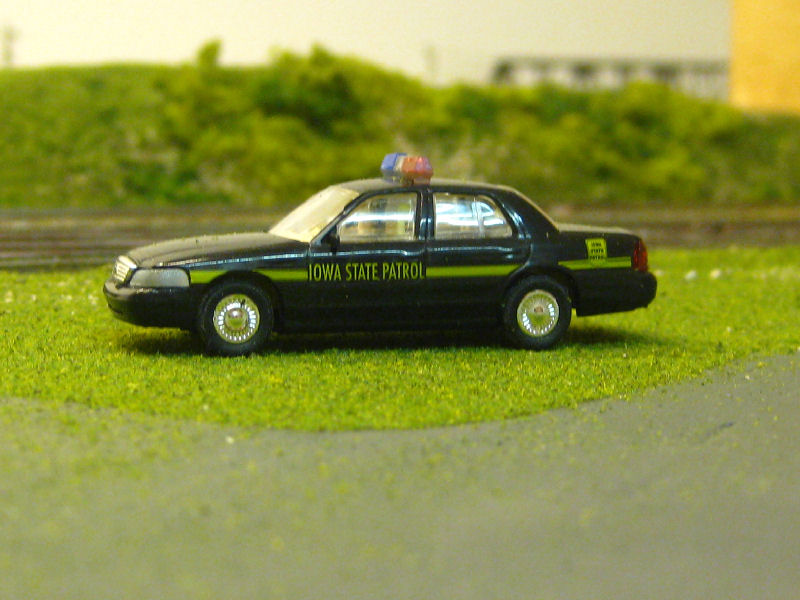
Fig. 66 - No sooner is there a nice meadow, the muggers are already there! As clean as this car is, the guys can do nothing else! But, it's the police of the state where Beans is located. IOWA!
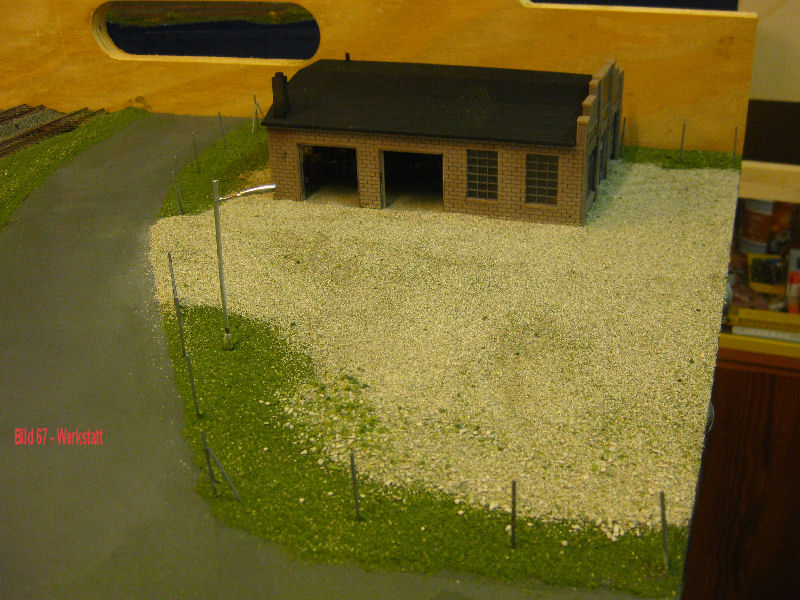
Fig. 67 - The first surfacing around the workshop. The gravel is from Asoa, mixed with a touch of green. The green areas get 2 more jobs wet in wet. Also, long-flowered grass with the electrostat.
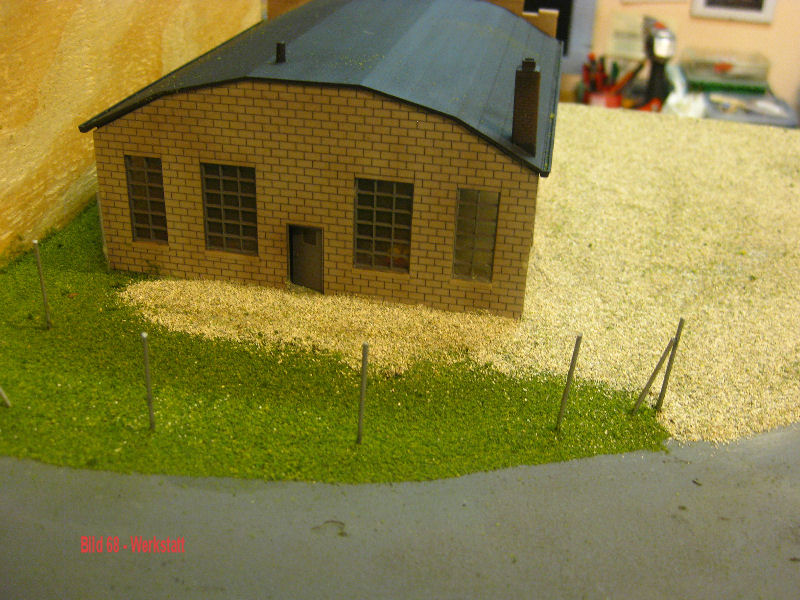
Fig. 68 - The head side of the building facing the street. The wire mesh of the fence comes last. Andy!!!! Sh... Superglue!
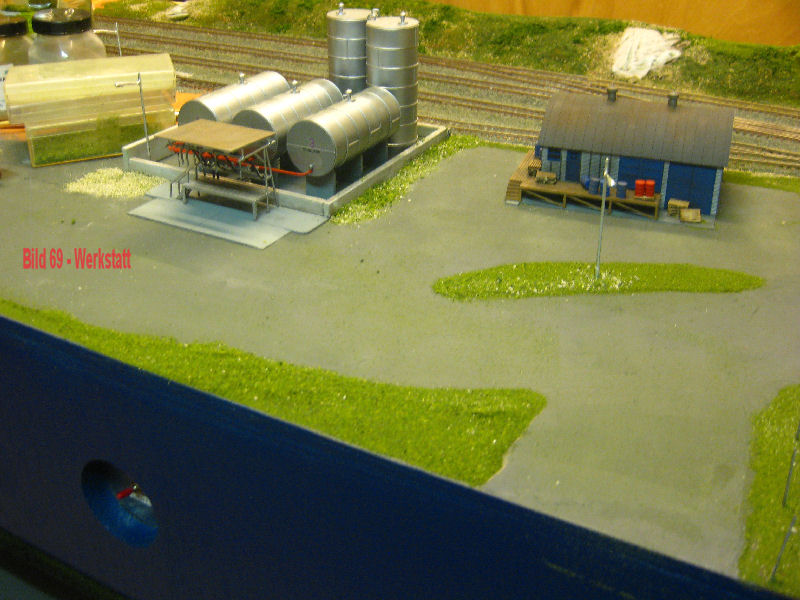
Fig. 69 - First greening of the edge strip and around the tank farm.
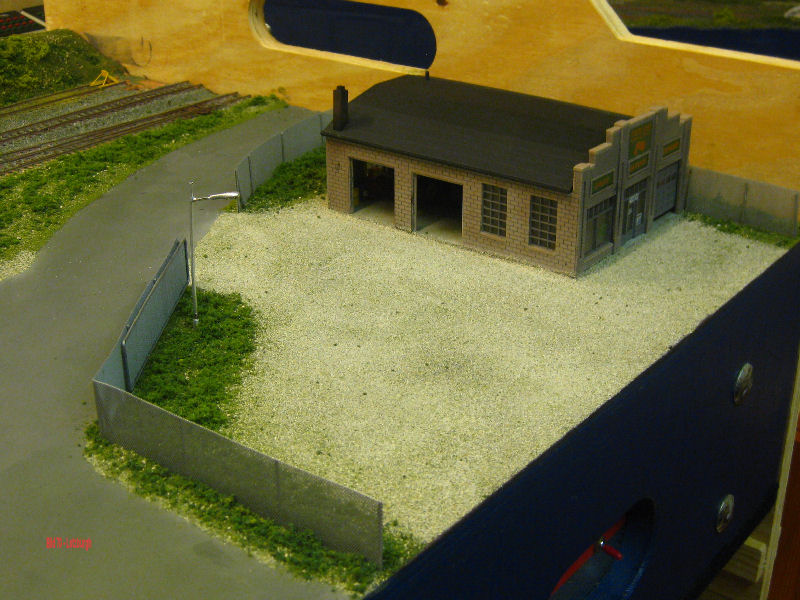
Fig. 70 - The fence is finished and the 2nd green sprist! High pile grass, applied with the electrostats, bushes and trees follow...and of course farm machinery, billboards (ANDY!) and lazy people
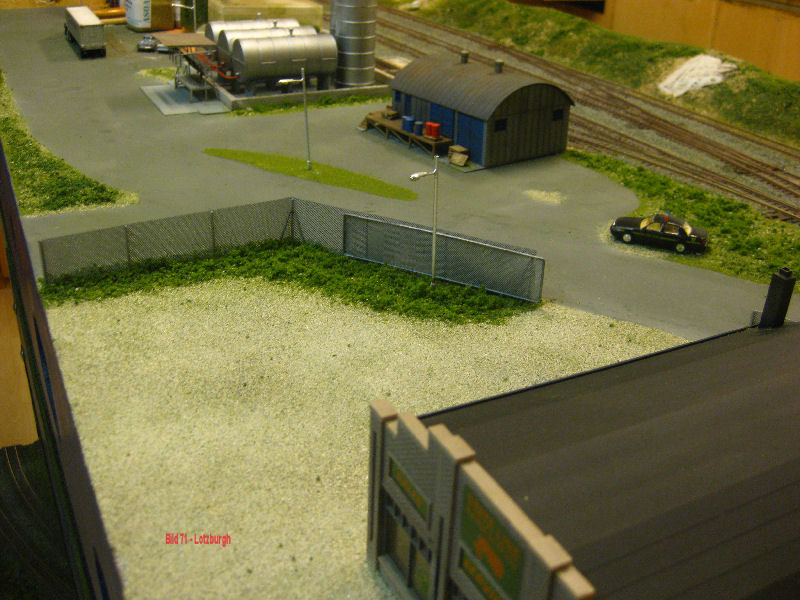
Fig. 71 - Again differently. Here also the sliding gate is recognizable..also in Iowa there are thieves and loafers..in black cars with blue/red light! Whether they notice when a tractor is missing???
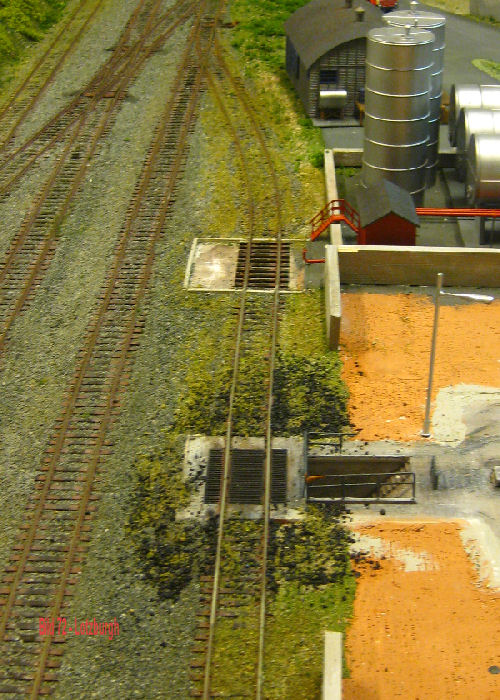
Fig. 72 - Weeding of the loading track.
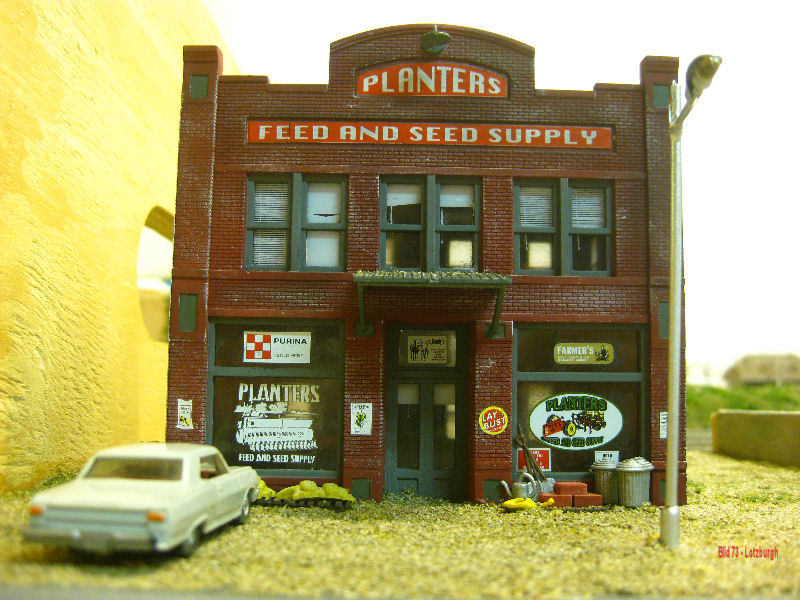
Fig. 73 - Also around the farmer needs lies the first flooring.
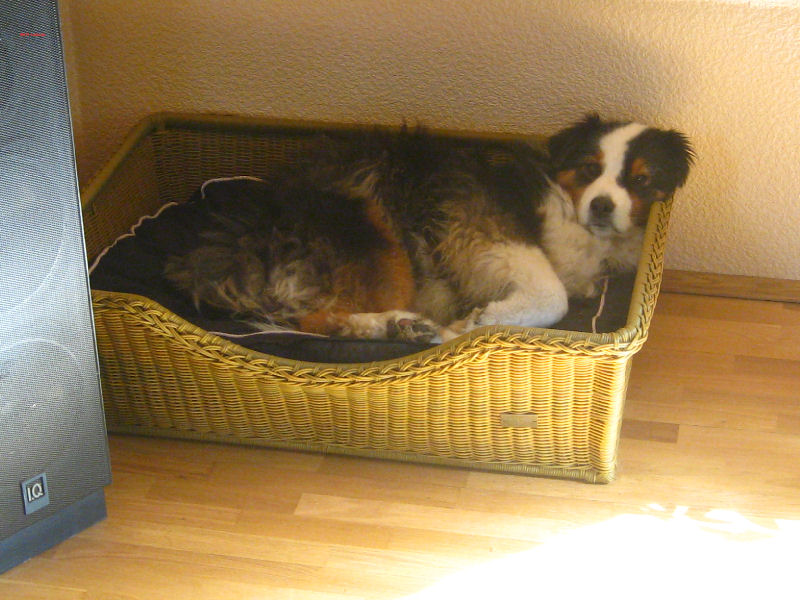
Fig. 74 - I am sooooooooooo bored! Play with me.
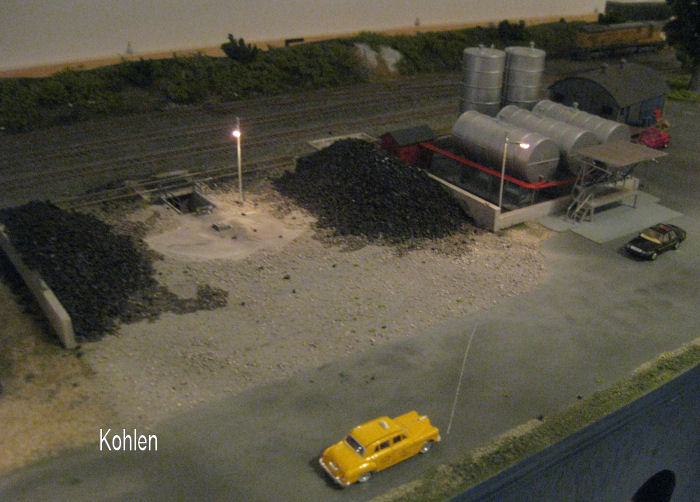
Fig. 75 - The coal trade has finally received its coals. Now the conveyor belts and the wheel loader are still missing. Due to a move of Bernd still in some box! Question: WHERE?
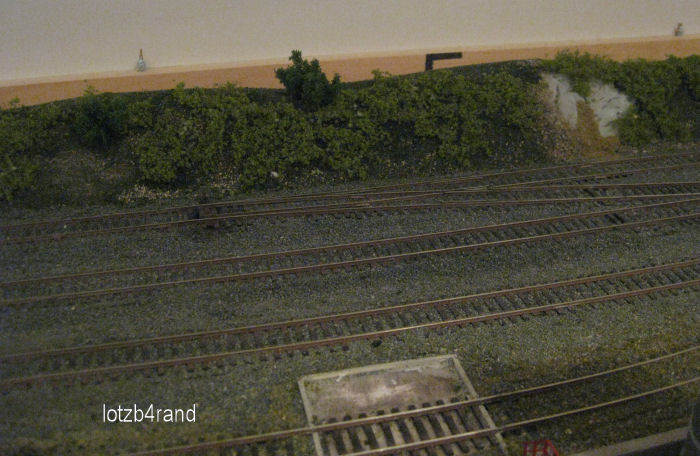
Fig. 76 - The back edge of the module is also finished!

Fig. 77 - Planting has also been done. Now the road markings are still missing. Here we are still waiting for colored pencils from Woodland, which will appear this year as a novelty. This will save Andy the tedious masking of the individual markings!
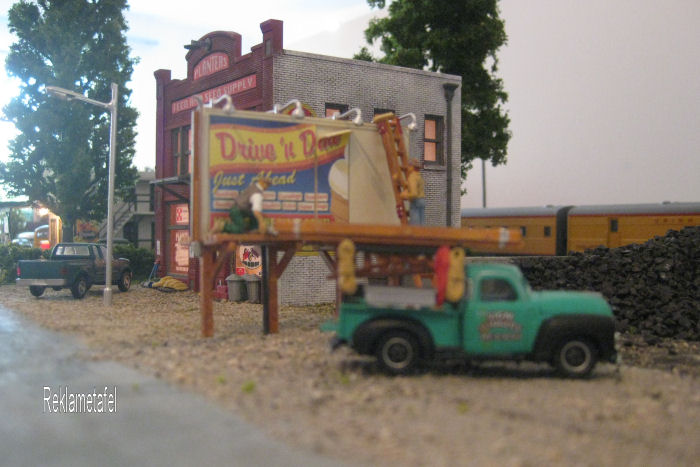
Fig. 78 - The advertising industry uses every free space! The first coal truck driving out will already fix it!
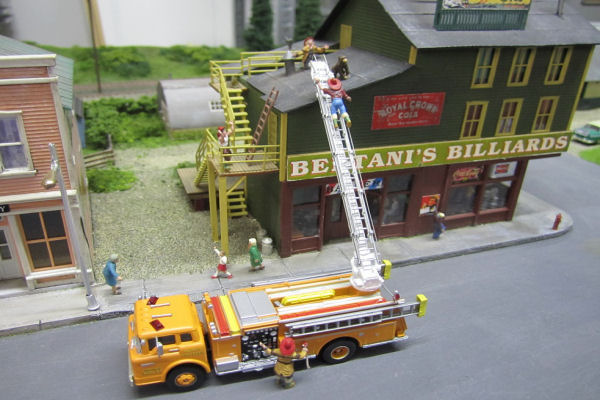
Fig. 79 - While shopping, a monkey ran to us! The had to be on the layout! So...monkey ran away from a circus train stopping in the station! Escaped from our pet shop is not possible. Trading with monkeys is a no-go! The boy sits on the roof of the pub. A case for the Lotzburgh fire department. Well, they will be busy with the egg catching for the next years! Question from the chronicler..where does the Lotzburgh fire department live? We need to find a place.
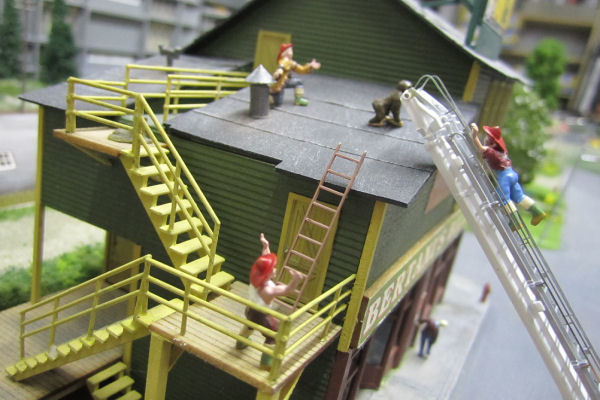
Fig. 80 - Without banana and net it will be nothing. Andy carve yellow banana and build net!
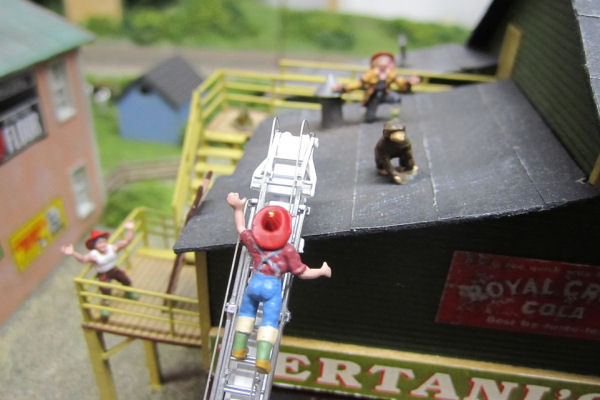
Fig. 81 - Now things are starting to get hectic!
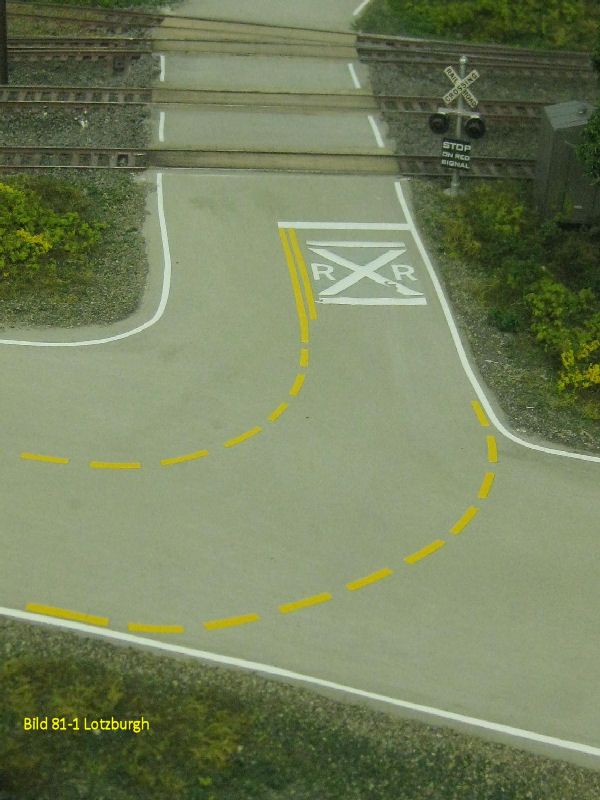
Fig. 81.1 - We've been avoiding it for a long time! Road markings! Dirk and Frank took pity on us. Frank at the PC with Google-Earth and hundreds of shots on the streets of IOWA and Dirk with unshakable hands and angel's patience. Basis are large self-adhesive foils in yellow and white, which are e.g. stuck as transport protection foils on new cars. From these foils corresponding strips were cut out in the respective width and glued to the road. A huge job..but with beautiful success. THANKS!
Here the crossing at the level crossing. The main road turns left here over the railroad crossing. Straight ahead begins the local road of Lotzburgh.
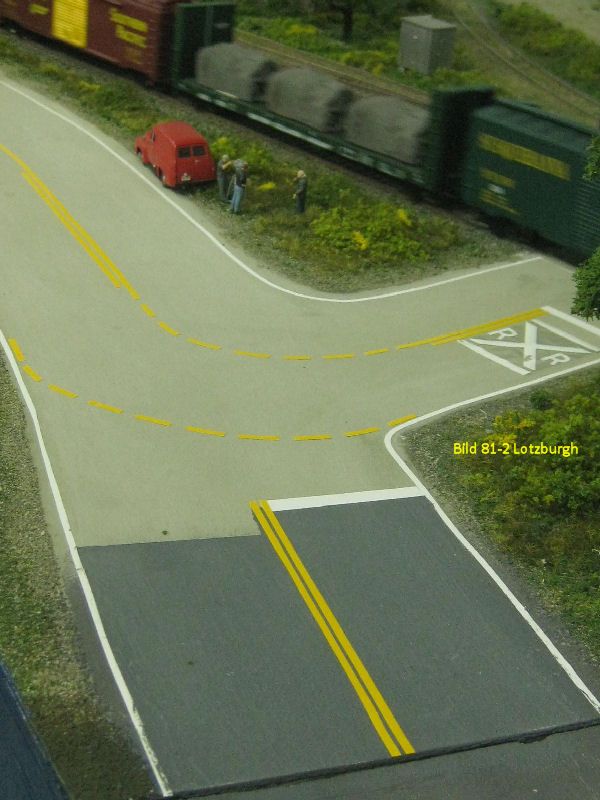
Fig. 81.2 - seen from the village the junction
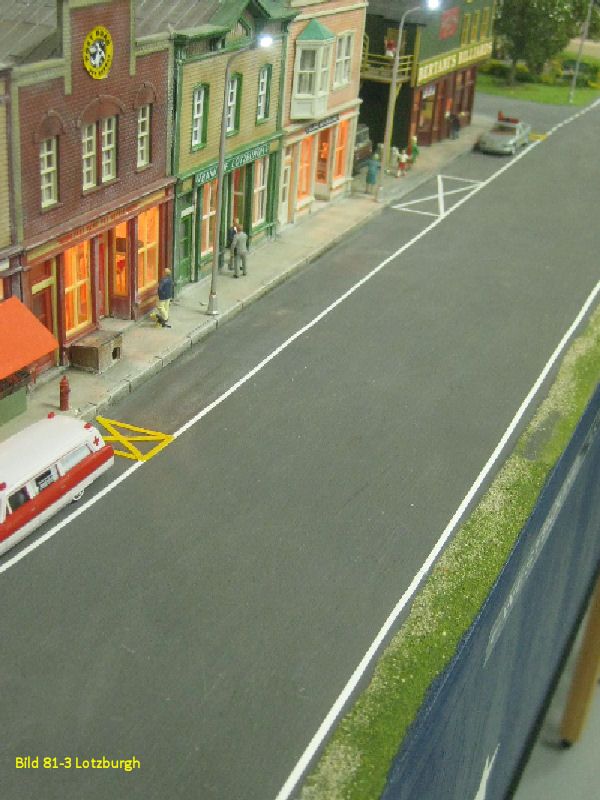
Fig. 81.3 - The local road has not been given center lines, but only two side verges. Yellow no-parking zones have been placed in front of hydrants, etc. Lotzburgh also got new street lighting. New elections were coming up...at least a promise from four years ago had to be kept.
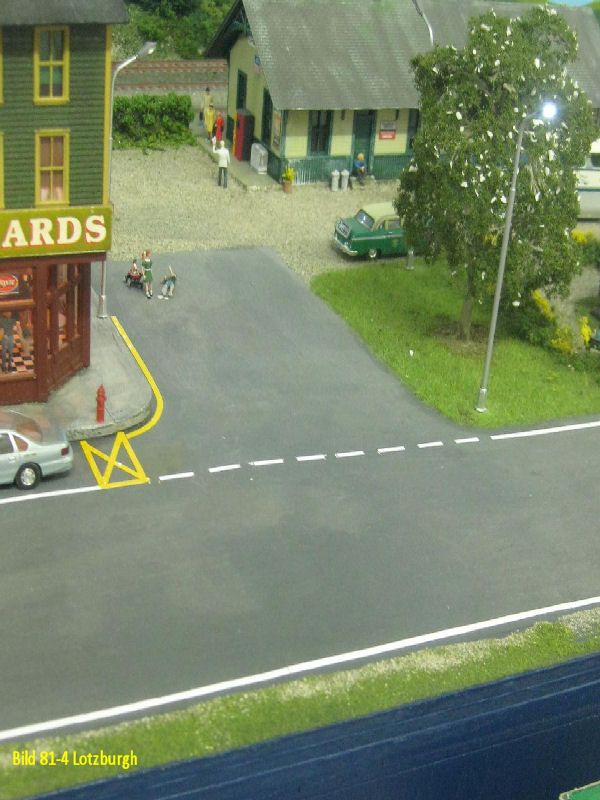
Fig. 81.4 - The turning of the road to the station area. The fallen child is standing again!
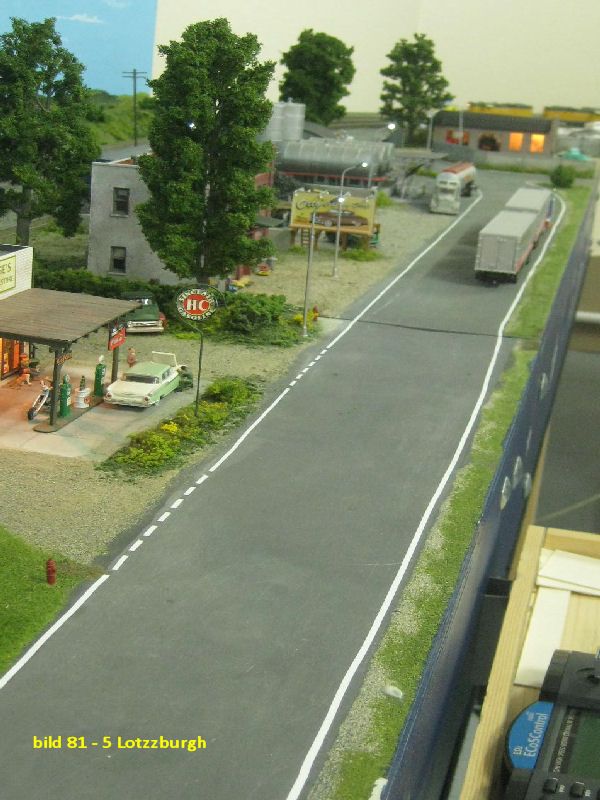
Fig. 81.5 - The whole length of the street.
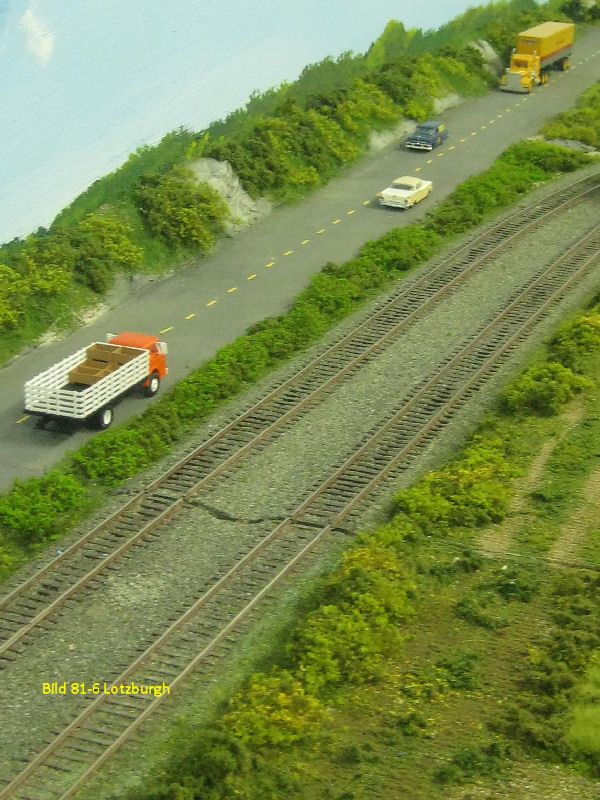
Fig. 81.6 - The country road outside the actual place has received only yellow center stripes. Complete yellow stripe stick and cut out each marker individually!