
")
")
First buildings
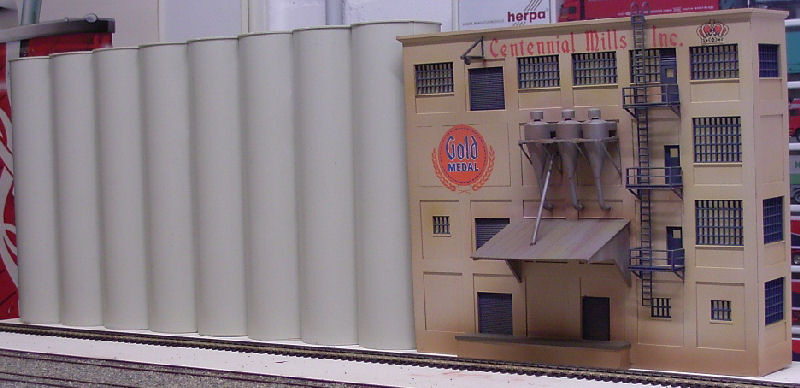 The first building for the "scenery" of the first part of the sidings station. The kits are from the "cornerstone" series from Walthers. A mill building with grain silos. The silos are usually arranged in rows of four. Andy separated the silos in the middle and arranged them side by side. Roof superstructures and a hoist tower are still added to the siolos. In front of the silos, an emptying pit for the silo cars is installed in the track bed. To the left of the already aged mill building, a self-built storage building (triangle) will be built at about the same height. The ground floor will have a covered loading ramp. In the rear, the access road to the adjacent (under construction) container/trailer yard will "disappear. Construction will start when Walthers has (finally) delivered all facade parts.
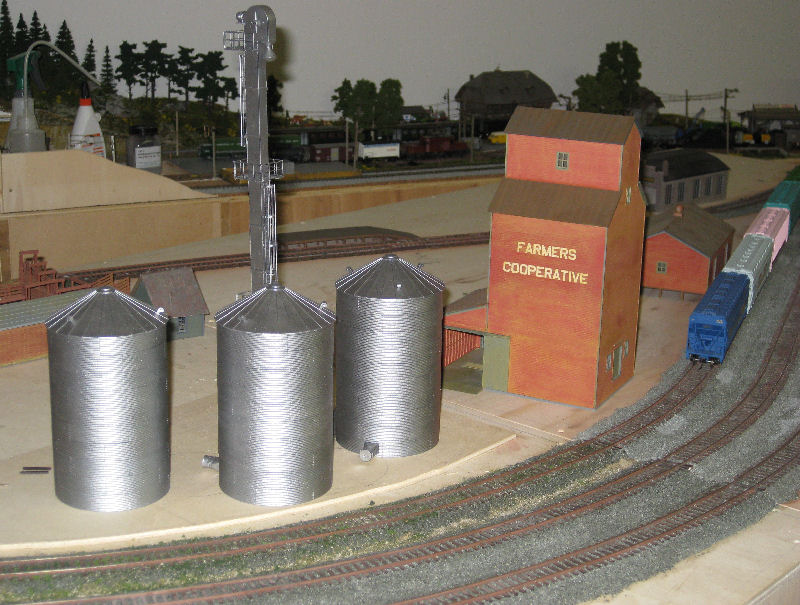
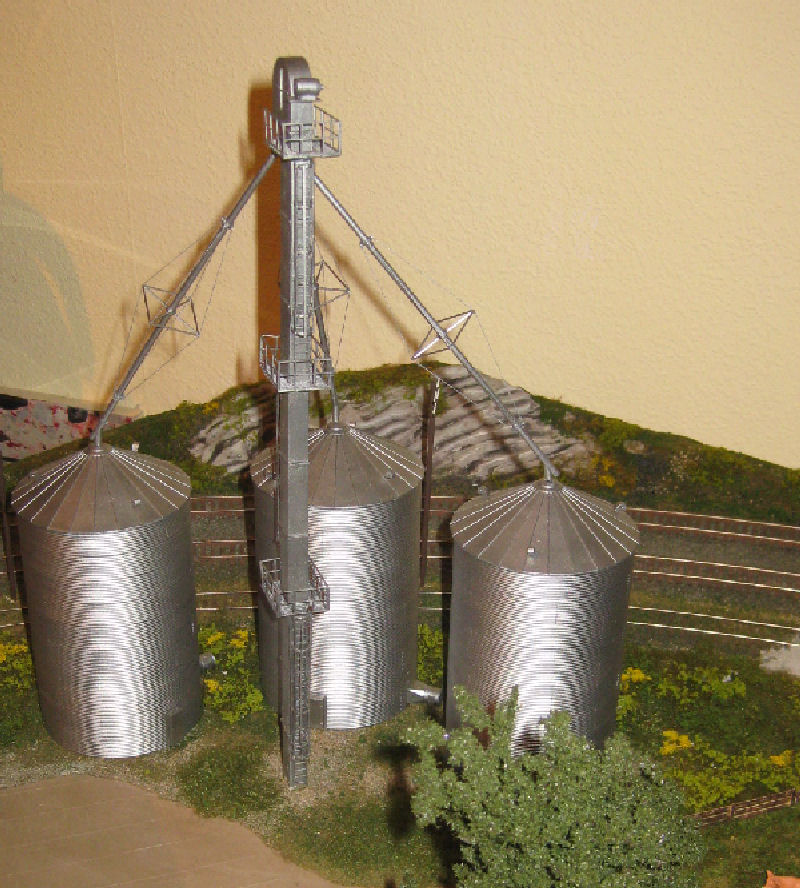
The grain storage in the area of the small land station. The elevator still needs to be fitted with the pipes to the tanks. In addition, the aging is still missing. Andy had already finished the lines with a lot of effort after Bernd had "glued" them. After that they were stored in a bag. Bernd put something heavy on it. MATCH! So, here's to a new one. Andy is already looking forward to it! On the picture also the approximate installation sites of the buildings.
Switzerland in the background! Retouching I can not! But the Atlantic is not sooooo wide.
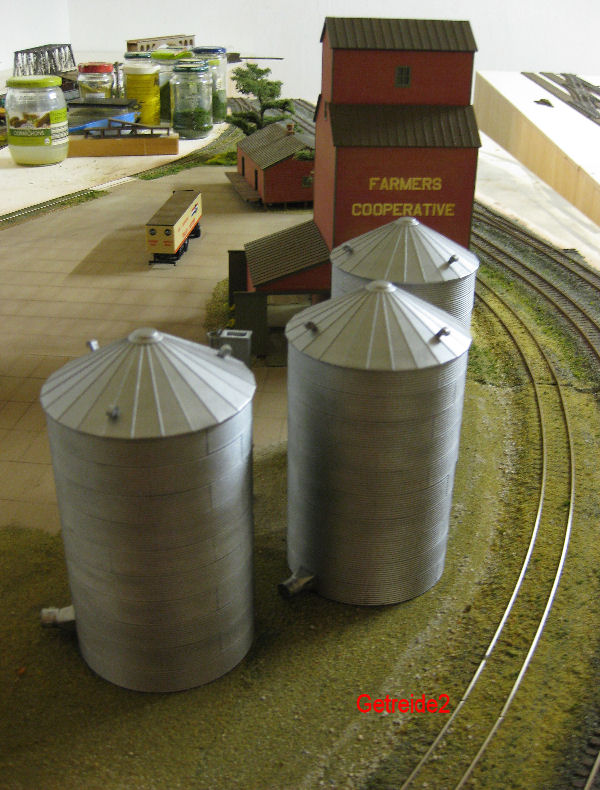
The silos are in their final place. The site has its first green. The access roads were made with ASOA gravel and sand from the Bergisch. After completion of the site, the winding tower and the pipes to the individual silos and to the main building will be installed (Andy, not me!).
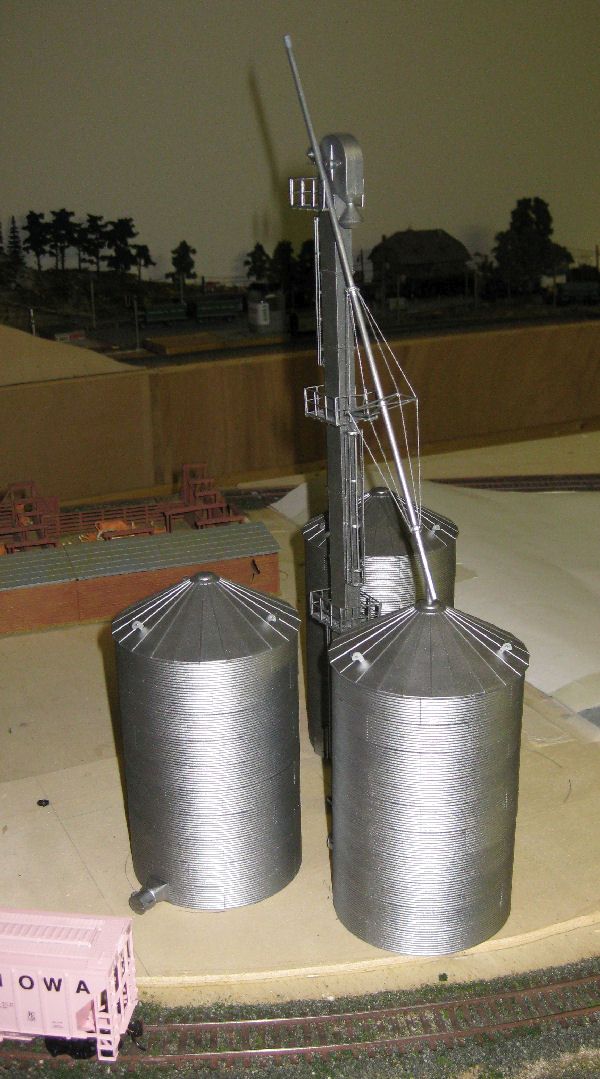
Andy's new lines from the elevator to the tanks. After 3 calming teas incl. substantial content and seven cigarettes I would perhaps manage the stabilizing wires! Enclosed now (6.6.09) the construction manual with photos and text from Andy...o.K. with the equipment I might have made it with 2 teas and 5 cigarrettes. Is already smart my car plumber.
Since the grain pipes had a small "accident" at Bernd, we had to get and build them again.
 After I deburred the tubes, they were glued together from 2 tube elements and the small angle piece.
After drying, I pushed on the 2 fastening rings and the guy square. Before gluing, make sure that the 4 hooks on the rings are aligned with the corners of the square, so that afterwards the guy lines are also straight.
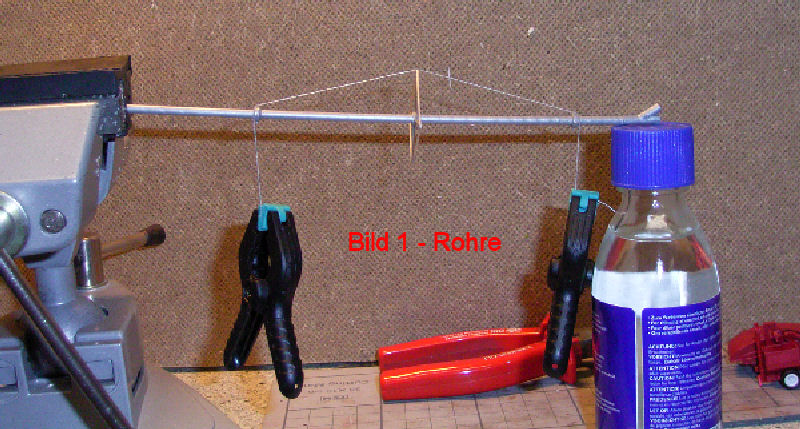
After everything has dried well, I take a tube and fix it on one side in a vice and on the other side on a base so that the tube does not break off again at the freshly glued points. I cut a piece of sewing thread a little longer than needed and attach a clamp to both ends as a weight.
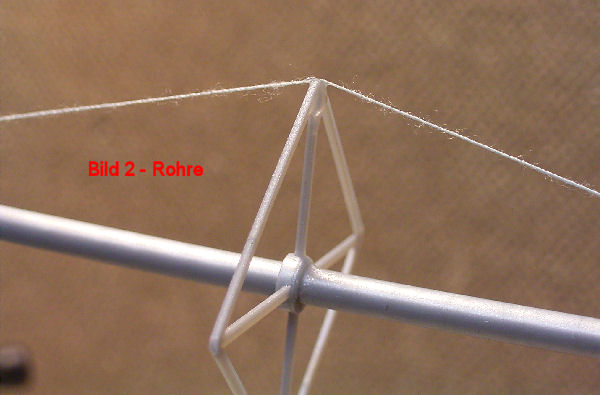
Then I lay the thread so that one end is over the hook of a tension ring.
The center of the thread is placed on a corner of the square. So that this has a small bearing surface, I cut off a small piece of the corner with a scalpel beforehand.
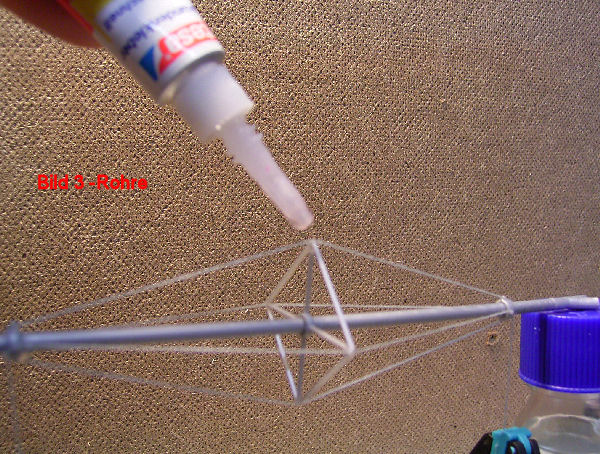
After that, all 3 points get a small drop of superglue.
After a few minutes of drying time, the protruding ends of the thread are carefully cut off with a scalpel.
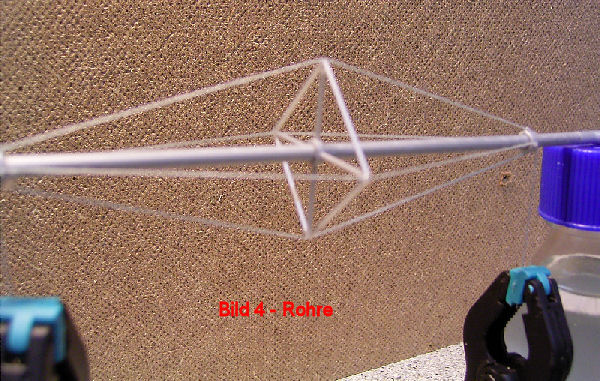
After that, the pipe is only painted with the airbrush and is ready for installation.
Addendum Bernd: Tubes were now delivered in a sturdy cardboard box! Why not immediately so?
The elevator lines have been installed by Andy. To allow some "movement", metal pins (nail shanks) were inserted into the connections to the tanks. Pipe drilled out, pin glued in. The whole thing without any accidents! Great Andy! Bernd has the strict prohibition to look at the things even crooked! No one ever praises me!
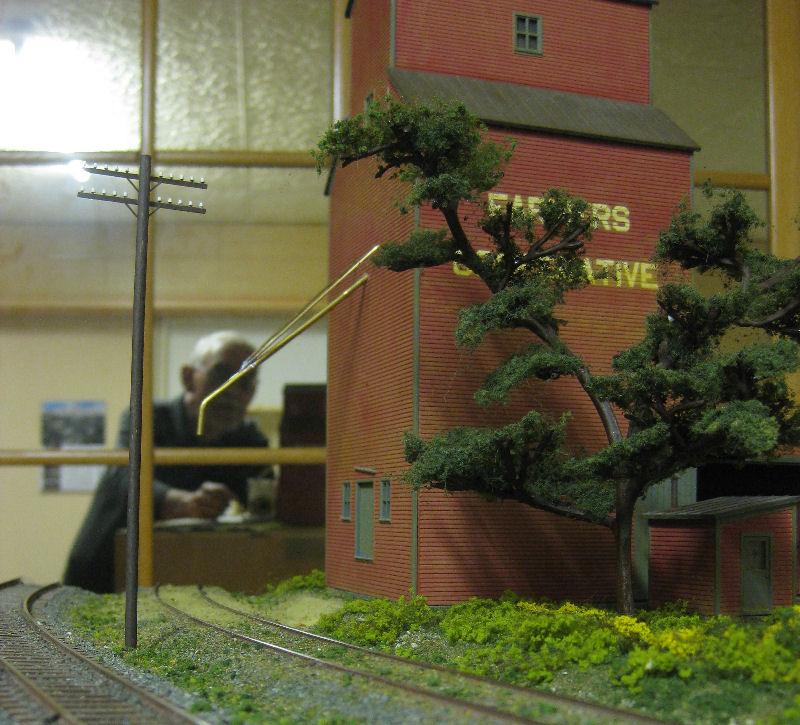
Our granary also got its tube for loading wagons. It is a piece of suitably bent brass pipe and two stabilizing wires (from the actuating levers of the point machines that we do not use). Suitable holes were drilled into the wall and the tubes were fixed from the inside with hot glue. Andy did this too, Bernd hates hot glue guns! Fingers burn, stupid threads everywhere! The pipes are still painted.
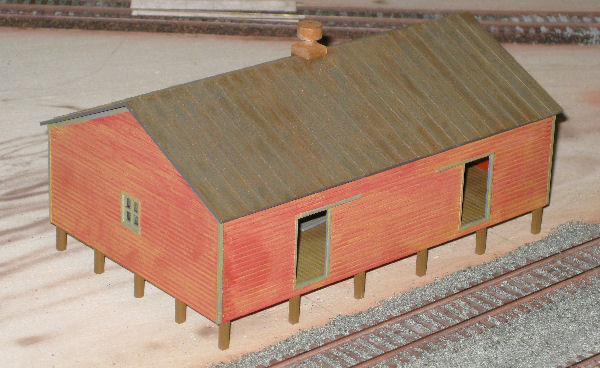
Near the grain warehouse will be this warehouse building. The loading ramps in front of the building we will make of wood.
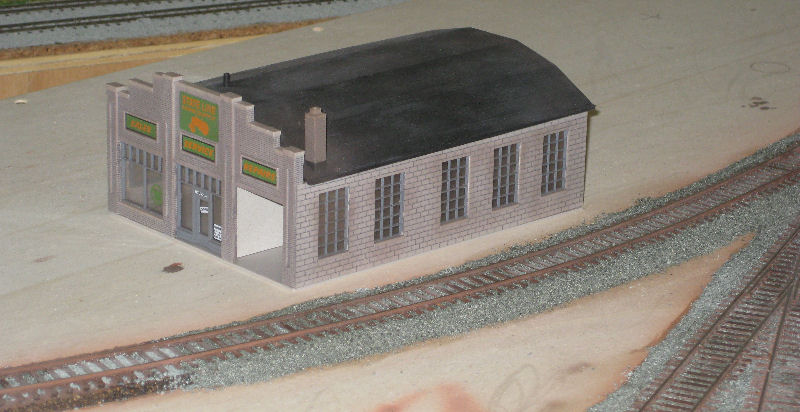
A workshop building for an agricultural machinery dealer. All buildings shown are from the "Cornerstone" series by Walthers.
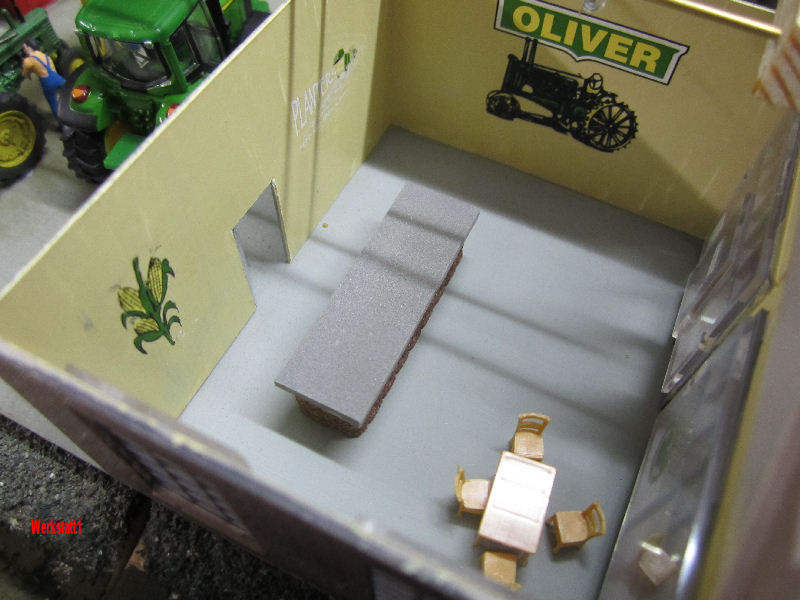
Andy got to work on the interior of the John Deere farm equipment dealership. The office and sales area is still getting shelving/cabinets and counter small parts...and of course employees and buyers.
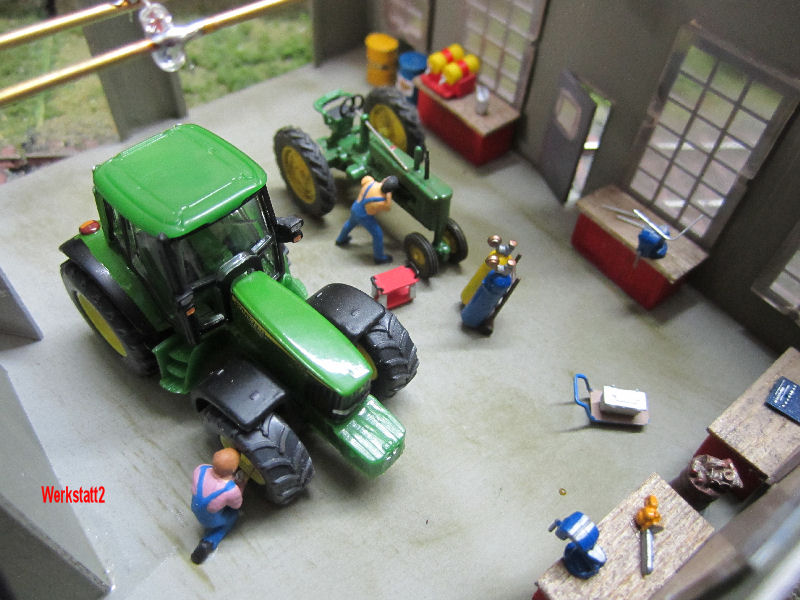
In the workshop, an old tractor probably has a slightly bigger problem. Next to it is a new tugboat being prepared for delivery to its new owner. All furniture and tools were lacquered by Andy.
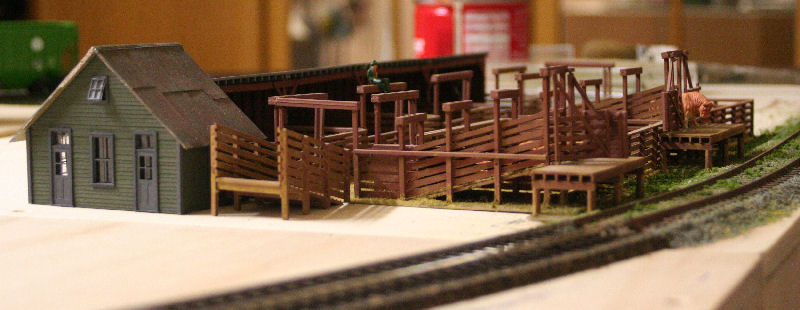
The livestock loading with the "office building". Both are kits from the Walthers program. Trucks can be unloaded via the ramp next to the office building. The cattle is probably very interested in the tasty green between the tracks.
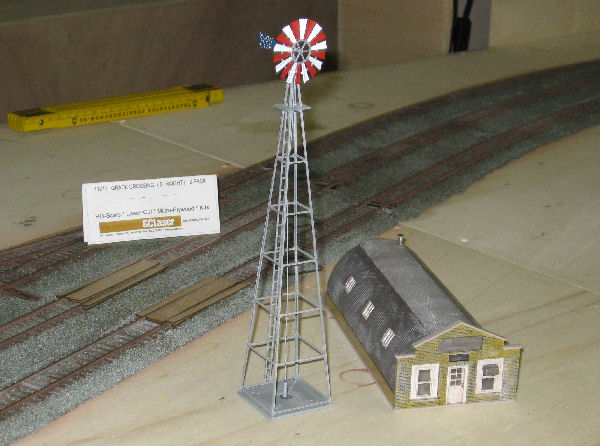
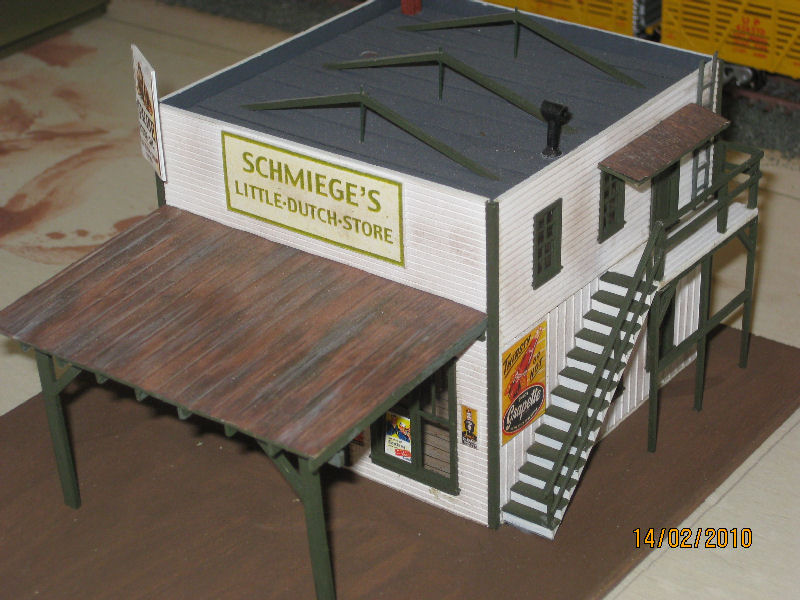
2 new buildings for the country station area. A windmill for the fountain and a store. The buildings were built by Bernd. The store (a small supermarket will move in here) was also aged by Bernd. The painting of the windmill in the Yank colors incl. the "stars" on the wing was applied by Andy. Also to be seen on the photo are the plank crossings for the level crossing made of lasered wood. The building kits are again from the Cornerstone series by Walthers. The level crossings (also available curved) are also from Walthers.
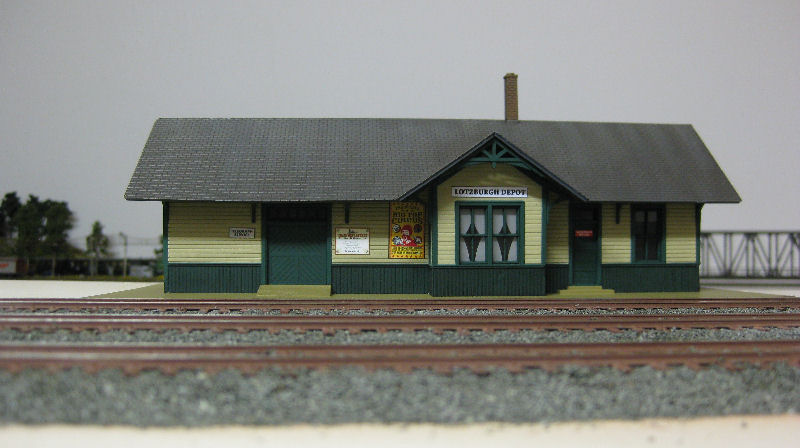

The station has a name! The country station will be called Lotzburgh Depot due to Andy's lonely decision! The building is a prefabricated kit from Walthers. With the background we are once again in Switzerland!
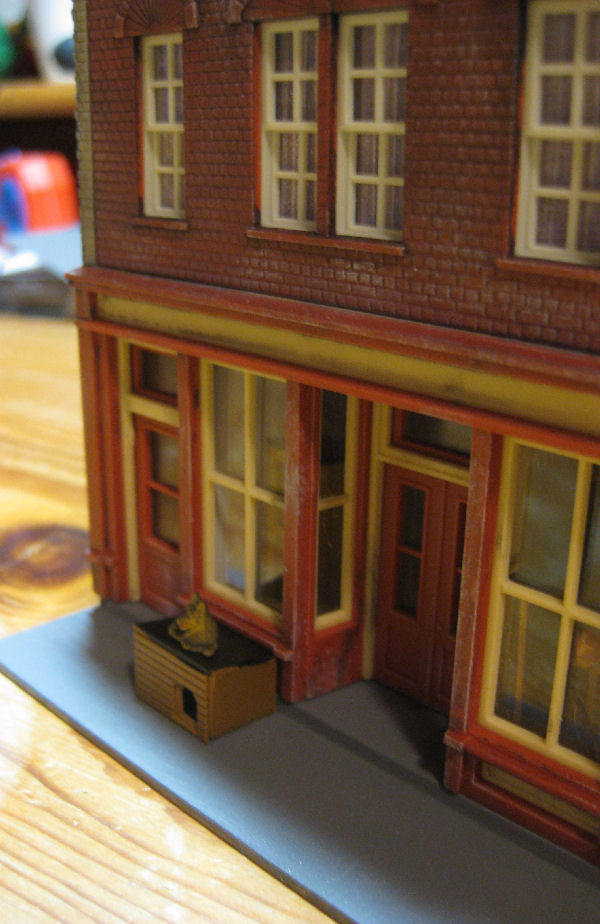
The houses around the country station are slowly taking shape. Here the "Post Road Pet Supply" from the Cornerstonserie of Walthers (933-3620) By the way according to the labels in the box a Kibrib kit! Bernd built it and aged it. Walls etc. with acrylic paints/roof with oil paints (apply rust and dust in wiping technique and wipe with rag!) Then, as with the walls, set the lights with white acrylic paint ( pick up paint with brush. Then brush almost dry on a wooden board and then glaze only the elevations and edges). With a little patience and practice and courage easy!
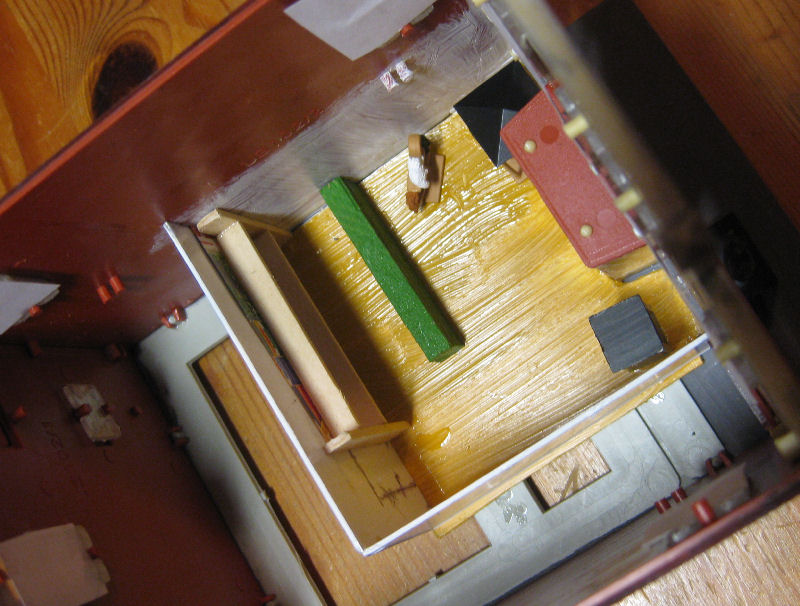
 An interior view! Walls and floor are made of a thin polystyrene board, which we have also used for the flooring of the container station etc. (cover Art-Service). The floor was painted with acrylic paint (Yellow Ochre). Care was taken to create a wood grain (Apply thicker and do not paint completely smooth). The walls with acrylic paint (Titanium White). The paints are from Reeves (reference Art-Service or Knauber). Behind the wooden shelf is a cutout from a feed advertisement. The counter is a green painted wooden bar. On the left in the corner the first four-legged guest was probably already not tight! Humans and cash register are still missing. Andy found the cages and critters in the Noch assortment (No.15716). The store will still get a ceiling, in which a LED will be inserted for lighting. Nice and sparkling! it must be. Here our club boss has to help as chief selector. On the inside walls still feed advertising from catalogs (American brands are e.g. Hill `s) Also decals on the outside walls. But this is Andy`s job as a fine motorist. With Andy the remaining buildings are under construction. The lout just never thinks of photos! Well, at that age and thinking of two things is difficult. After all, he is not a woman! So, soon here the rest.
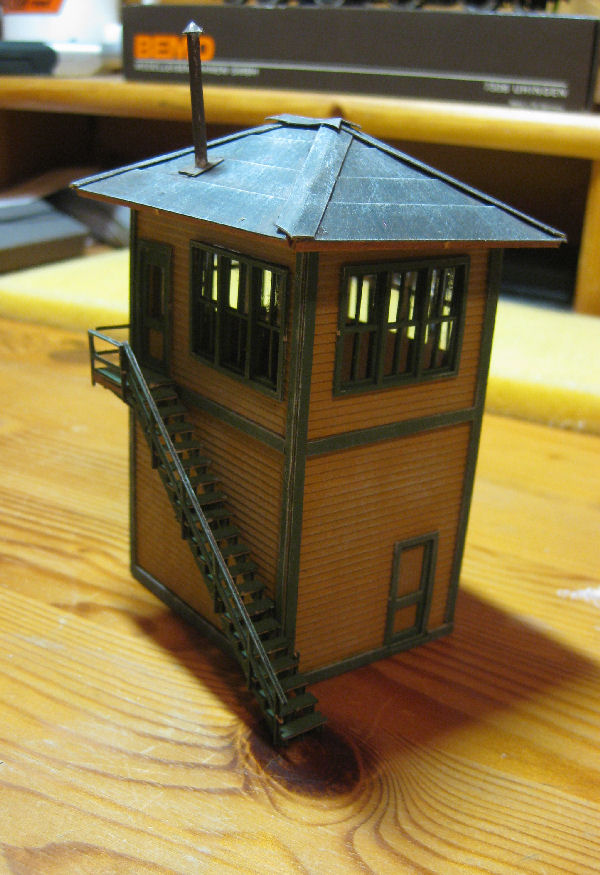
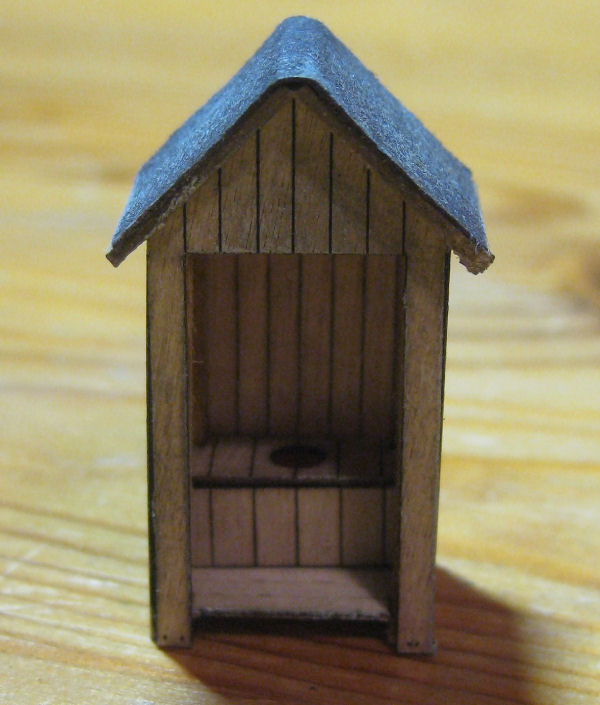
Also created at Bernd - an Interlookingtower??? Only looky, looky or also leverage? no idea. If leverage, then we still have to take care of an interior. By the way, the roof is on the wrong way round! It is a laser cut kit from the Walthers program. Hm! I threw away the package. The painting was done by Andy before. The aging was again done by Bernd with acrylic paints. By the way, definitely not a kit for beginners in laser cut kits. Glued with Uhu and three cognac. The loo was then again easy! Laser cut kit from Master-Creations (23005) from the Walthers program. Doors are also available. Separated for male and female by the way! Here Andy still has to add the super thin brass handles. Bernd doesn't see them with and without cognac anymore!
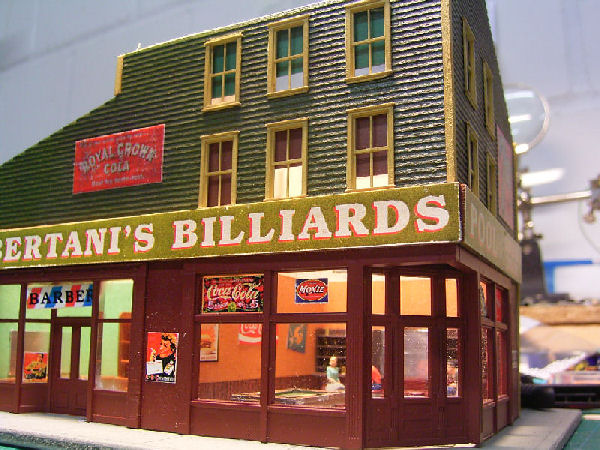
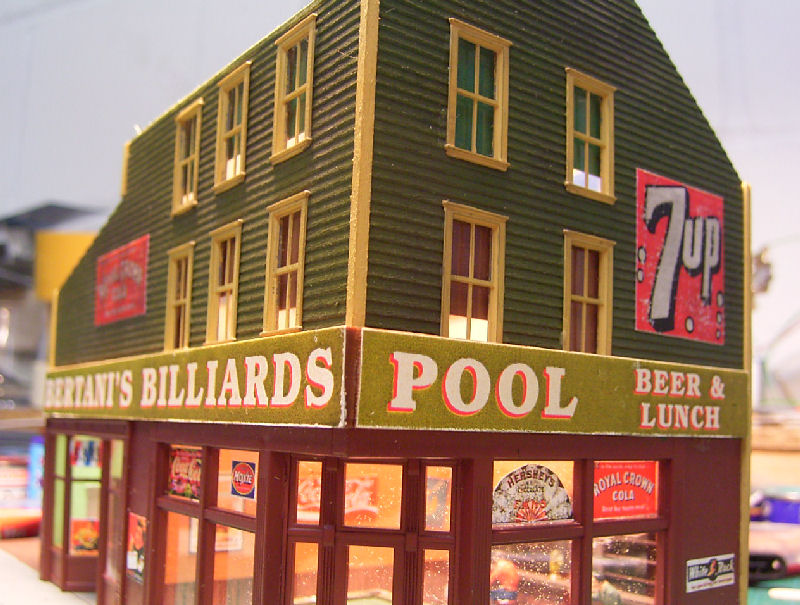
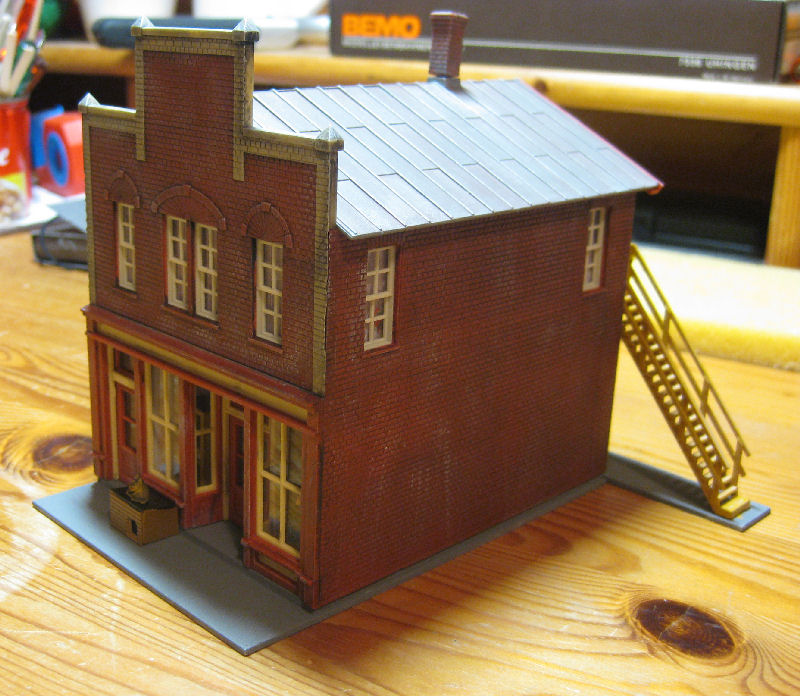
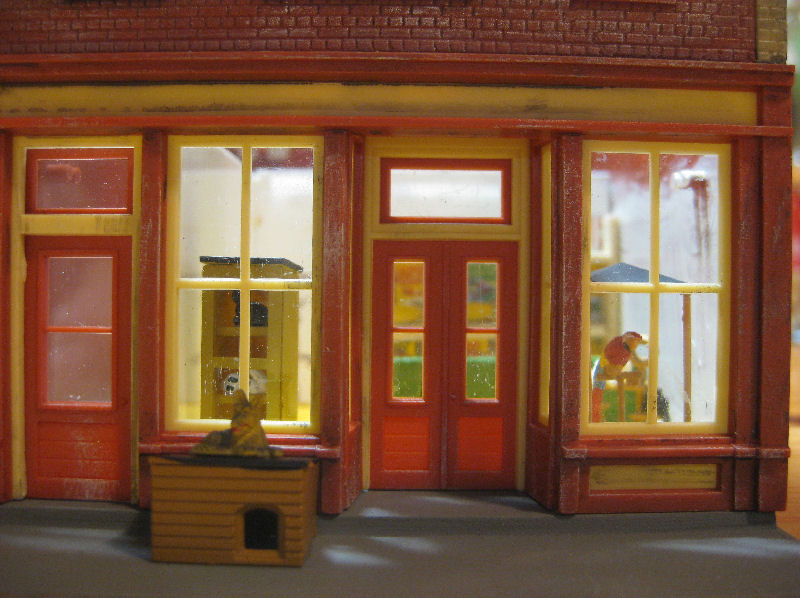
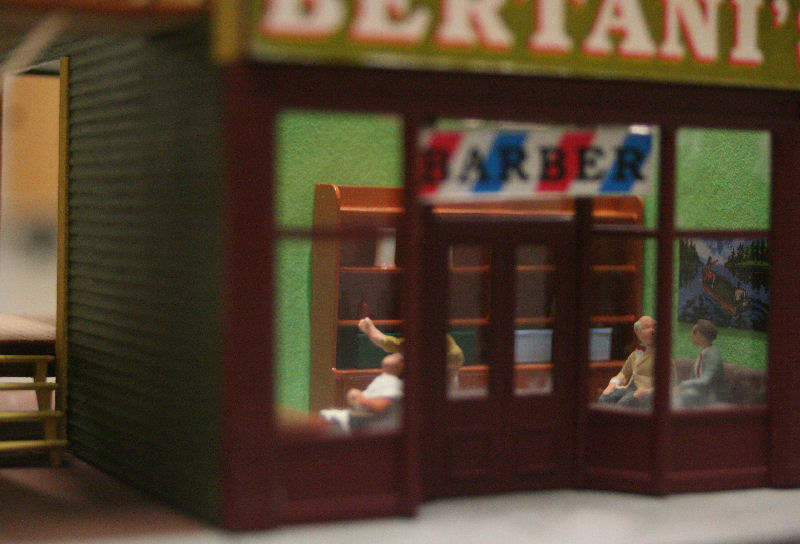
A gentle hint helps! Andy delivered. A billiard saloon with a barbershop. This is also a laser cut kit from the Walthers program. The first step was to paint the individual parts and then glue the kit together. The exterior advertising is included with the kit as paper pictures. An interior is not included.
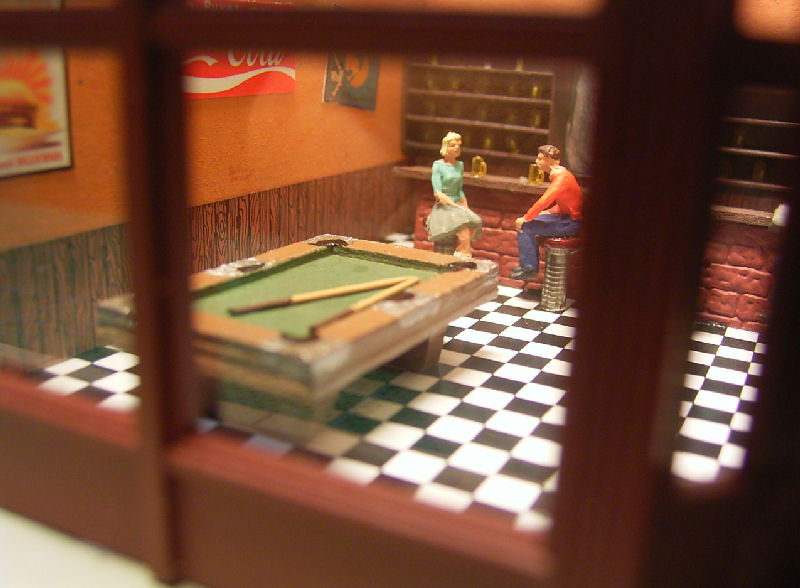
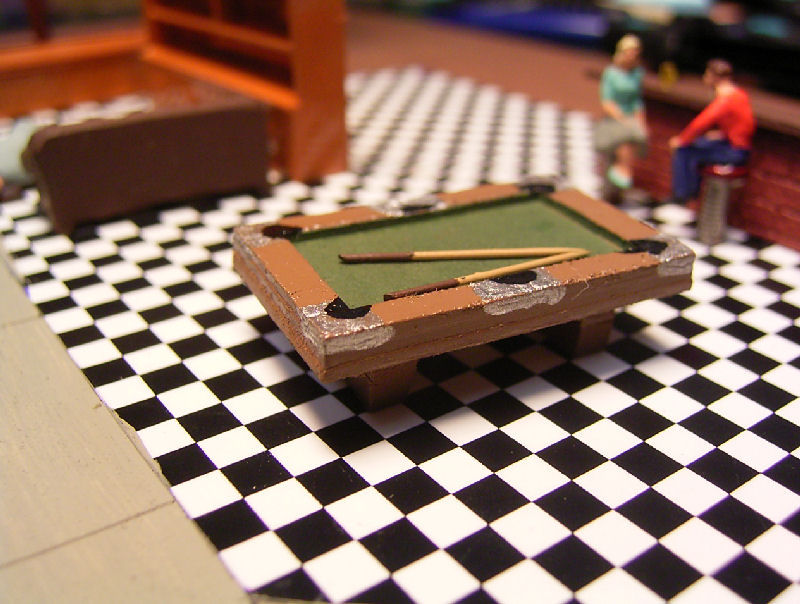
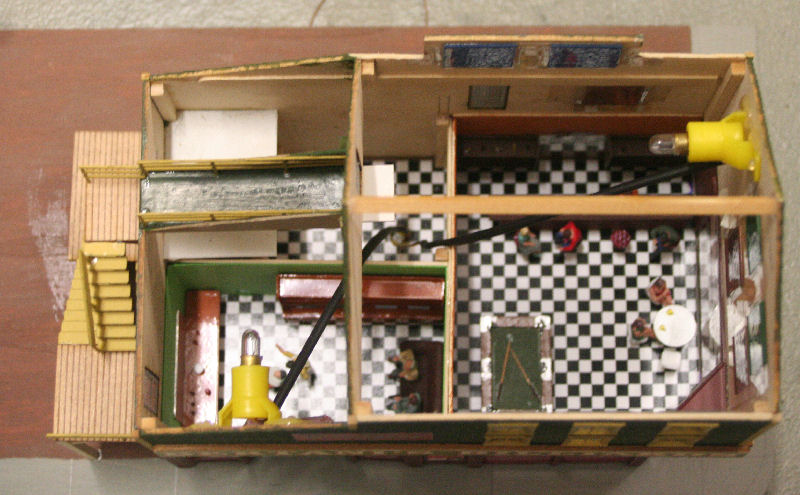
The interior was completely made by Andy himself incl. the partition walls. The tiled floor was created by Andy`s partner Katja on the PC. The wooden wall paneling is from the accessories of Busch. The interior signs are collected pieces from the leftover box. All other parts were made by Andy from plastic plates or wood. The bar stools are also his creation. The glasses, taps etc. are from a Busch kit (beer garden). The pool table and the cueues (did you know how to spell that??? Thank God for Wikipedia) were also made by him from wood, cardboard and pins from a shirt pack (forn shirt you get on ebay also almost ne locomotive - holds longer than a shirt!) and paint. No wonder the guy never gets finished. In the background you can see the hair artist's furnishings, also made by Andy. He can't open his store yet, because Andy doesn't know how to make the barber's chair! Wait and see and drink tea.
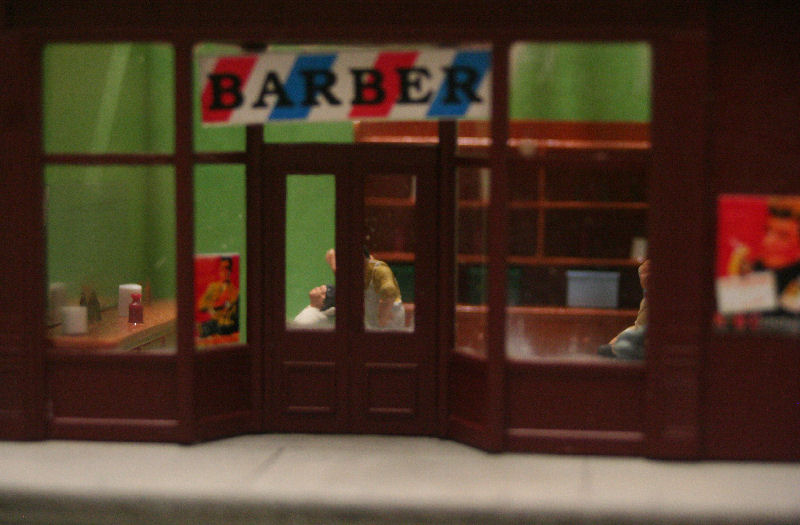
The barbershop has finally received its chair and owner.
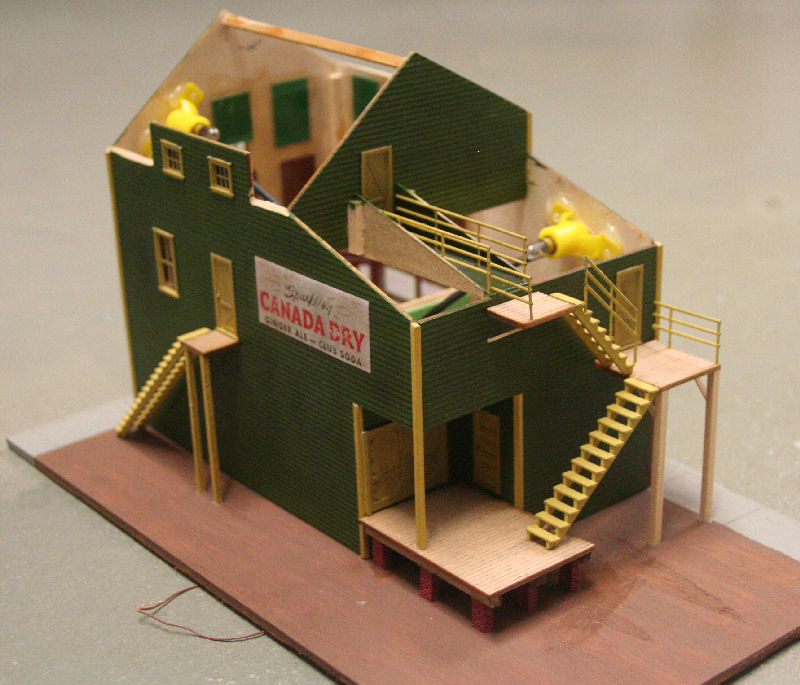
 The building was glued to its base plate. Now Andy could proceed to install the loading ramp and the missing stairways/fire escapes. There are still some railings missing at the moment, but they will be installed in the next few days. Since it is a kind of "yard goods", all pieces must be cut to length themselves.
The building also already received interior lighting, because otherwise, when the roof is on, you can no longer see anything of the beautiful interior.
Andy has done it. The building is finished. The stair railing is made of individual strips that are included in the kit. Fun to build!
 A gas station built and aged by Andy from a laser cut kit from Walthers. Here the interior and the gas pumps etc. are still missing.
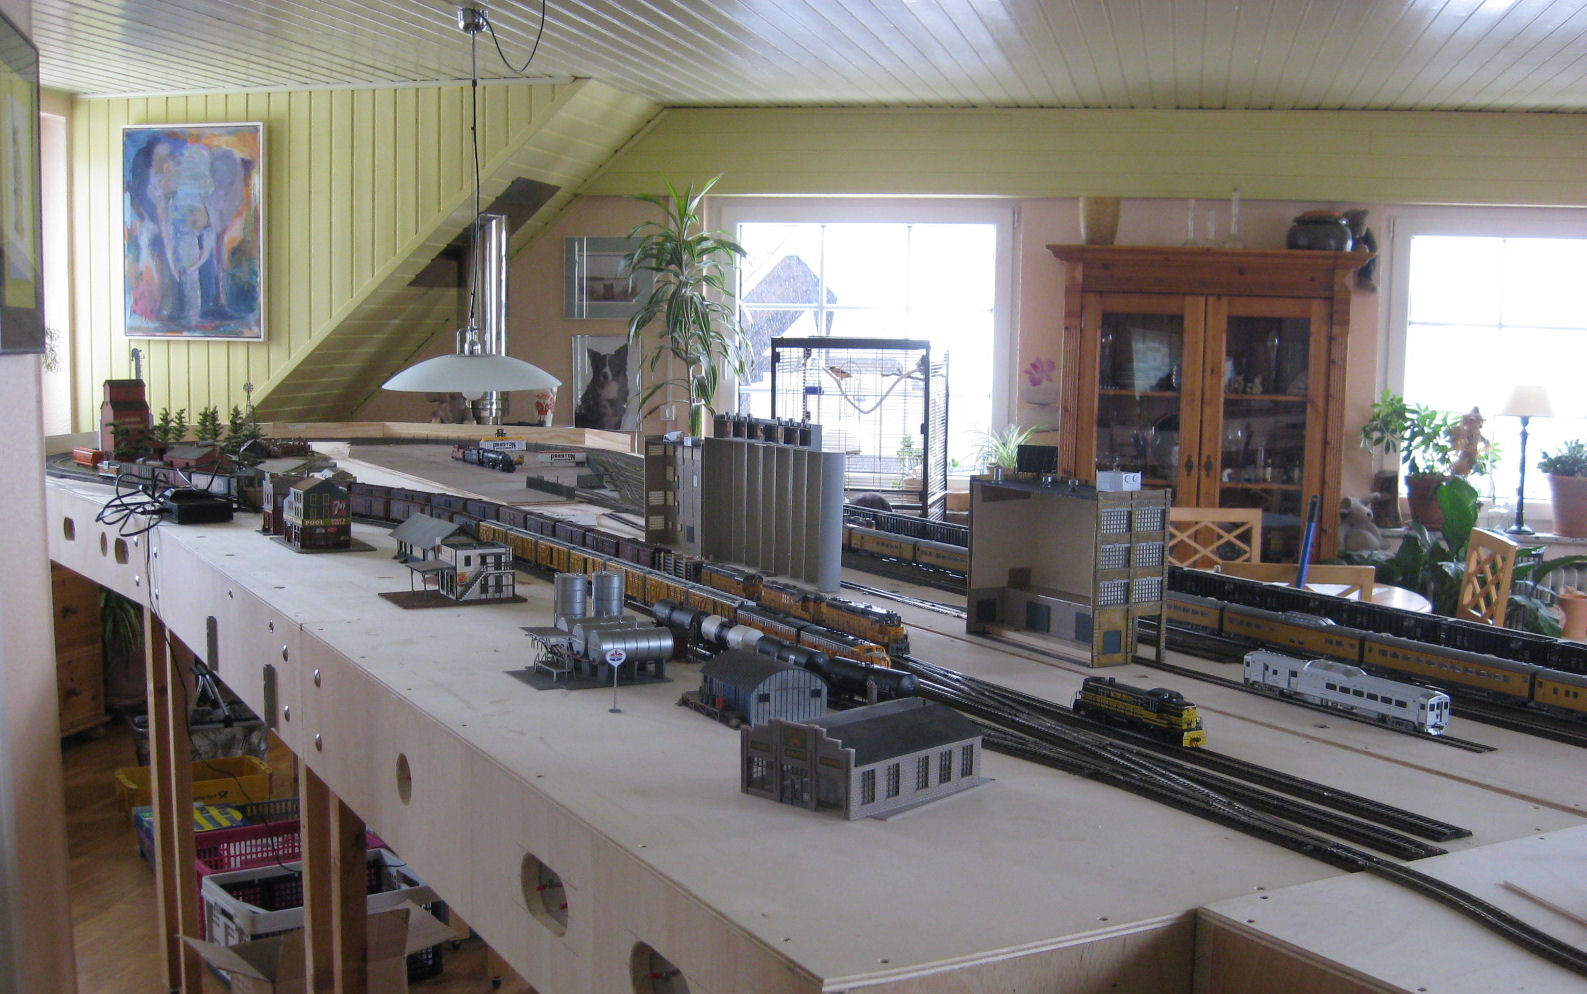
Next to it, an overview of all the buildings that have existed so far. The exact locations will still change. The not yet completely aged tank farm will be extended by a small coal storage. For this purpose, the loading track will also be extended a bit.
In the Lotzburgh station fit without crossing already quite long trains!
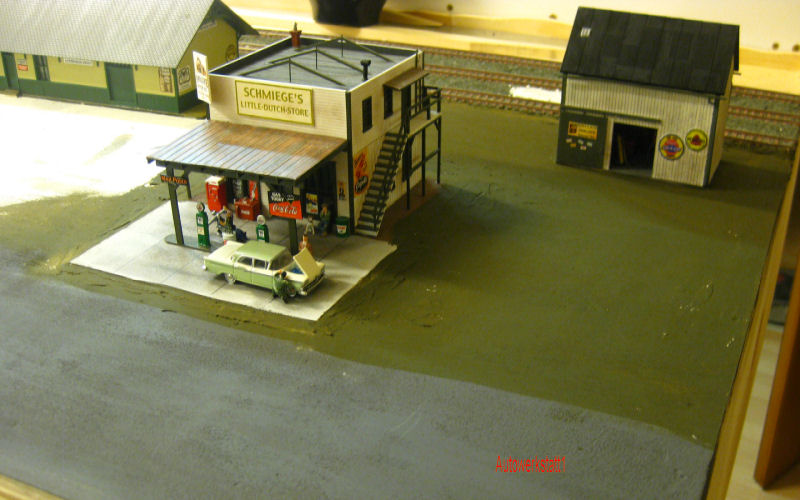
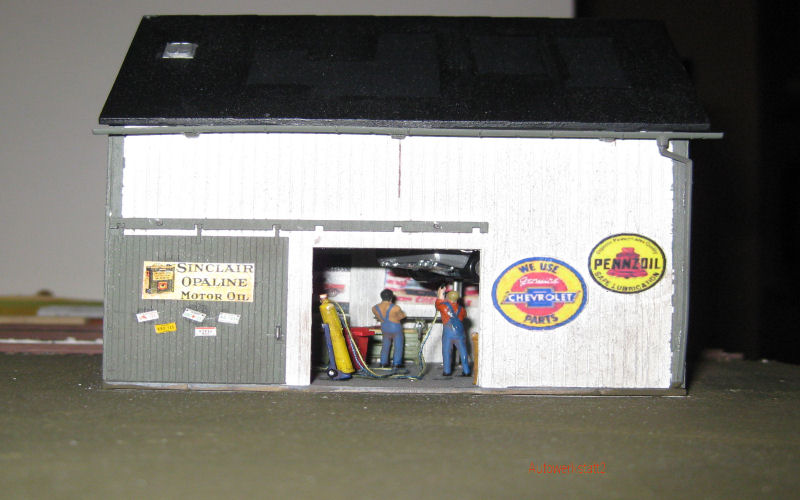 For the gas station area in Lotzburgh Andi made a small workshop out of the Busch lasercut kit barn. The wooden building was color-matched to the gas station building and equipped with an interior (lifting platform, welding machine, cabinets etc.). The lighting still has to be connected. The switch for this is still missing in the module cheek.
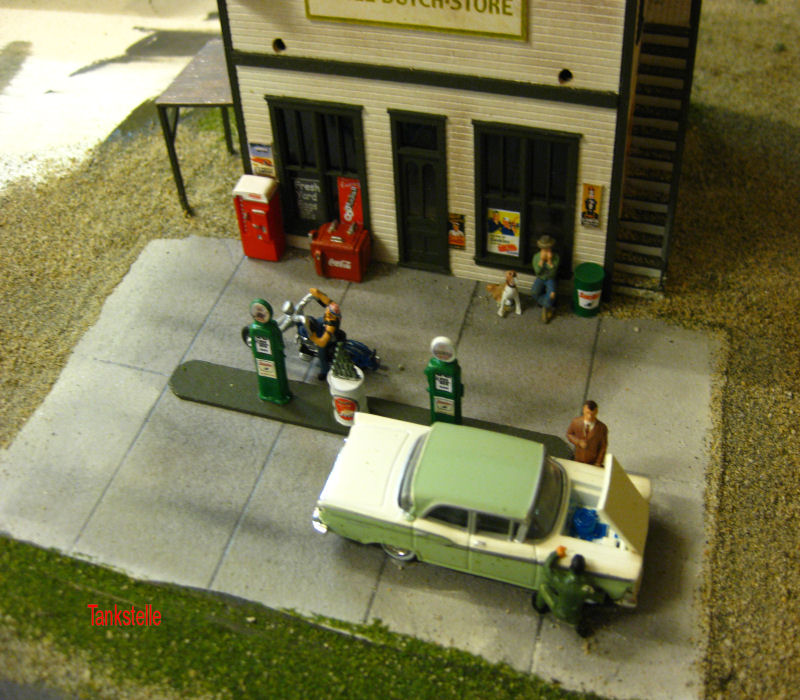
Gas station life! Beautifully put into the picture by Andi. Whether the St. Bernard likes the harmonica dueling of his bum? Or is he waiting for the treat? The troubleshooting on the Yank can take time.
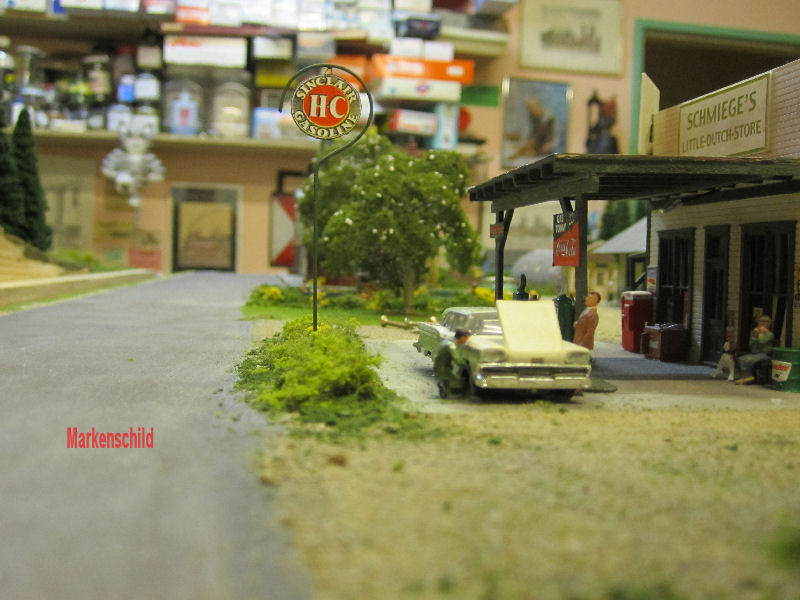
Andy's gas station brand sign, brass wire, carefully bent. Small metal hook bent from brass wire, sign hooked in! I needed at least 2 cold shells to calm down for this.
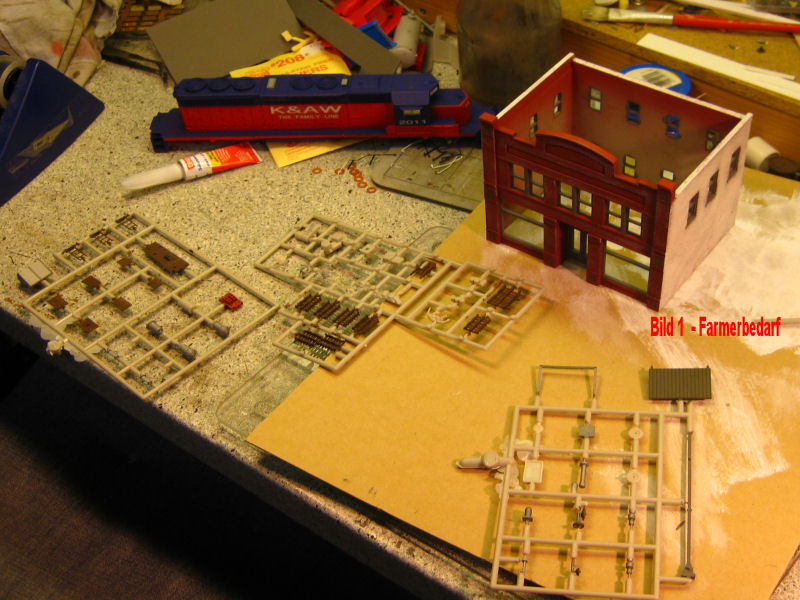
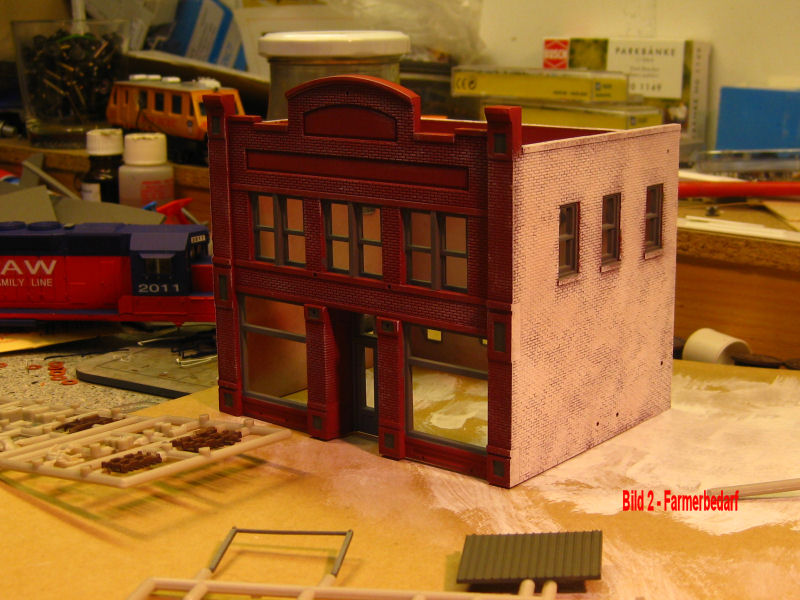
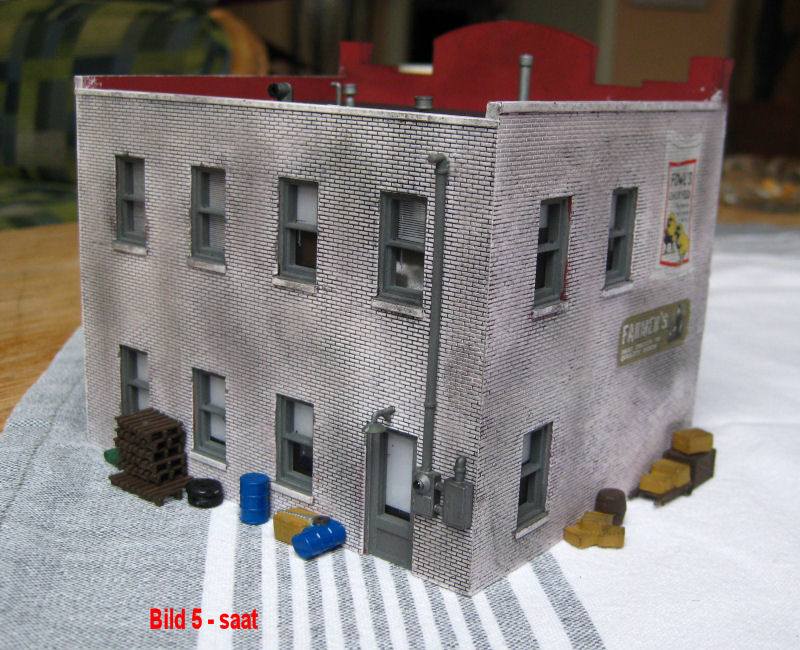
On the 4th Lotzburgh module, to the left of the gas station on module 3, a farmer's supply store will find its place. The building is a kit from Woodland. The whole building cube is a one-colored prefabricated part made of presumably resin. Windows and doors are already built in. The building was completely resprayed by Andy. The side walls and the back wall were painted with a heavily weathered white paint. A final aging still follows. In front of the building are the enclosed small parts, which also all need to be painted. The store on the ground floor still receives an interior.
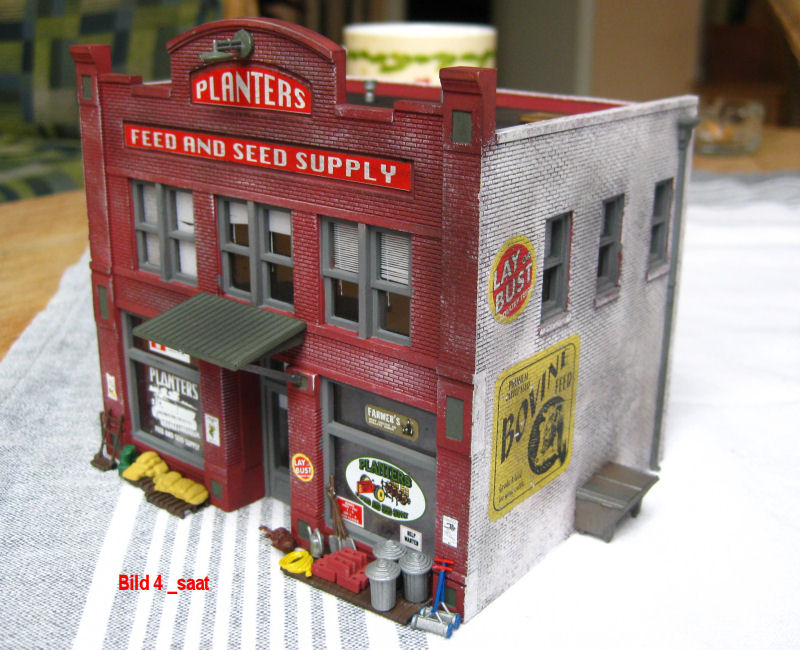
The building was completed by Andy. Now Bernd is working on the floor slab, the interior and the lighting of the store.