
")
")
Dakota City Yard
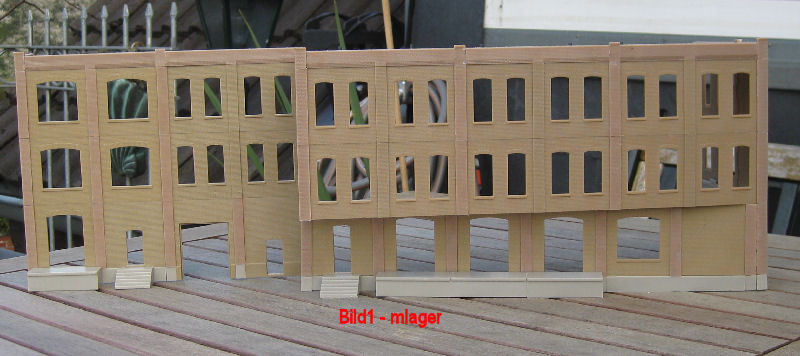
This storage and production building will be located adjacent to the mill building on the 1st part of the stabling yard. It is intended for the finished goods of the mill. Here the finished goods can be loaded directly into railroad vehicles. The building is made of parts of the Cornerstone series "Modulars". Here you can get (very cheaply!) walls of different sizes and designs including windows and doors, plinths, roofs, etc. Have a look at the Walthers catalog or online at the Walthers site (you will find it in the menu "links"). The materials can be processed excellently!
Fig. 1 - Shows an overall view.
Fig. 2 -
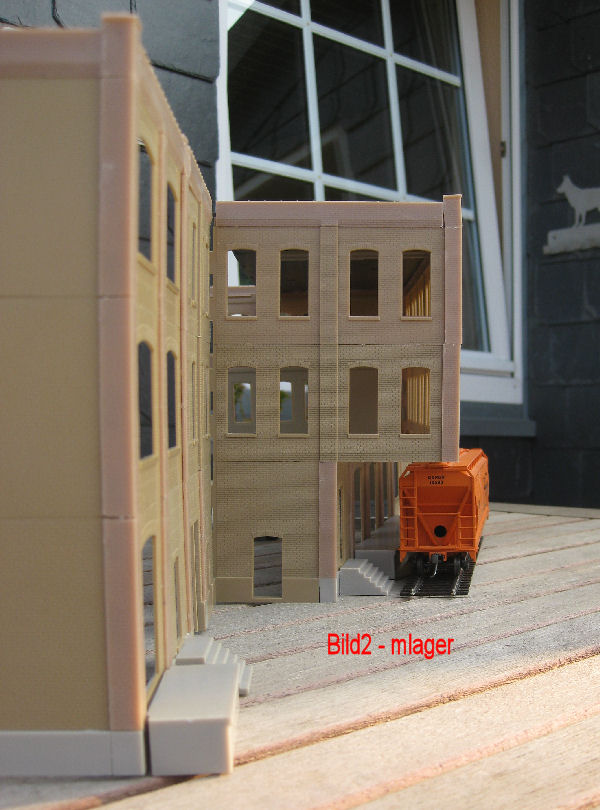
A shot from the side. The basement with the loading ramps for the rail cars is built in at an angle to make room for a road underpass from the container yard on the back side. I worked with these kits for the first time, too. Somehow, with a little "snipping", everything fits together. It's really fun! I glued with Faller-Expert. Andy usually takes superglue...With me, everything always sticks with the stuff...e.g. the fingers! Newfangled stuff!
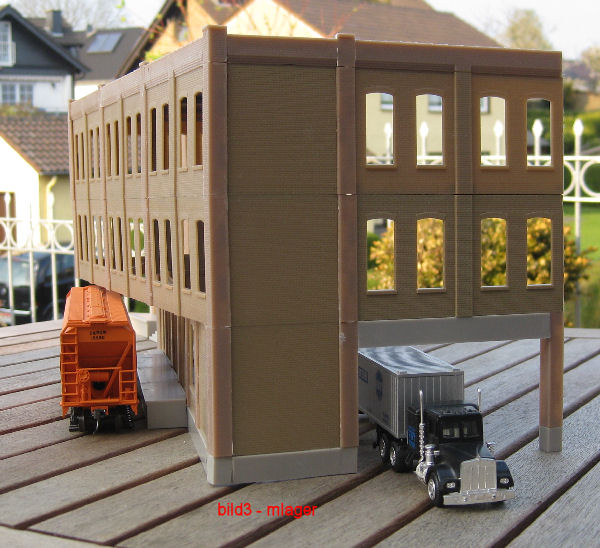
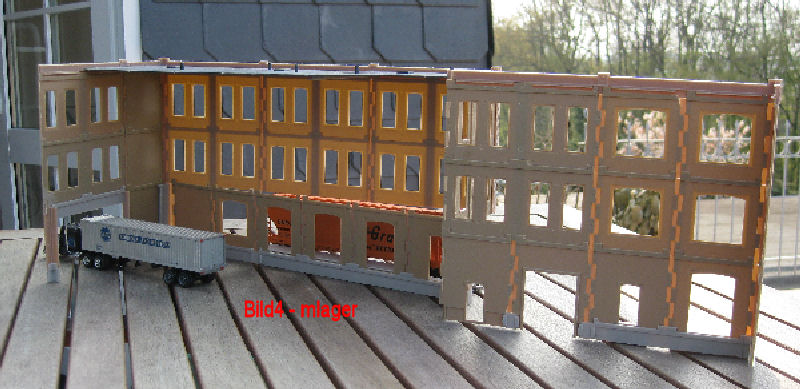 Fig. 3 - Shows the side of the building facing the container yard. Here is also the truck access to the container yard led under the building.
Fig. 4 - Shows the back of the building. Part of the roof is already glued in place for stability.
We will report on the further expansion of the building.

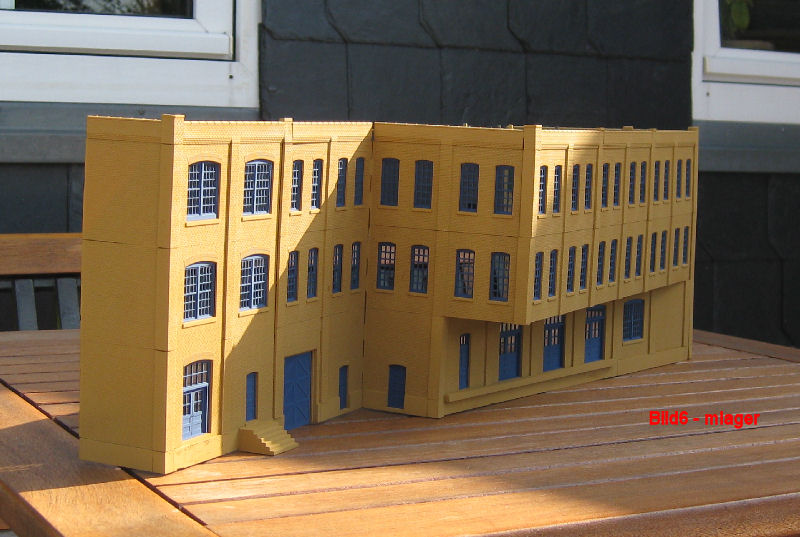
Fig. 5 und 6 - The "shell" is back from Andy`s paint shop. The colors of the outer walls and windows have been matched to the colors of the mill building. Bernd has already glued in the windows. Now the completion of the building follows. Then Andy may still do the aging.
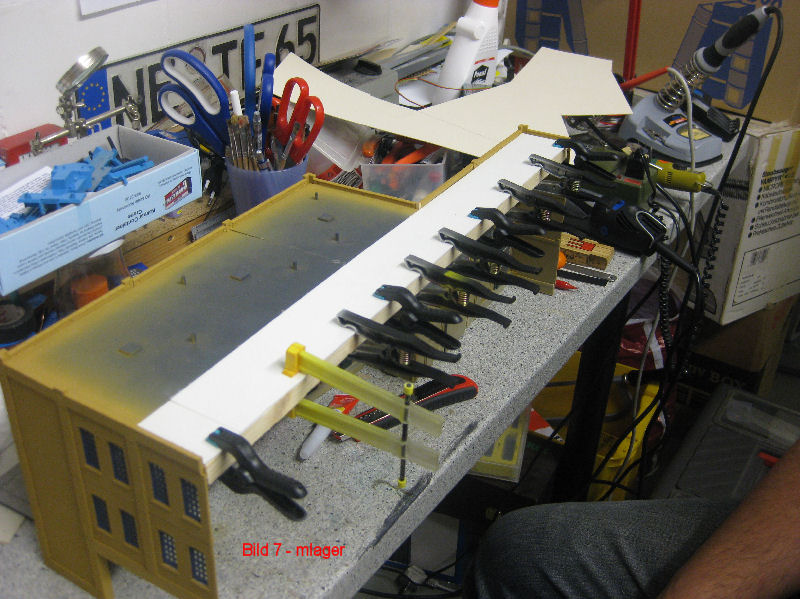
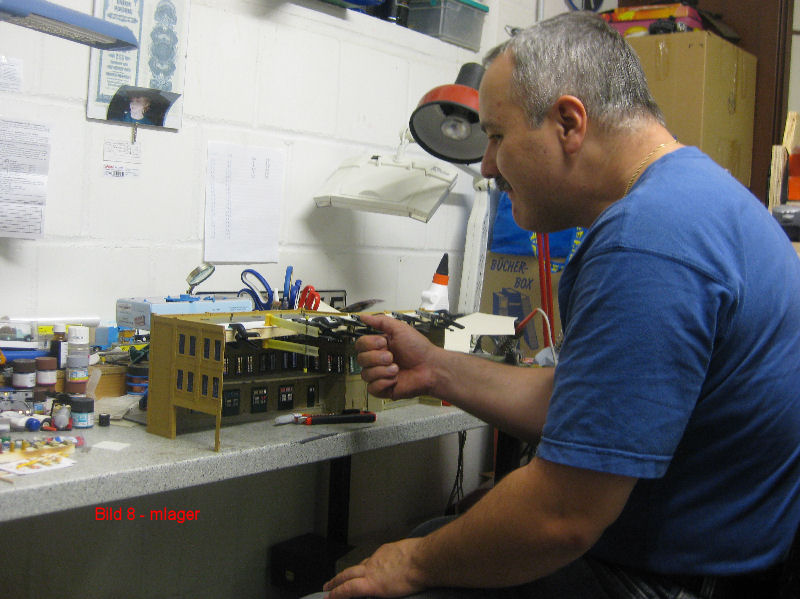 Fig. 7 und 8 - During a visit to Andy, we attached the missing roof piece to the warehouse. Better, Andy has! Bernd helped with the clamps and applying too much superglue! We found on Andy`s work table still a corner on which we could work. It only worked with Andy, because no one has as many clamps as he does! The roof part consists of a 1mm thick plastic strip. For stabilization a wooden strip was glued underneath. The roof will be painted after copleting with the necessary superstructures (fan, cooling unit, water tank, elevator box etc.) and then covered with a layer of sand from Bernd`s stock. In addition, aging marks are applied and the windows are glued behind, so that a view through is no longer possible.
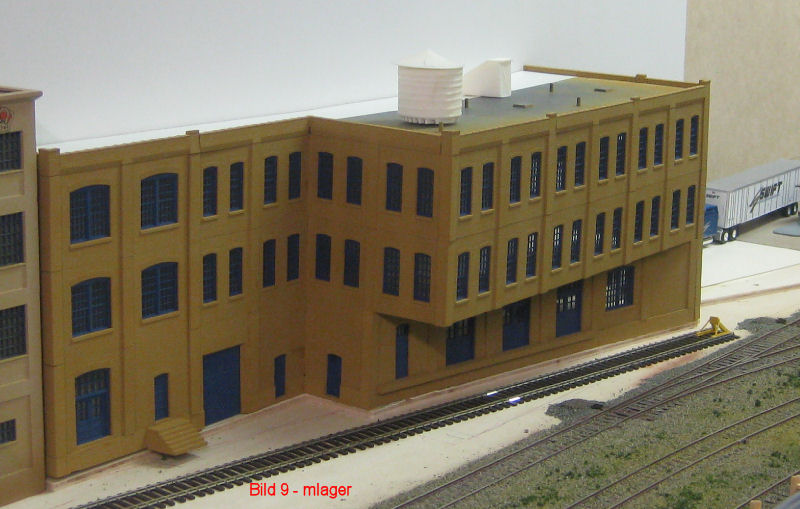
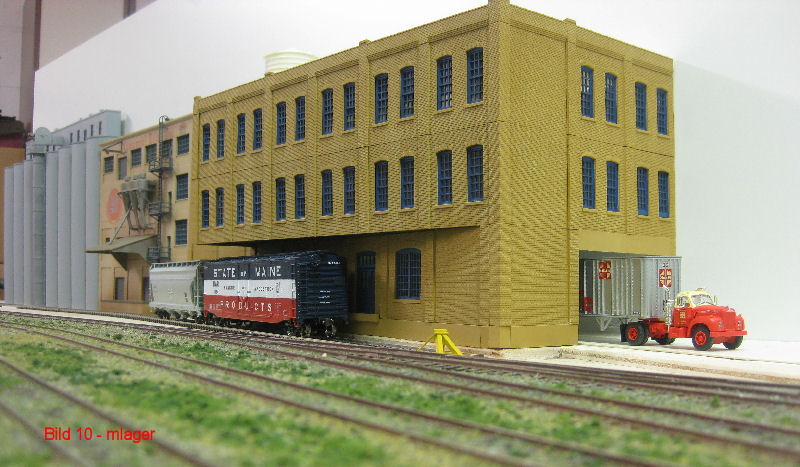
Fig. 9 und 10 - The storage and manufacturing building for bread and cookies in its place adjacent to the high tanks and the mill building. The passage is still being covered. After that, the area will be landscaped. The staircase will then also get ground under its feet!

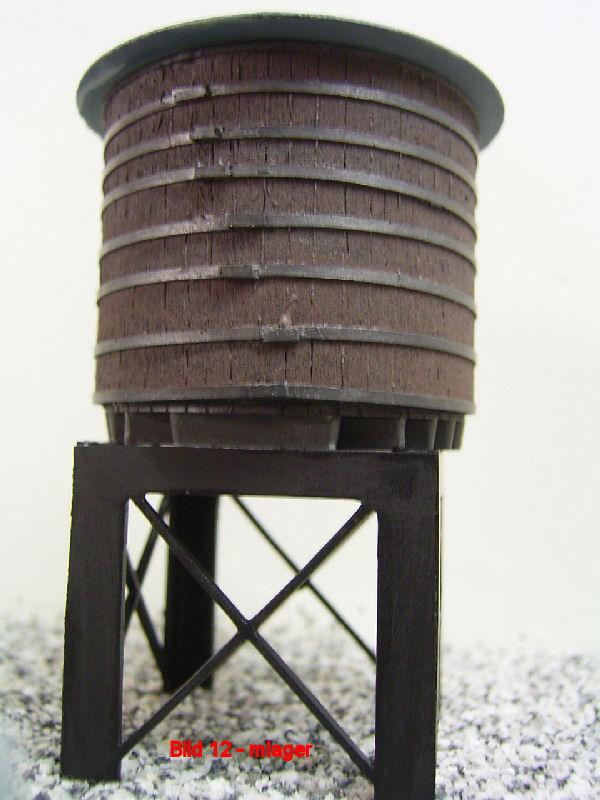
Fig. 11 - First rehearsal for Andy's roof design. An elevator shaft and various ladders are still missing.
Fig. 12 - The water tank already painted and weathered by Andy. The final assembly and the access ladders are still missing here as well.
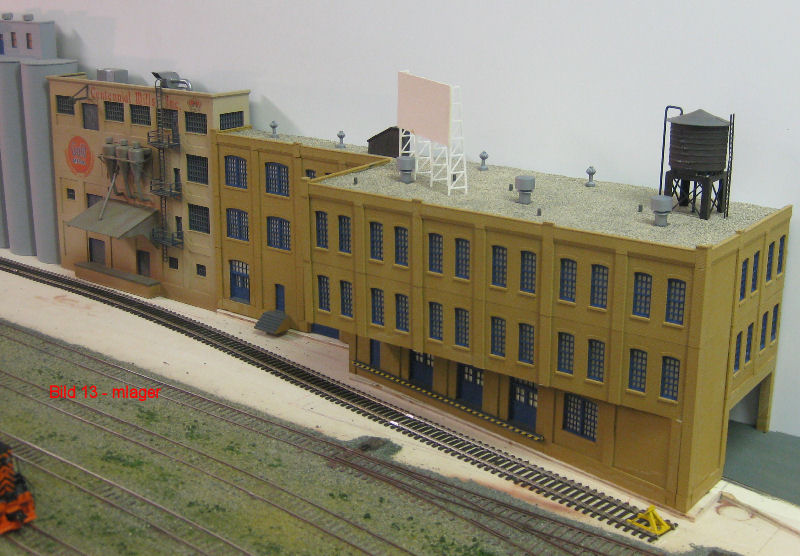
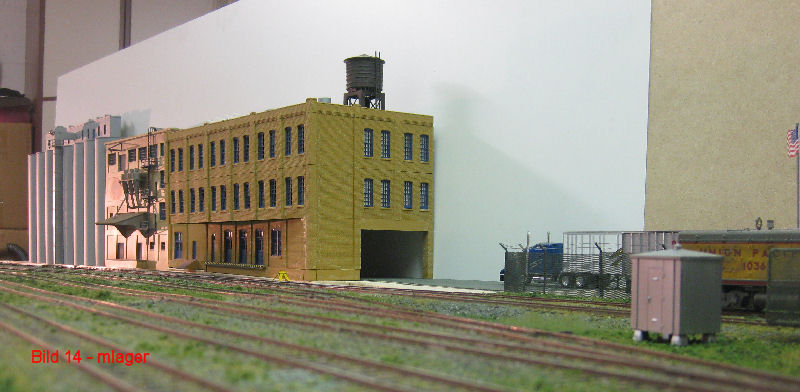 Fig. 13 - The roof is finished. Andy will still make a large billboard with a bakery poster and put it on. In addition, aging marks will still be sprayed on.
Fig. 14 - The group of buildings in the evening light. The silo building is also still receiving lettering and signs of aging. The landscaping around this group of buildings can now begin.
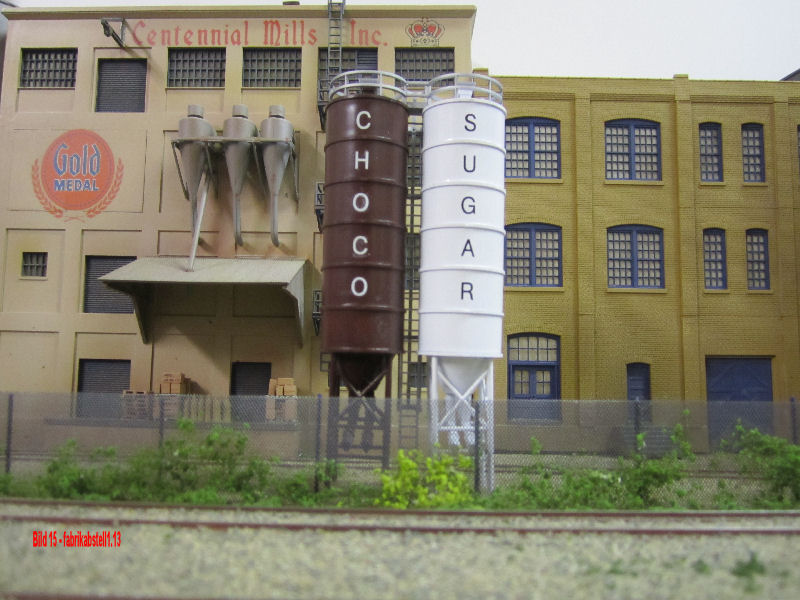
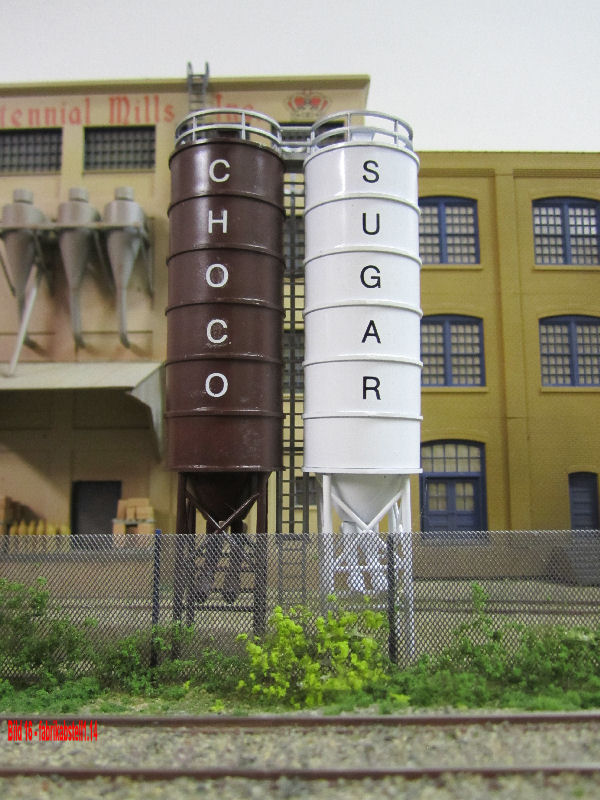
The bakery/bread factory also needs chocolate and sugar, of course. These raw materials come in tank cars. Andy built these two silos from an inexpensive Walthers kit and painted them according to the basic colors of the raw materials. The silos are now connected to the factory building via "pipelines".
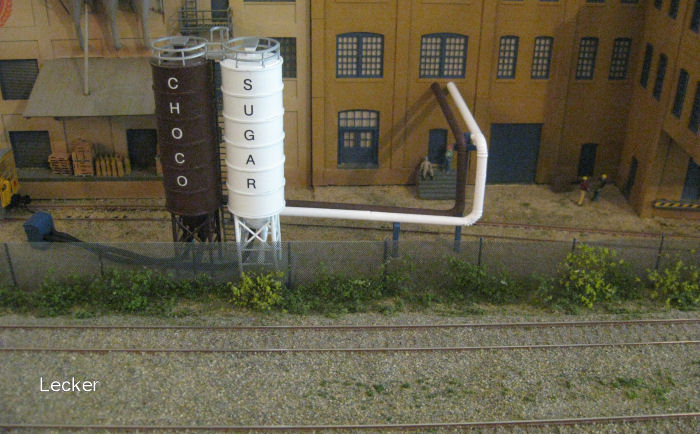
Pipes, drains, junction box for the tankers, etc. are ready. Yummy!
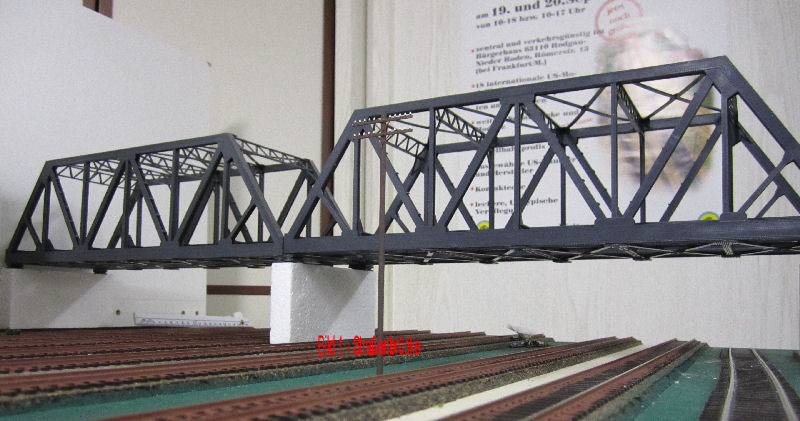
Now that module three of the stabling yard is (almost) complete, we are starting on module four, where only the tracks and electrical work have been completed so far. This module will also house a warehouse/factory complex. 2 buildings have already been presented above. A third building is in the planning stages. At the beginning of the module, immediately behind the grain silo on Module 3, a road bridge will span the tracks. It is being built from 2 steel girder arch bridges from the Walthers program. These bridges are actually intended as railroad bridges. We will provide them with a roadway for road traffic. We are not quite sure about the color of the bridges yet. A dark shade of red would be nice.
Fig. 1 - shows the two bridges in their shells.
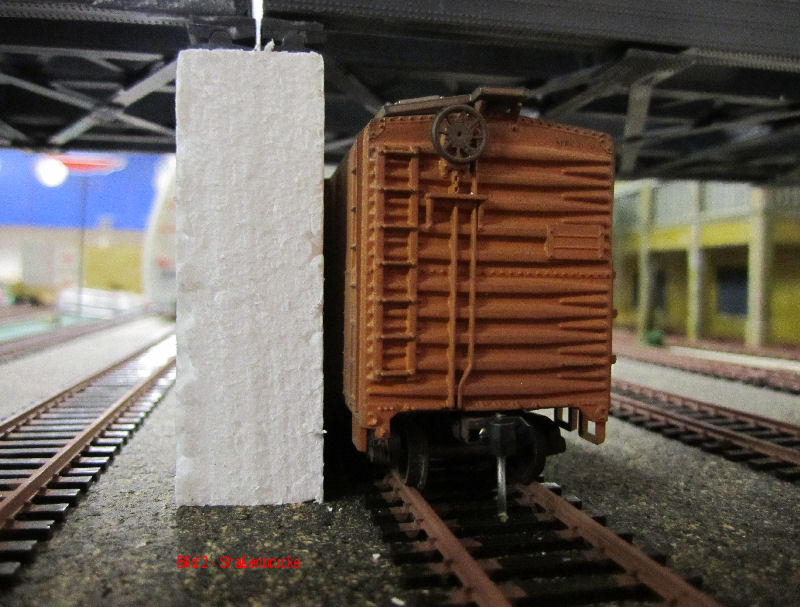
Fig. 2 - The center pier causes problems (here still made of styrofoam)! A pier support of 2 cm is needed for the abutments of the two bridges. So it stands too close to the track on the inside. Either we slope the top of the pier (then a concrete pier) or we make it out of metal profiles. We are still thinking.
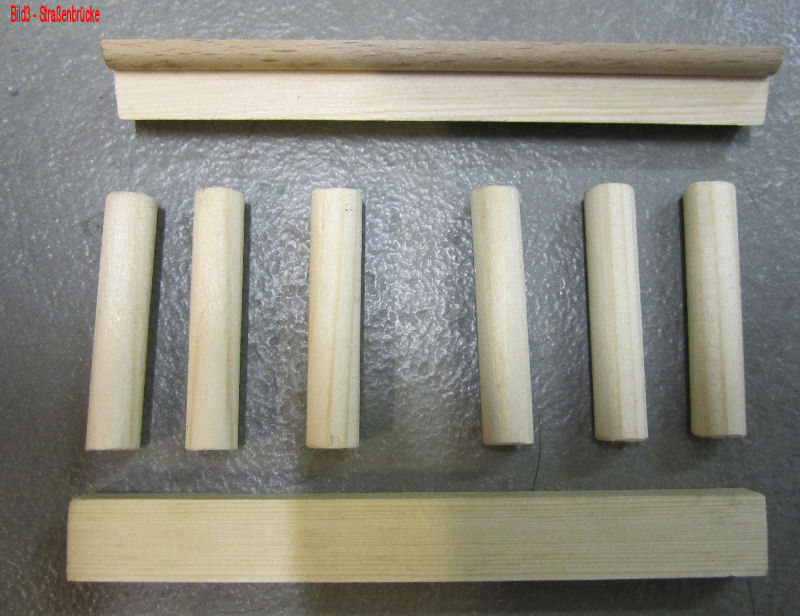
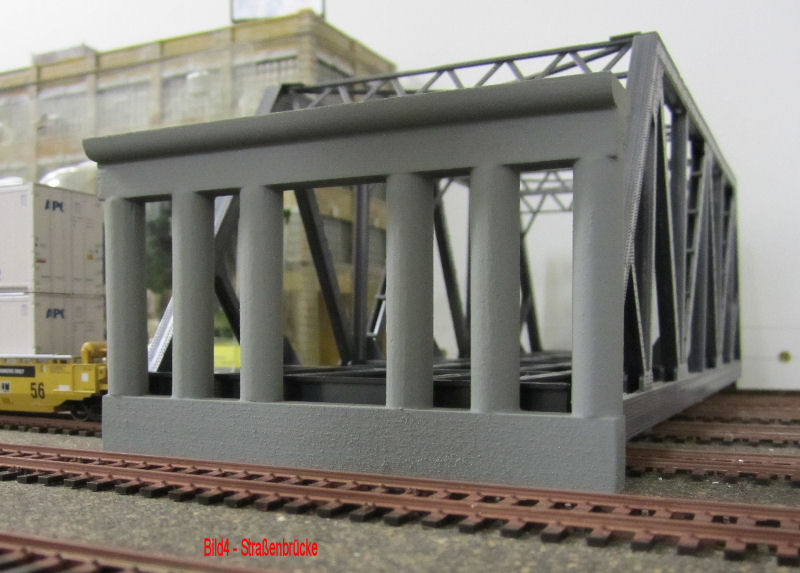
Fig. 3 - Andy has carved! The bridge pier structure will be a concrete structure. Andy has cut wooden strips and logs accordingly. The abutment support is a finished wood profile from the hardware store. Looks good!
Fig. 4 - shows the construction glued together and primed. Concrete color and aging follows. The bridge is also primed.
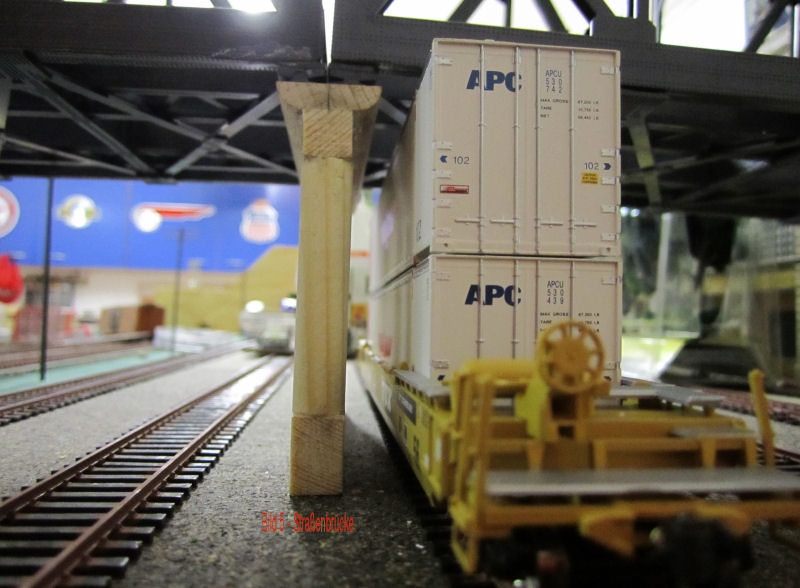
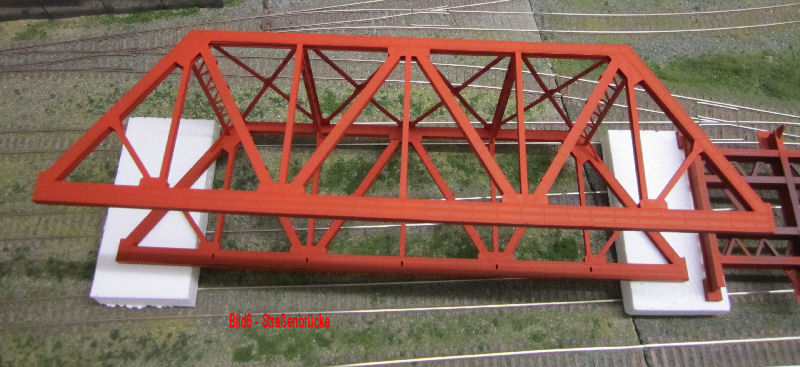 Fig. 5 - The pier construction is provisionally set up here. The height and distance to the rail are now correct. It is clearly visible in this picture that the proportions of the pier are correct.
Fig. 6 - The first bridge has your color! Before the red was applied, the plastic kit was primed. Both colors were applied by airbrush. But now Andy has to buy paint again. One pot is nothing!
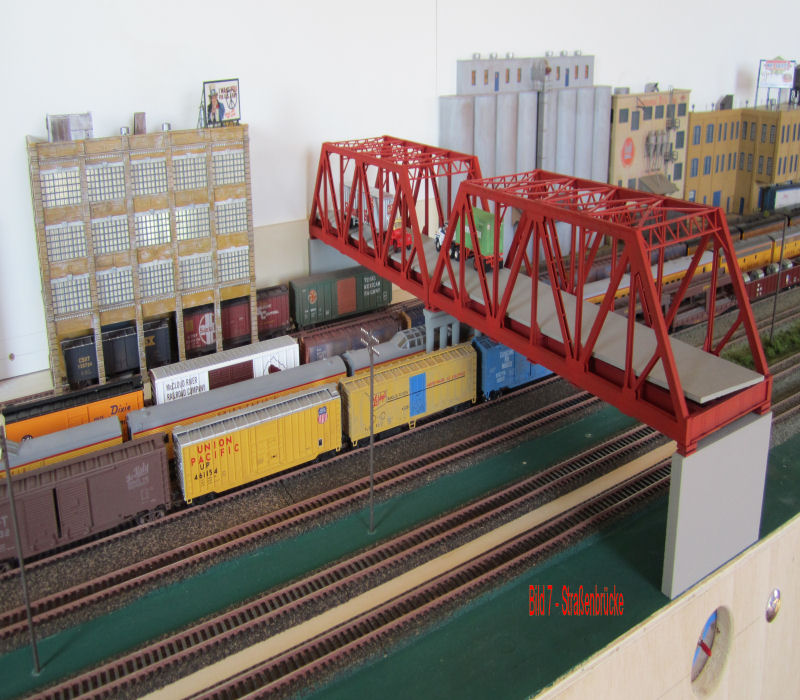
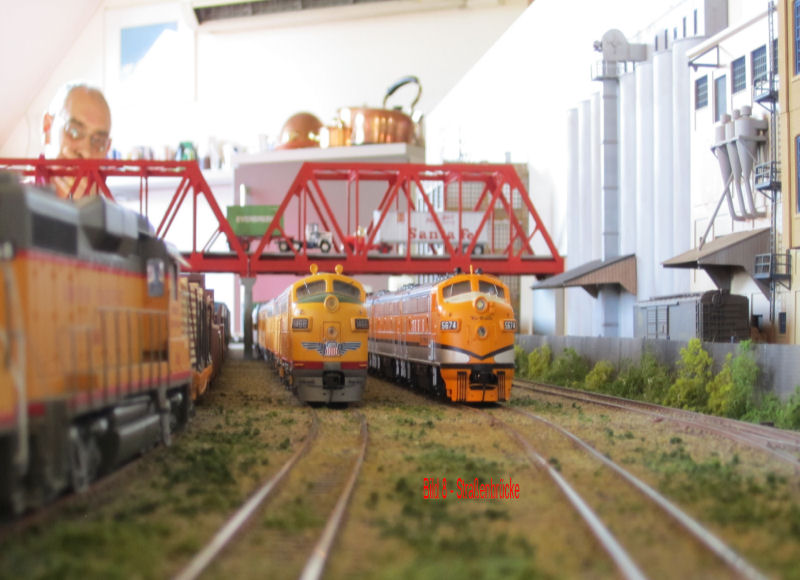
Fig. 7 - The bridge is completely painted red and is provisionally on its piers during our driving weekend (Carnival 2011). The provisional roadway has also been laid. But here Andi still has a lot of work.
Fig. 8 - Another view.
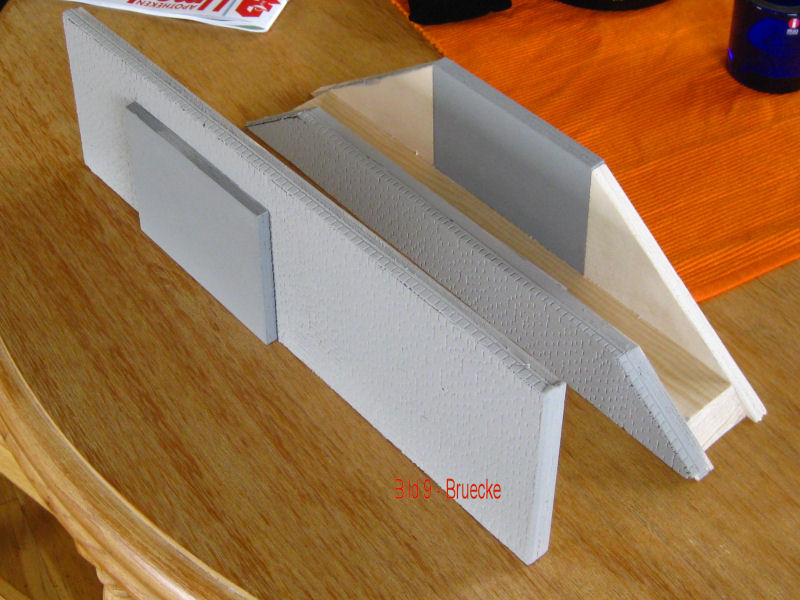
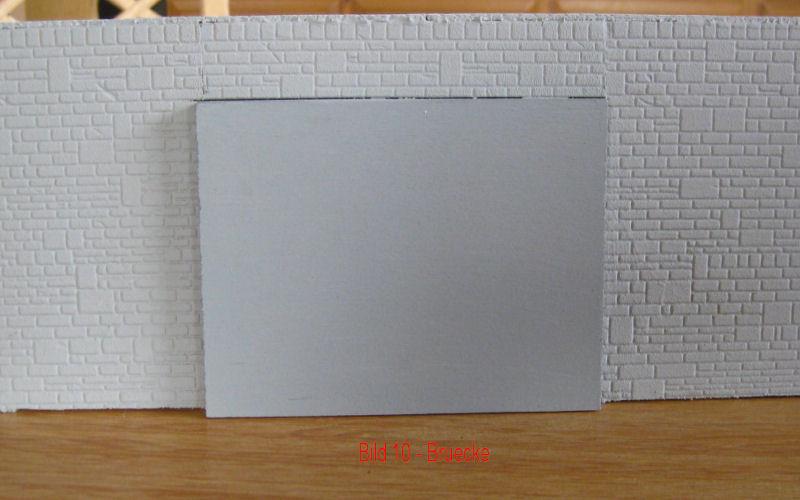 Fig. 9 - The bridgeheads are created. At the back of the module in front of the backdrop, a wall between the buildings will accommodate the bridgehead. At the front of the module, the bridgehead will be incorporated into the end of an embankment. Andy sawed the heads out of plywood and glued them together. Bernd is doing the shaping. Heki-dur plates (here 70012 natural stone) were glued onto the wooden plates with white glue. The plates and also the strips for the wall crowns (70072 vault panels) are cut with a sharp knife. For 45 degree cuts (wall corners etc.) Heki has a special cutting tool in its program. After gluing, the panels were painted with Hekidur primer Granite 7102.
Fig. 10 - A close up view

 Fig. 11 - After the base color has dried, apply Hekidur Lazurfarbe (7103) to cover. For long walls, apply in sections, as the color is immediately removed again (e.g. with a pot sponge) wet. the color should only be retained in the joints and recesses of the stone structure. The degree of soiling can still be determined by lightly rubbing with a cloth rag. After drying off the glaze paint, the mossing of corners and edges of the wall can be indicated with a green tone (acrylic painter's paint). After that, "lights" are set with a white acrylic paint. To do this, take up some paint with a painter's brush and immediately paint out almost completely until the brush is almost dry again. Then stroke from top to bottom with this almost dry brush over the stone edges. Only a hint of paint remains on the stones.
Fig. 12 - Again, a close-up view. The concrete wall for the abutment was also treated with the colors.
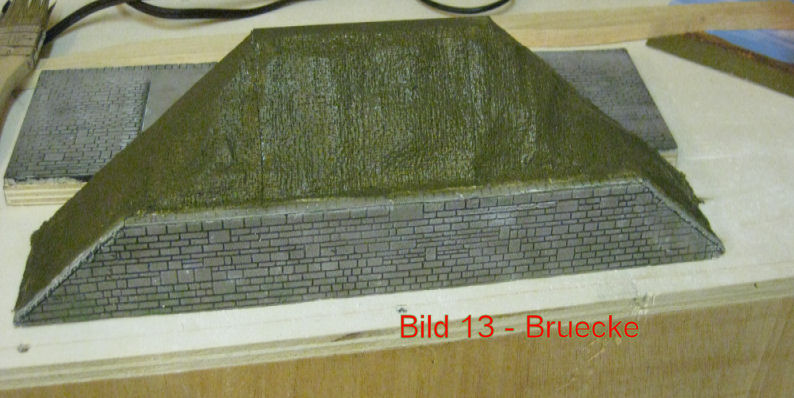
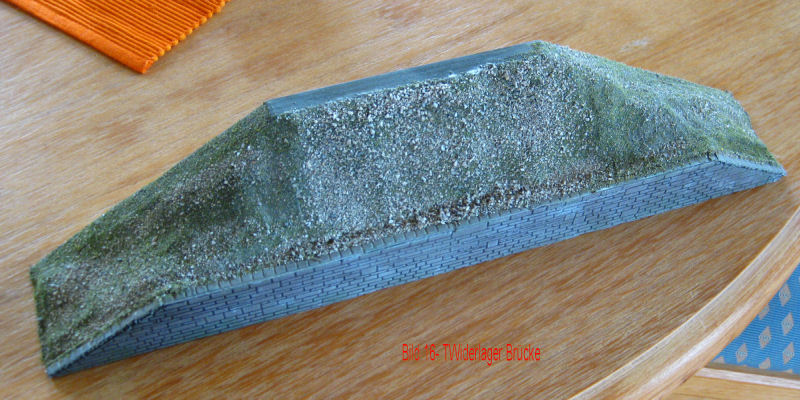 Fig. 13 - A polystyrene core was worked into the bridgehead intended for the dam side and shaped with a hot cutter. Then covered with a plaster bandage and painted green. Next comes the "greening"
Fig. 14 - The 1st greening. The slope immediately below the bridge has more Asoa gravel. The final revegetation will be done when the terrain strip is completed.

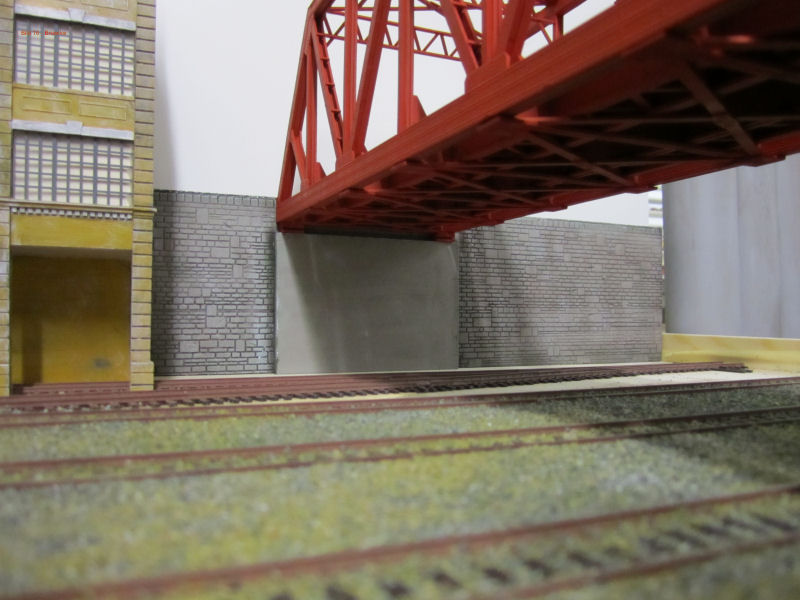
Fig. 15 - The bridgehead on the dam side has been installed. The bridge is still provisionally supported.
Fig. 16 - The wall with the bridgehead is also installed on the backdrop side.
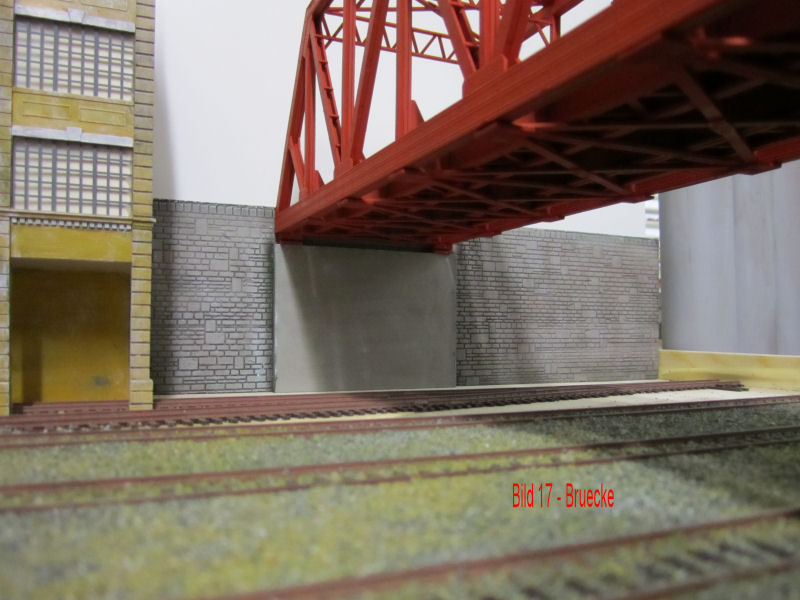
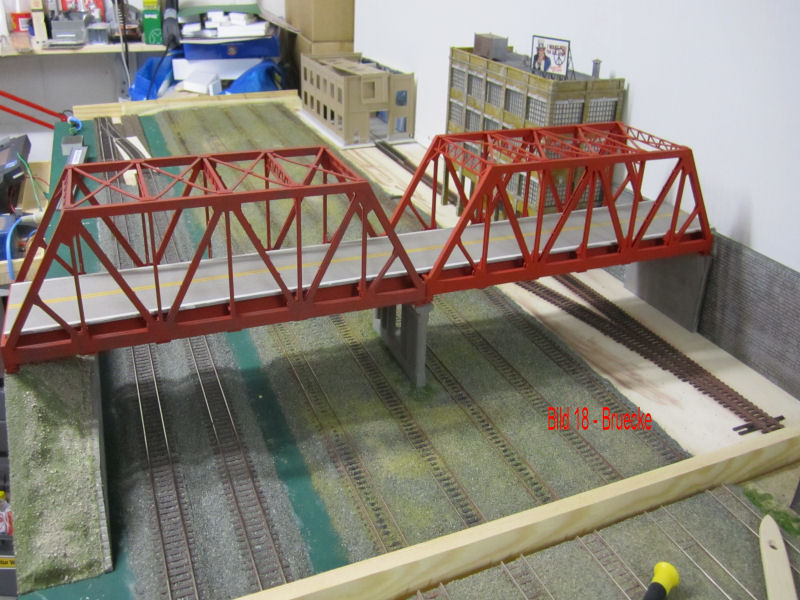 Fig. 17 - Immediately adjacent to the wall is a larger storage building. The construction of the building and aging was described under the button "Building". Although it is cramped at this point, the whole thing looks spacious.
Fig. 18 - A general view of the module. The tracks are ready ballasted, except for the loading track. Behind the aforementioned warehouse will be the loading/warehouse of a machine shop. The gap between these two buildings will be closed by a one-story extension to the loading hall. The loading bay is still in the shell stage. The addition is on top of the building. The construction of this building is also described under the "Buildings" button.
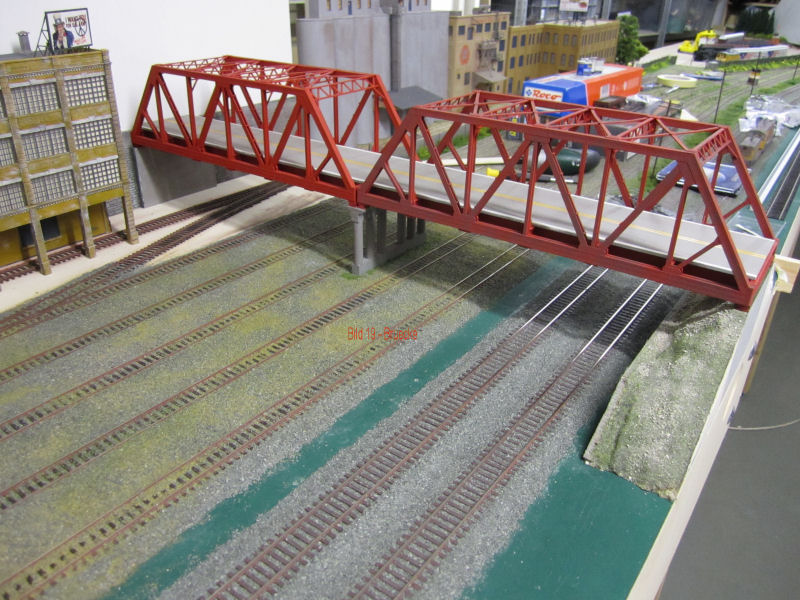
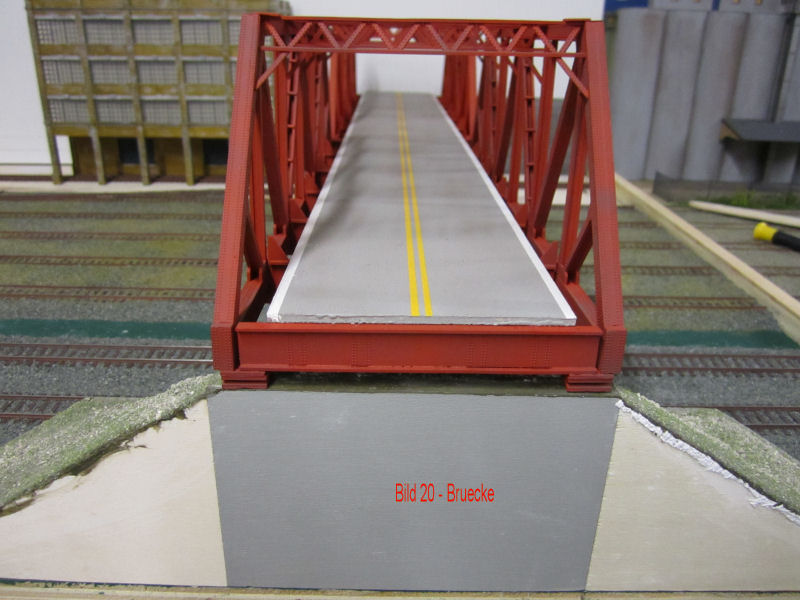
Fig. 19 - A look in the opposite direction. The "Waste" that lies on the plant is not installed...but with artists it always looks like this!
Fig. 20 - The roadway of the bridge. Here still follow the obligatory guard rails, signs and signposts. Andy will also still provide for the aging, incl. tire tracks. But there is no tool on it for that!
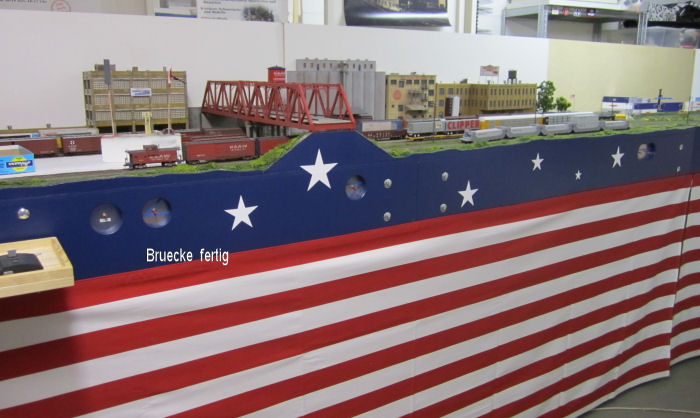
Fig. 20a - The completed road bridge in Dakota.
 On the "bridge module", another factory building with an entrance for rail cars will follow behind an already finished warehouse building (the one with the advertising board on the roof). This building was also created from Walthers modular parts, but considerable changes had to be made to them. In this series there is no gate suitable for rail vehicles. So "carving" is the order of the day. Due to the necessary passage width, nothing fits into the given grid.
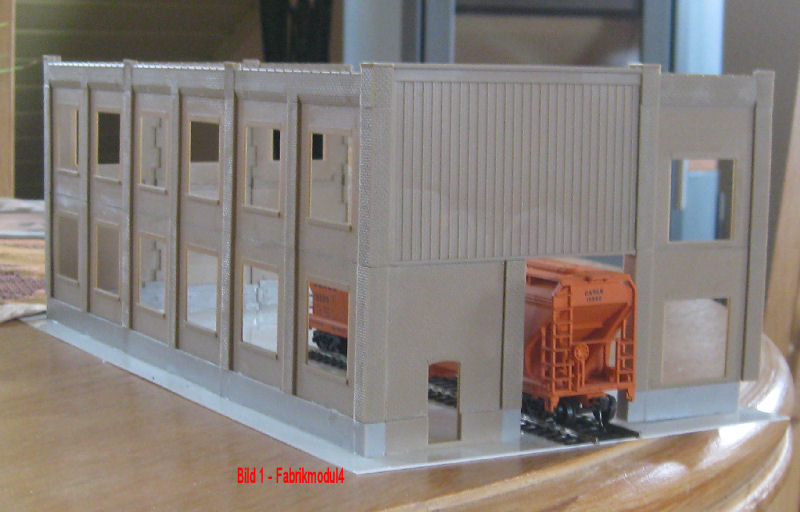
Fig. 1 - shows the building shell from the drive-through side. Here, a one-story annex will be added to the right of the drive-through. But it still has to be "carved" to fit. A 1mm thick plastic plate was glued under the building. This was necessary because the building warped after assembly.
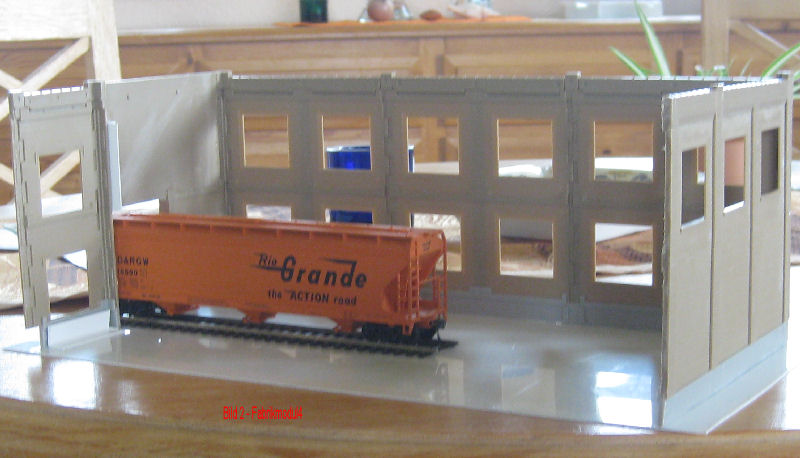
Fig. 2 - shows the carcass from behind. A track is now laid along the entire length, sunk into the floor that is still to be finished. Then the whole thing goes to Andi for spraying and aging.

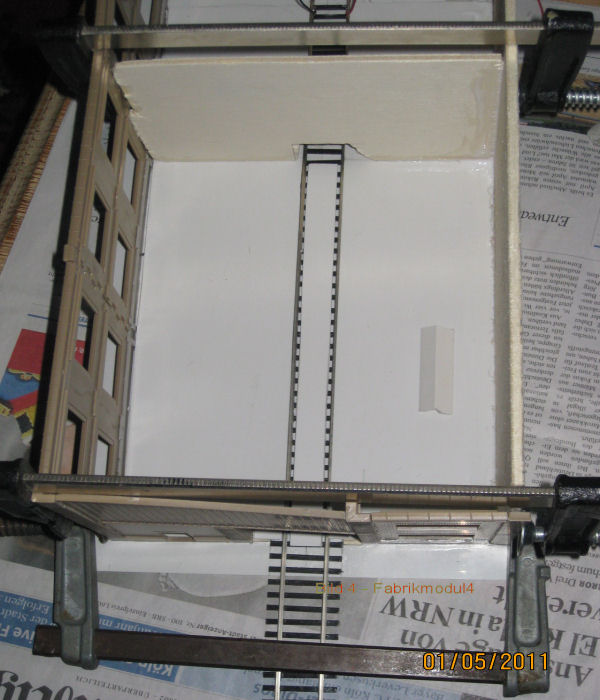 Fig. 3 - The building gets a back wall and a partition for stabilization out of a 6mm plywood plate (sawed by Bernd with a jigsaw - do you know how dangerous that is?). The remaining track length is long enough for a normal US freight car - not for Andi`s debris, of course. Bernd is thinking of adding a false ceiling. But an overhead crane would also look good here. We are still thinking about it!
Fig. 4 - The interior view. The floor has been drawn up to just below the top edge of the rails. (3x1mm Finnboard/1x1mm plastic sheet). The space between the track is also covered (1mm Finnpappe and 1mm plastic strip). The hole at the end of the partition wall was a specification of Andi! He is afraid for the Kadee couplings! With the driving experience that modern digital Mikey Mouse centers provide, also necessarily announced! With the ollen Märklintrafo would not happen, there was the feeling for the machine!
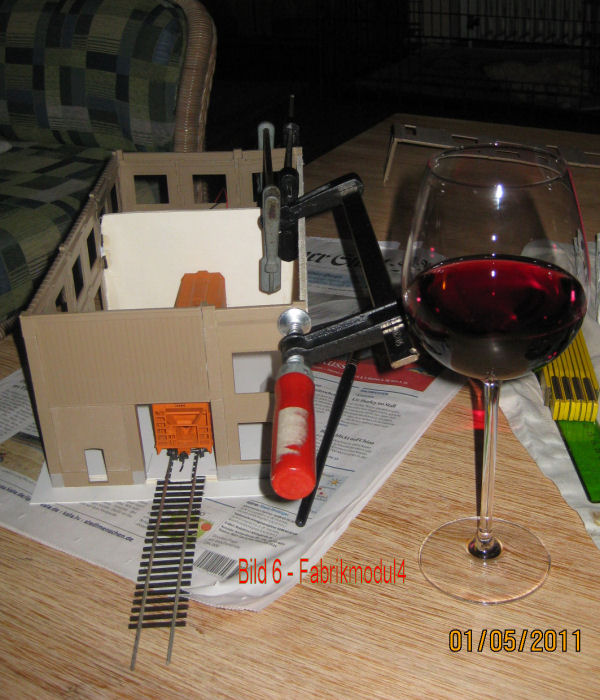
Fig 5 - The enthusiastic spectators at Bernd`s Superbasteleien on the living room table! My Manuela was on the way! Cheyenne and Indi on your favorite place. In the background "The Boss" sings a serenade on TV 3Sat.
Fig. 6 - Who has no long ferrules must be skillful! Two connected ferrules also help to glue...and of course a beautiful Brunello!
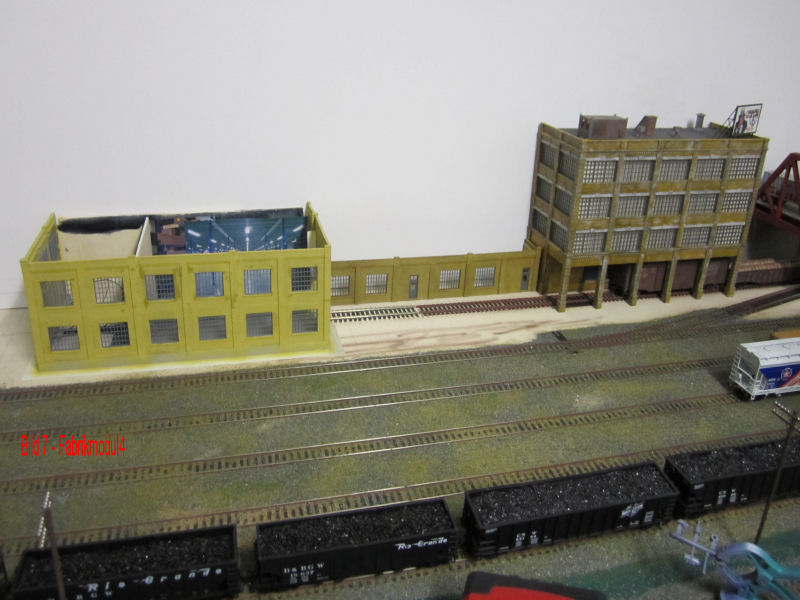
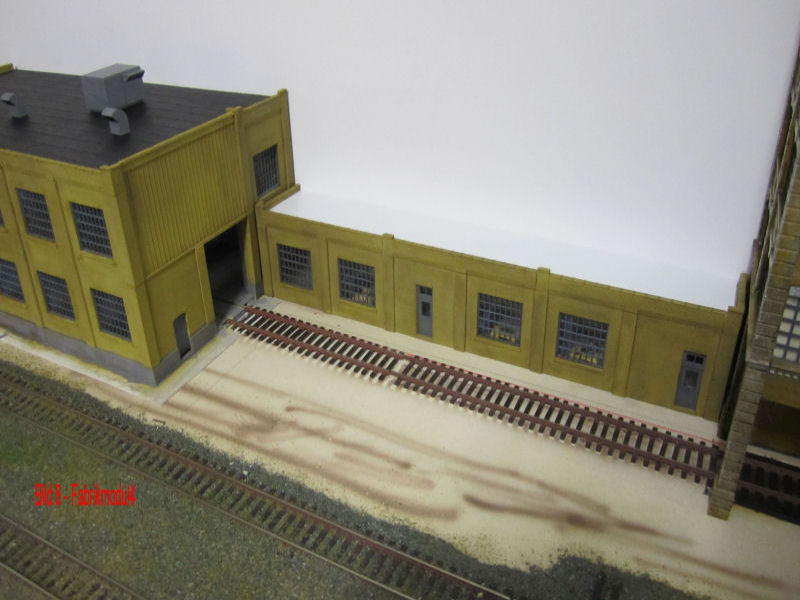
Fig. 7 - The shell of the later cable and electric motor factory made by Bernd was "almost" finished by Andy. The roofs were made of wood and upgraded. The building was painted and aged. Offices were set up in the office annex.
Fig. 8 - A view of the entrance. The building has already been connected to the rail network.
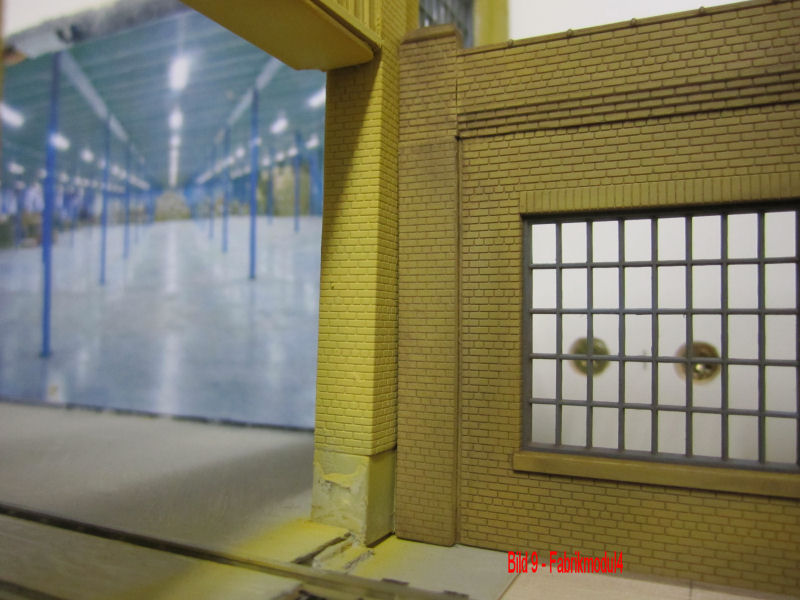
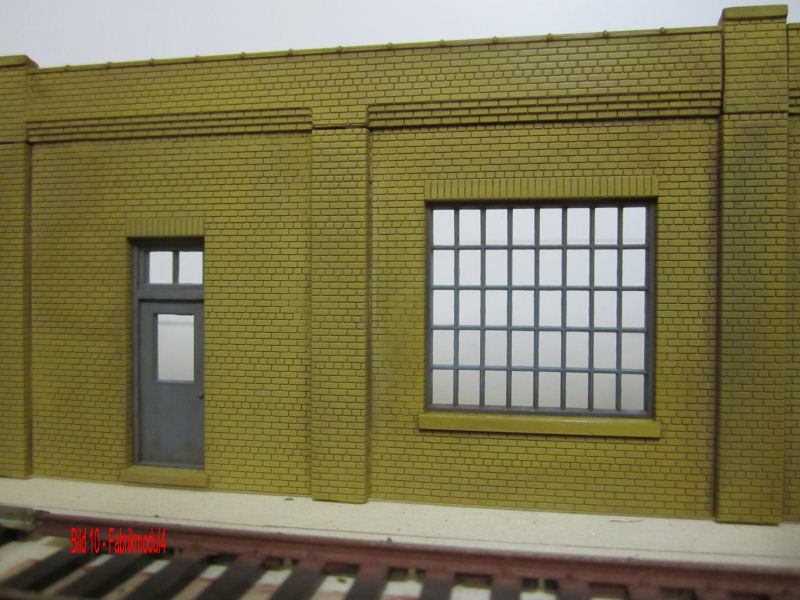
Fig. 9 - A view through the driveway to the back wall of the hall. Here a photo from the interior of an original hall was applied.
Fig. 10 - A lacquered and weathered front.
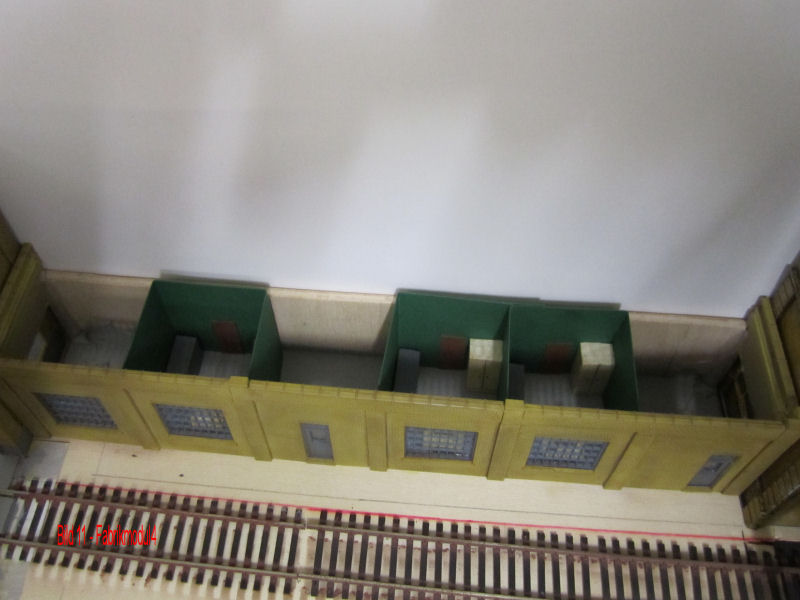
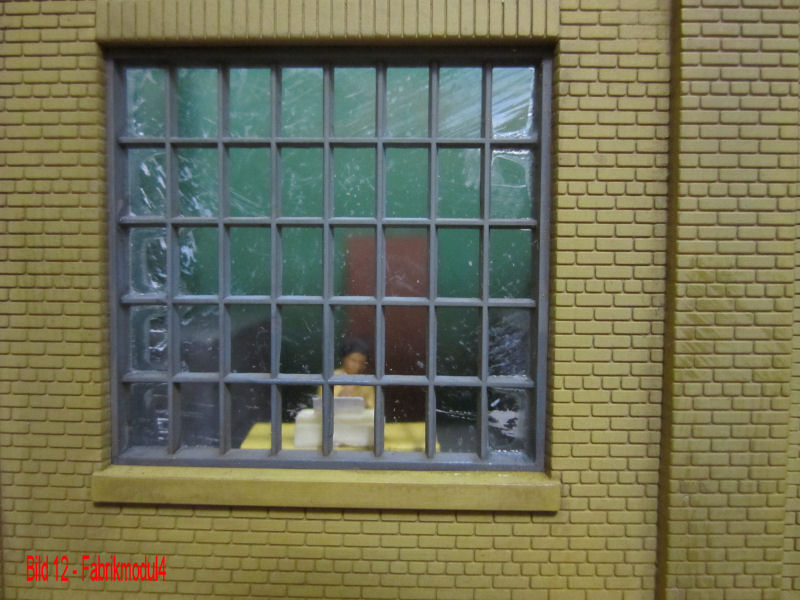
Fig. 11 - The furnished offices in the annex. The office walls are made of green cardboard. The cabinets etc. are made of wooden blocks, which were painted accordingly.
Fig. 12 - A view through the window into an office room.
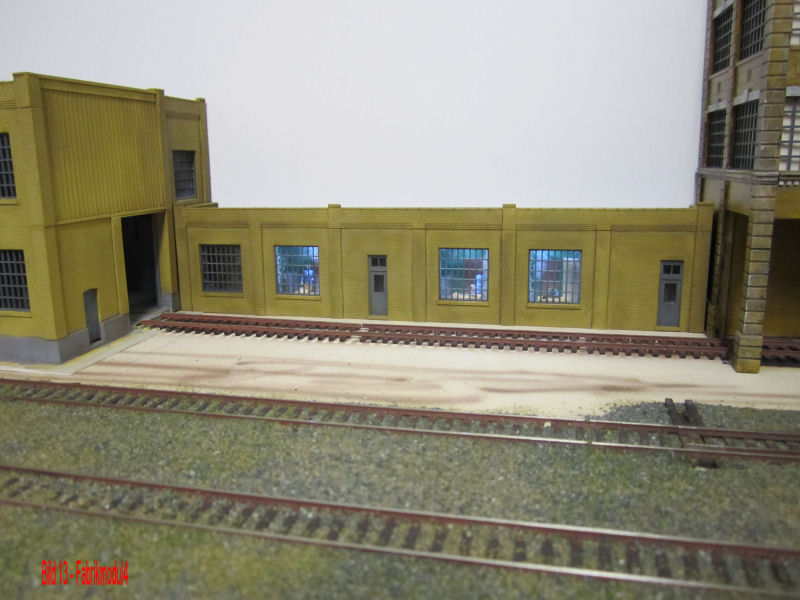
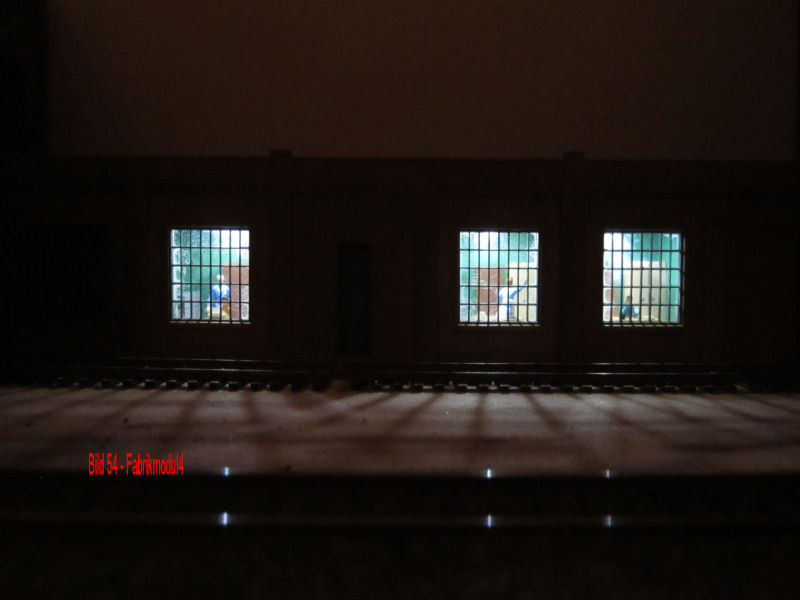 Fig. 13 - The office annex completed by Andy was built.
Fig. 14 - Here they also work at night! 35 hour week???