
")
")
The Modules:
- Turning module 100x100cm. Adapted to the track curve. 2 turning modules make the turning head. The track diameter of the outer track is 196 cm. On each turning module there is a track change. This is formed by 2 curved turnouts #8 from Walthers/Shinohara.
- Intermediate module This module 150x100/80 cm returns from the width of the reversible module to the width of the standard module..
- Standard module 150x80 cm
The total length of the layout will be 17.00m, the width 2.00m (turning heads) and 1.60m respectively. The two sides of the layout will be separated by a center backdrop.

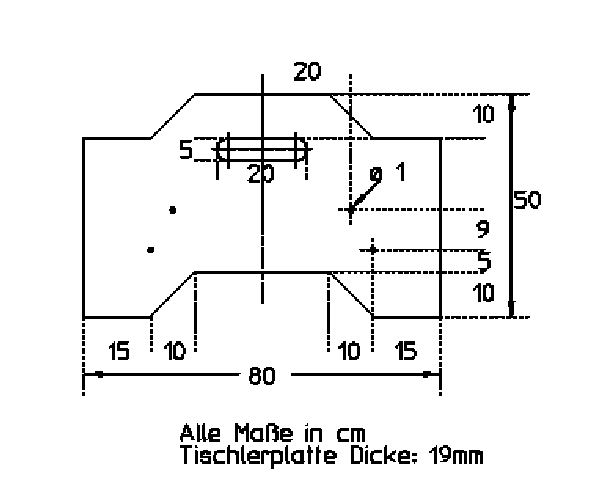
Standard module - Size 150x80 cm
Plywood 2 cm. The frame stringers are 20 cm wide. Dovetailed and glued.
Other modules are cut out for the terrain profile.
This work will (hopefully) be done by our club carpenter Rico Kaddatz from the Club der Modelleisenbahnfreunde Erkrath e.V.. Rico has built all the modules made so far.

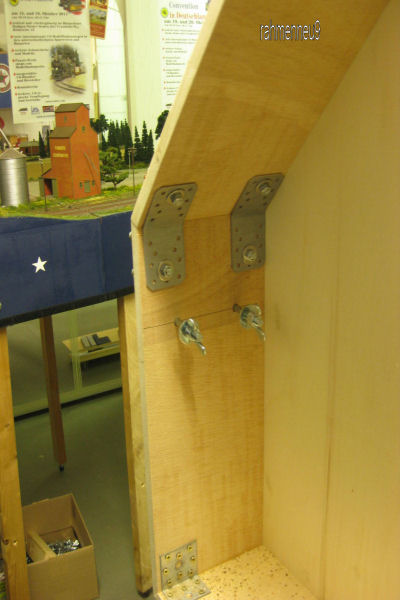
To stiffen the wooden boxes, L metal hole profiles (shelf construction) were sawn to size and screwed on. The screws were recessed flat into the base plate at the top and tightened with self-locking nuts at the bottom. The hole profiles have the advantage that the cables can be pulled through.
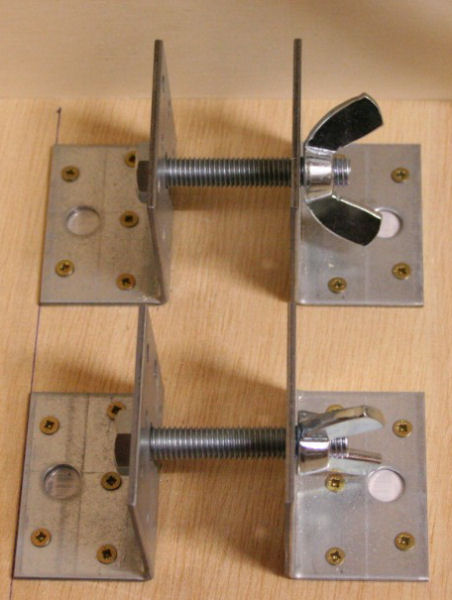
This form of leg attachments of the module consist of angle plates (hardware store) and screws with wing nuts. We use this form of fastening when the legs can not be installed directly in the outer walls of the frame, because here another module is connected directly.

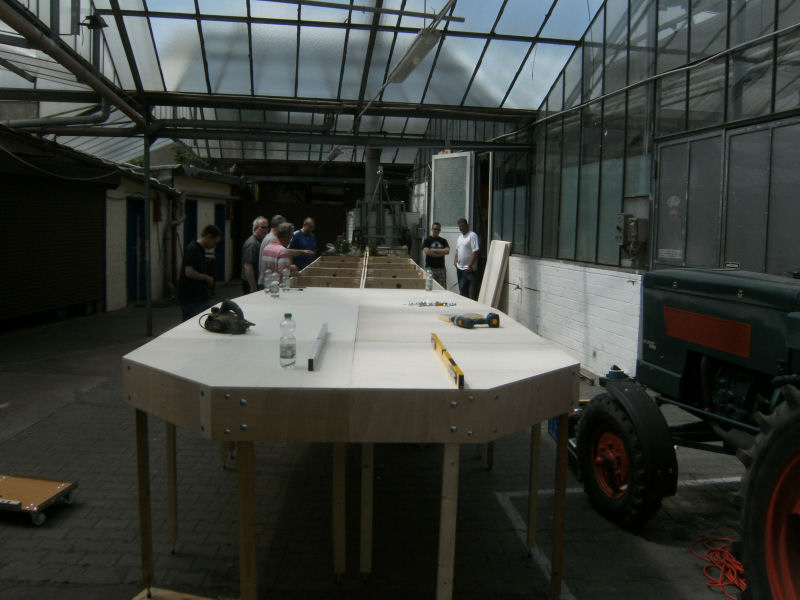
Turning head - consisting of 2 corner modules 100x100 cm. The outer edges are adapted obliquely following the track radius. Here already connected two more modules 150 x 100/80 cm, which lead back to the width of the standard module. Bernd is just grinding the edges of the modules here.
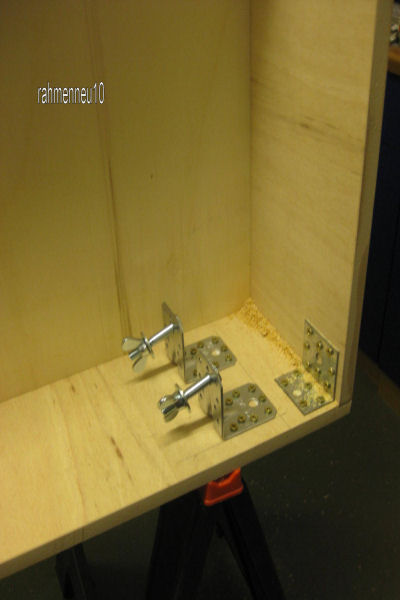
Corner module - Bottom view of a corner module. Here the different leg attachments can be seen well. Above in the top an attachment made of angle plates. Below 2 leg attachments in the outer frame. They consist of 2 drive-in screws with wing nuts. The legs are slid on here and screwed tight with the wing screws. The legs are made of square timbers. A height-adjustable screw is inserted at the lower end. The screw head is covered with a plastic cap. This prevents damage to the floors.
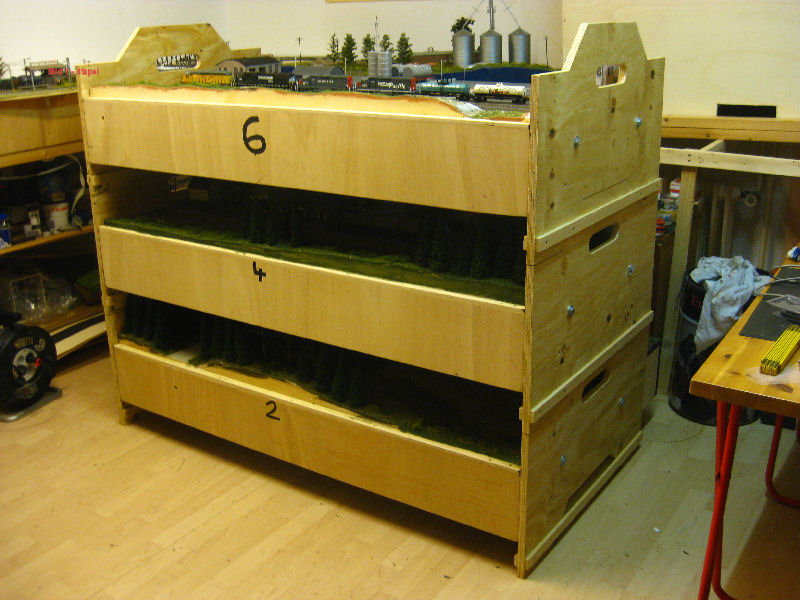
Stacking plates: In order to be able to store and transport the entire system in a space-saving way, transport plates are screwed to the head sides of the modules in the existing holes of the head plates. The transport plates are designed in such a way that further modules with attached transport plates can be stacked on top of each other. At least four modules are planned on top of each other. The lower height of the transport plates (10cm) is chosen so that the module stack can be moved underneath with a forklift or lift truck. Thus, four modules can be moved at the same time. The module superstructures (landscape, buildings, etc.) are chosen in height so that they fit into the module box of the next module stacked above. Thus, we achieve a good protection of the superstructures against damage during storage and transport
Honor to whom honor is due! The idea is stolen! We have admired this ingenious system at the layout of the Modell-Eisenbahn-Freunde Gangelt e.V. - http://www.mefgangelt.de/, at whose annual model building days we have participated several times with our club. By the way, we can highly recommend this exhibition, where a complete school is occupied. Dates can be found on the club's homepage. For potential exhibitors - The girls and boys of the club were touchingly concerned about us. Food and drinks were great! Also, a lot of visitors.
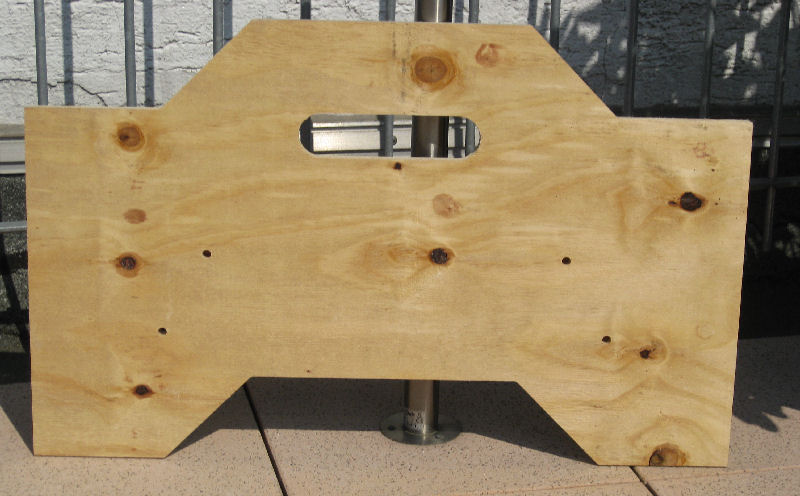
 The head plate made by a friend of Rico on a computer milling machine. Picture 2 shows the plate mounted on a module. Many thanks at this point also to Rico's employer, the company Franken Holz GmbH from Ratingen. Franken Holz GmbH provides us and our club with the required wood at a reasonable price. In addition, Franken Holz GmbH sponsors the Club der Modelleisenbahnfreunde Erkrath e.V. by providing us with the means of transport in the form of 2 trucks free of charge for trips to exhibitions of friendly clubs. This is certainly not a matter of course!
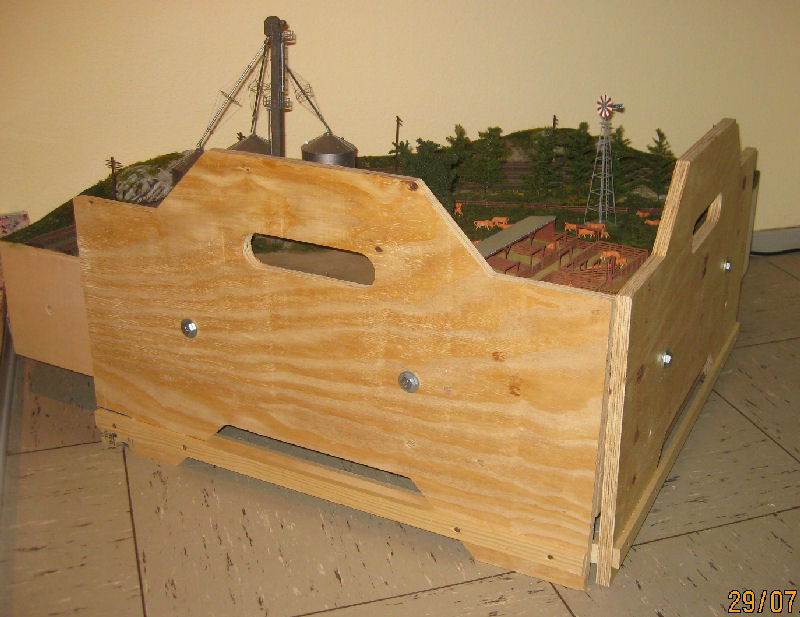
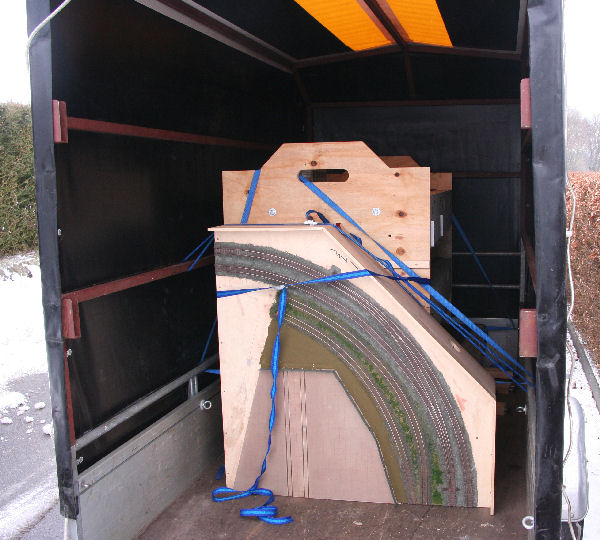
An (almost) finished corner module is ready for transport in its stacking boards. The lower part of the stacking boards has an under-run facility, which is clearly visible. Up to four modules can thus be stacked on top of each other.

So that we don't always have to "park" our Ecos control center on the layout, Andy built us a shelf. The parts for it all came from the Bauhaus. The board only had to be shortened by 20cm.
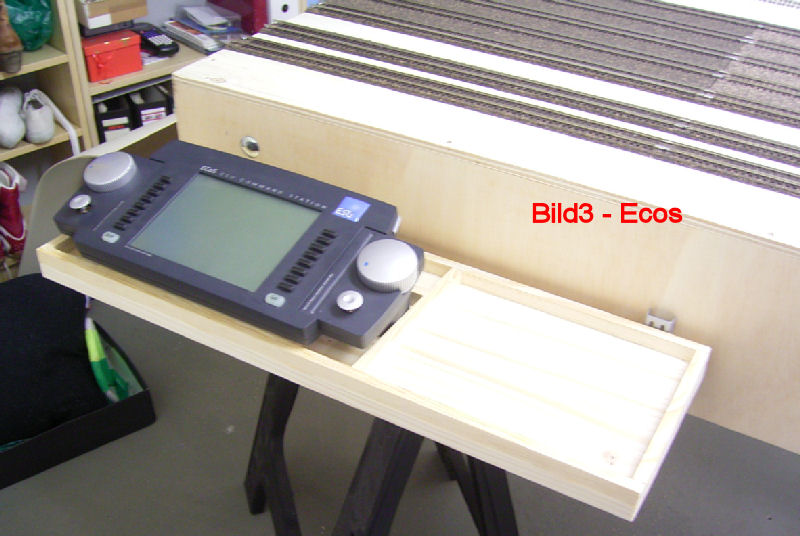
Andy attached a border made of 10x15mm strips. The Ecos fits exactly into this. Next to it is still space for a light transformer.
For transport, the tray can be simply unhooked.
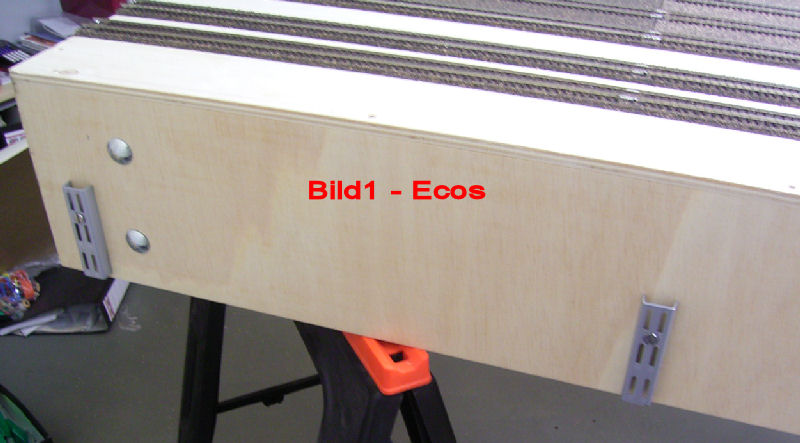
Above the suspensions for the tray are on the left the plug connection for the digital power from the Ecos. On the right, the plug connection for the alternating current connection of the light transformer.
Loading of the modules in Andy`s basement onto a rented single axle trailer for transport to Bernd`s living room. The modules survived their first transport well thanks to the stable stacking plates. The corner module is still single. Later, it will be stacked with the other corner modules. Above the suspensions for the tray, on the left, are the connectors for the digital power from the Ecos. On the right, the plug connection for the alternating current connection of the light transformer.

On carnival weekend (12.-14.02.2010) the modules available so far were built up in Manuela and Bernd`s living room. The previous total length, including the prov. reversing module, of over 6 meters just fit into the room. The prov. reversing module could only be connected in single track, because the inner circle would have become too narrow. Based on this experience, we will now add another prov. turnout connection in the two main tracks on the (so far) last module of the sidings station. Besides the Ecos we also connected (controlled via the Ecos) the Roco-Multimaus with your command station. Both systems ran in parallel without any problems. Thus, both sides of the layout could be controlled independently on the whole layout. This makes switching fun!
We then ran our trains for 2 days and switched heavily. The longest train that fit into Lotzburgh station and the sidings was a triple traction with 16 coal cars and the obligatory caboose. Super!
Many thanks from both of us to Manuela for joining in the fun.
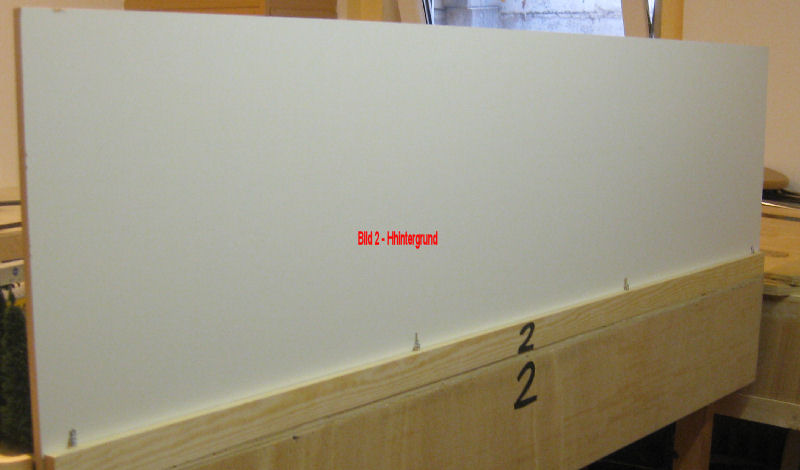 The background plates/center backdrop for the existing modules were made by Andi. These are 1.5 cm thick coated plates, which our club carpenter Rico has procured and cut to size from his employer, Franken-Holz in Ratingen. A background painting adapted to the theme and landscape will be painted on these panels by one of our friends. He has also already embellished our club room.
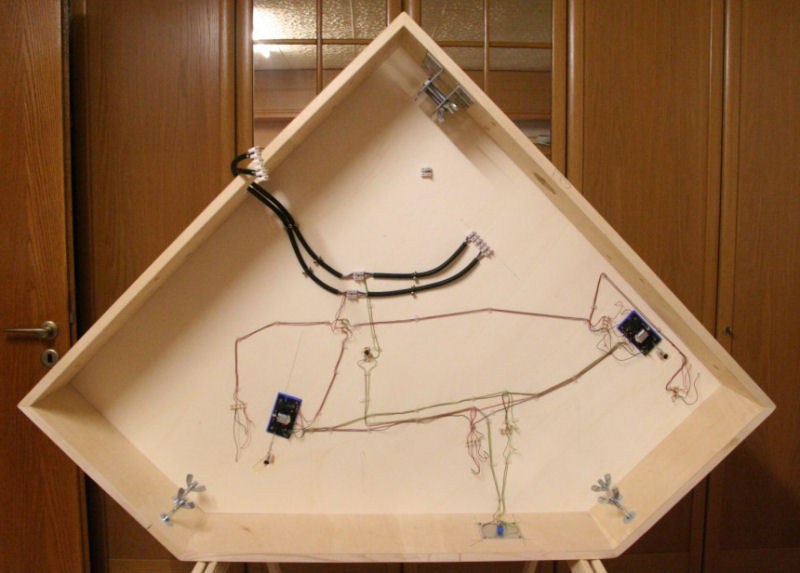
Fig. 1 - A 1 cm thick strip was glued/screwed to the back of the panels, through which screw bolts were inserted vertically. These are inserted into guide holes of the modules. They stand absolutely vertically and firmly. Module and background plate were labeled with the respective module number. Below each other, we will connect the background plates above still by a narrow aluminum strip. We would also like to install a system lighting on these background plates. We are still thinking about the design of this lighting.
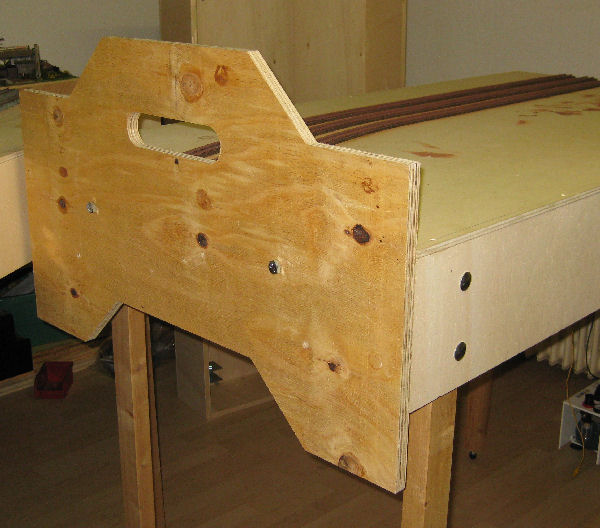
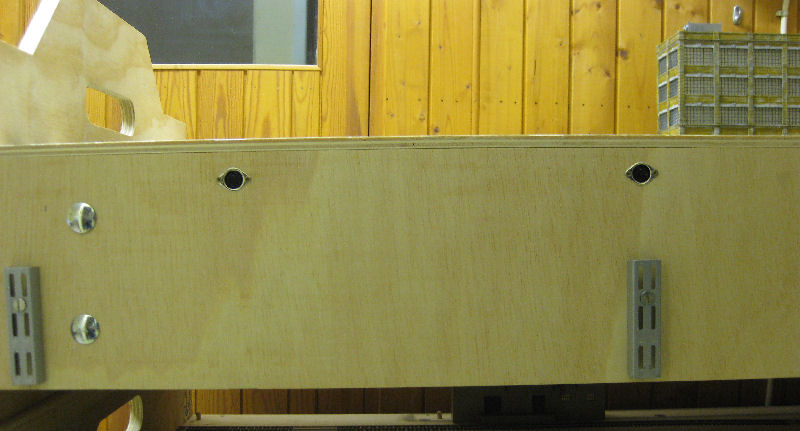
 Here you can see the holes for the background bolts. Wooden blocks were glued under the module for stiffening. These blocks were also provided with a drill hole. This way, the bolts are held in their whole length. The strip in front of it will later serve as the terrain structure.
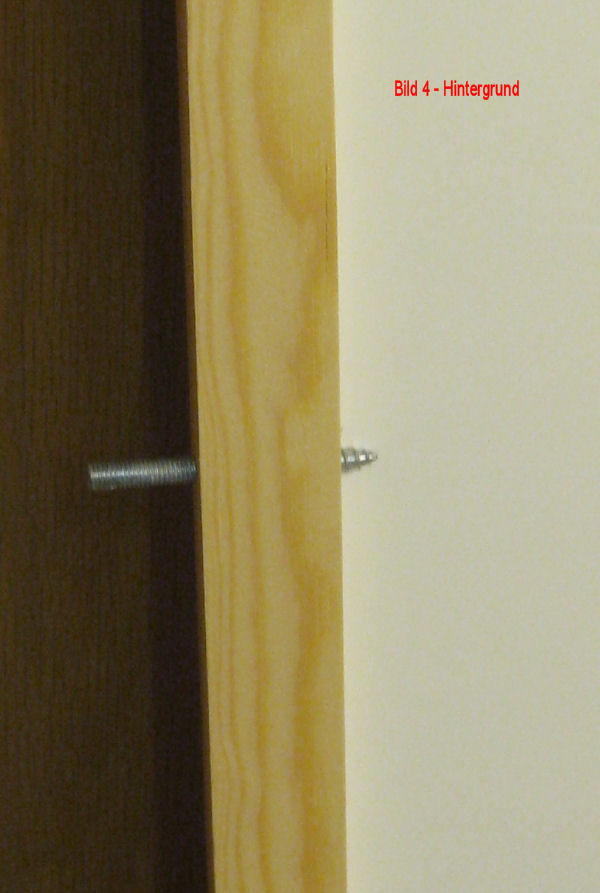
Fig. 2 - shows one of the bolts in all its beauty.
 After cleaning up and urgently needed "renovation" of the basement. The previous modules "Lotzburgh" in the stack. I promised to finish the last module quickly now. Reports will follow! In planning now: as the next module, instead of quiet landscape with river bridge and diner a SMALL-Shop! for Andy`s K & AW - Family-Line.
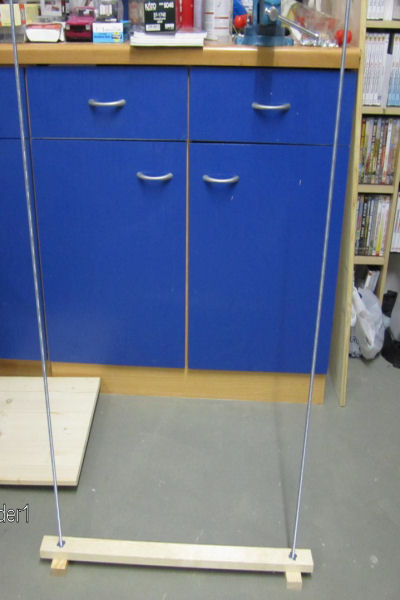
When we were building the layout, lugging and loading the individual legs got on our nerves. Andy has now built one leg transport stand. Three more still need to be built. These stands can also be picked up by a forklift or lift truck.
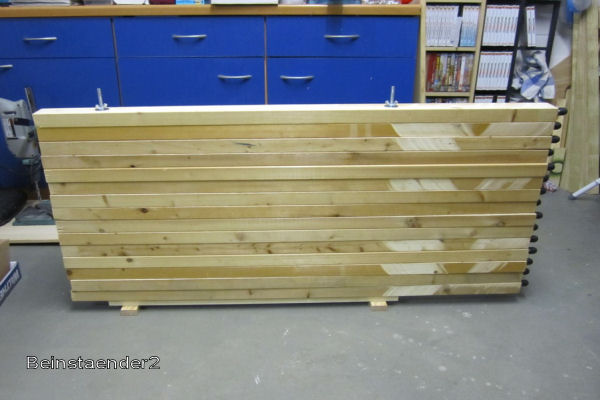
The stand loaded!
10/31/2014 - New modules - At Andy's all still needed straight modules are under construction. The module with the widening from 80 cm to 1oo cm and the corner module 100x100 cm will follow. Here our carpenter Rico still has to make the angled front boards. He will also cut the top boards for us. Final extension 15.50 m
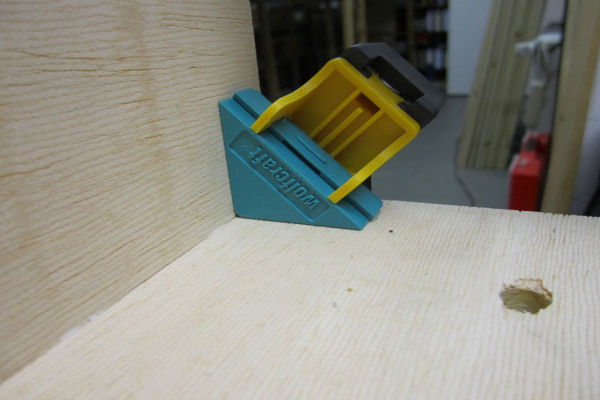
Our Andy has everything! Corner angle for a plumb box!

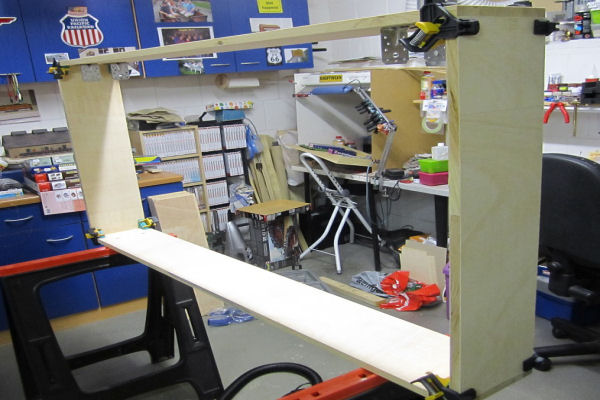
The finished side frames. The leg brackets are screwed on. Here Andy has also made a change. He has only installed a reinforced angle.
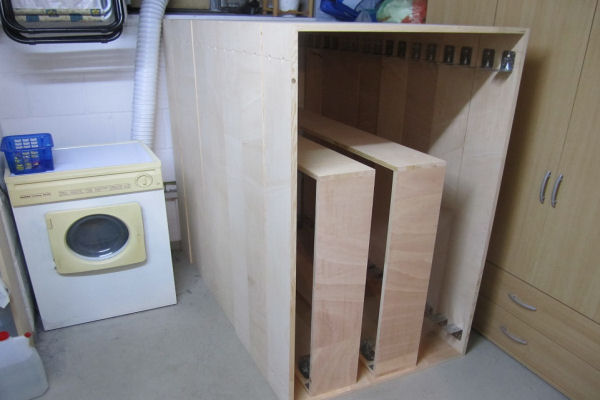
The finished frames. There was still room in the laundry room!
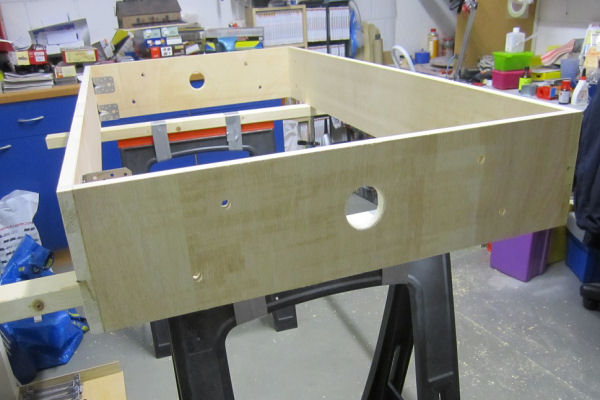
Now the cable grommets and the holes for the box screw connections are also ready. In addition, two holes are made on each side, through each of which a dowel is pushed into the counter board of the next box. This way, we immediately achieve the same height of the boxes. The tedious alignment is no longer necessary.
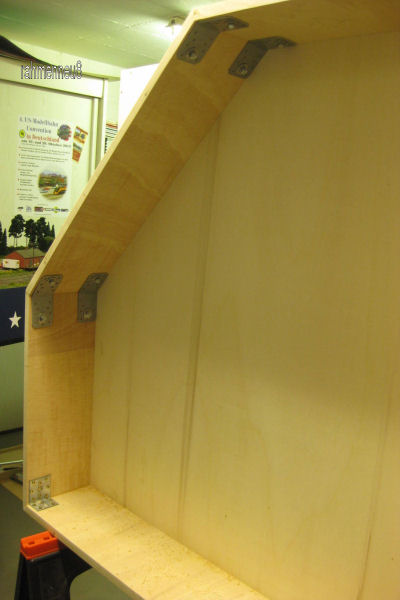
Our club carpenter Rico, called slim dove, has cut the side panels and top panels for the corner modules and for the transition modules from 1000 to 800 mm and then built the modules. For this he sacrificed a day of vacation in a friendly carpenter's workshop! Thanks Rico. We have now installed additional corner angles.
The leg attachments for the outer stringers are also located here.
Corner brackets for the inner leg attachment. Now the round holes for the cable bushings, the screw holes for the connections of the modules to each other and the cross stiffeners of the cover plates are missing. But these can only be mounted when the position of the turnouts etc. is fixed.
On June 6, 2015, all Beans members and still brave friends from our railroad club finally met to adapt the new modules to the existing layout parts. The cover plates were then also attached and sanded. The whole thing under a glass roof at what felt like 50 degrees! But...everything worked! Now we have 15,50 m Beans! Since we accompany our trains with the radio hand controller, roller skates are appropriate! About the construction work you can find more pictures under the button pictures/slides/17 meter modules.