
")
")
Here we will introduce the materials to our landscape crafts.
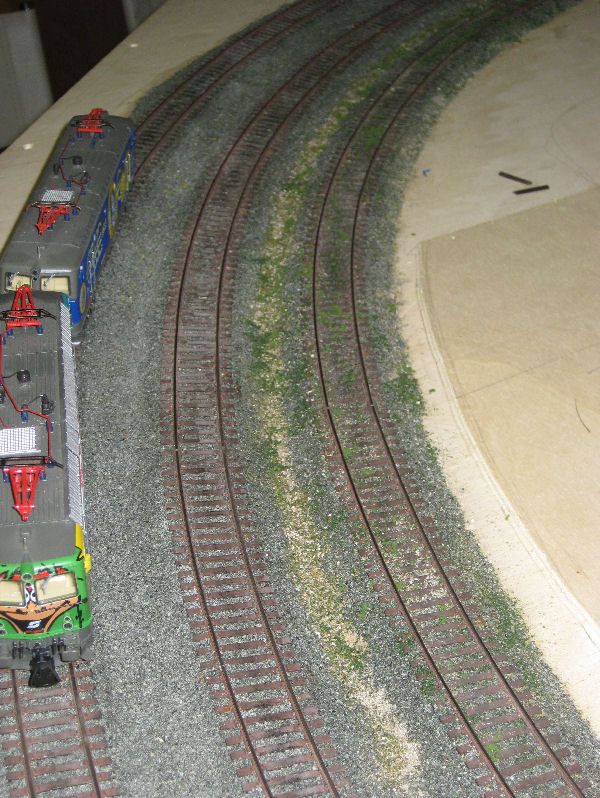
Track Overgrowth: These are applied after ballasting in the second operation. Gluing is carried out in the same way as for ballasting.
Material: Sand, gravel and fine gravel, which Bernd finds when walking with the Wuffis on the roadside. In addition to dog treats, the spoon and old glasses are also often present. For example, finely sifted chippings from road construction sites, mixed with sand, is a super grit for unpaved paths. Earth and forest soils (also sieved in several stages) are also good materials for a natural look. To avoid moisture and possible mold and germ infestation, materials should be dried in an oven for 15-20 min at a minimum of 150 degrees. Have fun with your wives!
Further materials
from ASOA
1204 gravel fine/ 1299 mineral concrete/1207 crushed stone
from Wodland Scenics (in Germany by Noch)
95010 Blended Turf Soil)/95150 Turf Weed)
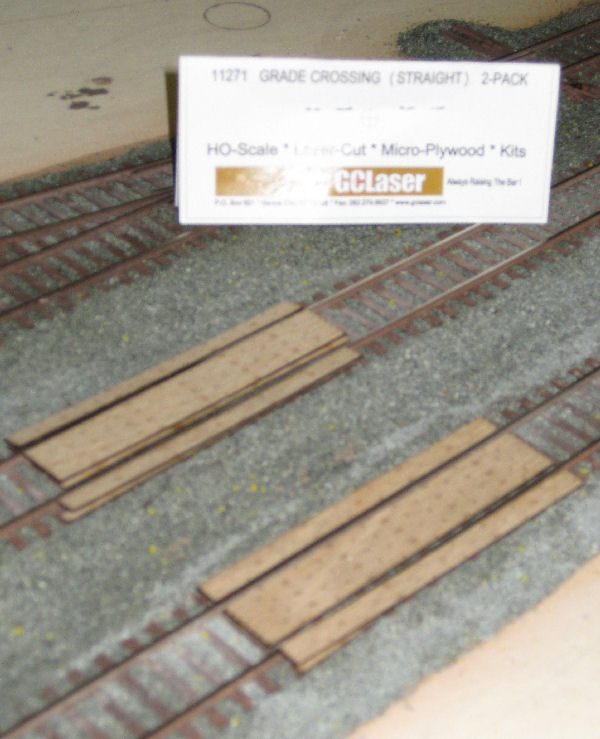
Railroad crossings - For the railroad crossings, we use laser-cut wooden crossings No. 11271 from the Walthers range made by GCLaser. These consist of 2 wooden plates of equal thickness that are glued on top of each other. These transitions are also available for track curves. The " weathering " is still to be done. Price: Eur 8.80 for 2 transitions.
Material for the concrete slabs
The wooden plate (poplar wood is enough) supplies any hardware store. In our case, this plate (top edge of rail approx. 8 mm) is 6 mm thick.
The following materials were purchased from Artservice -Tube in Düsseldorf. Here, in addition to all the articles that artists and therefore modelers need, materials for architectural modeling are also available. The company has several locations in Germany. See http://www.artservice-tube.de. The stores are a real treasure trove for modelers!
Finnish wood board (Finn board) - it is an unlaminated wooden board - natural beige. Thicknesses from 1 mm - 2.6 mm. Size 75x100cm. The 1 mm cardboard we use (order no. 106200) costs Eur 1.50. The cardboard can be cut with scissors or cutter/scalpel.
Plastic sheets - Are available in all possible sizes and thicknesses. we use plates in the thickness of 1 mm and sizes of 25x50 cm (order no. 628002) and 50x100cm (order no. 628015). The plates cost Eur 2.45 and 7.60. The plates have a rough and a smooth side. We take the rough side as surface, because paint or glue holds better on the rough structure.
Plastic profiles - The company carries the entire program of Evergreen Scale Models. Used here with us, H-beam for the loading sill. The profiles can be cut with a scalpel.
Wooden strips - As a rule, lime or balsa wood strips of various thicknesses and sizes. Likewise, there are wooden sticks or veneer strips. The veneer strips can be used to create wonderful wooden floors or covers, for example. The thin strips can also be cut with the scalpel. For thicker bars etc. a good scroll saw or similar is recommended. However, you can also find these materials in stores for ship or aircraft modeling. By the way, in these stores you can also find many other things from ship modeling (chains, ladders etc), which are excellent for railroad modeling. Take your time and look!
Etching needle - Consists of a pencil-like, thicker wooden handle, in which a ground metal tip is incorporated. Also available in several needle sizes. Ours has a diameter of 2 mm. Eur 8.00.
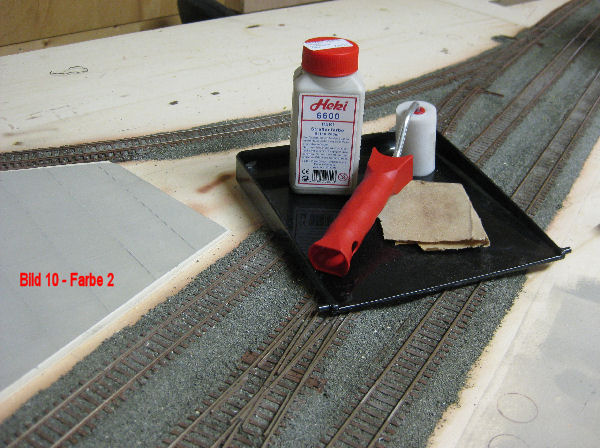
Painting - With Heki road paint "Concrete" - order number 6600. It is a binder paint-like compound. Applied with a paint roller. Here (similar to brushes) should not choose the cheapest option. The paint was poured into the tray to pick it up evenly with the roller. Depending on the degree of coverage, a second application is required.
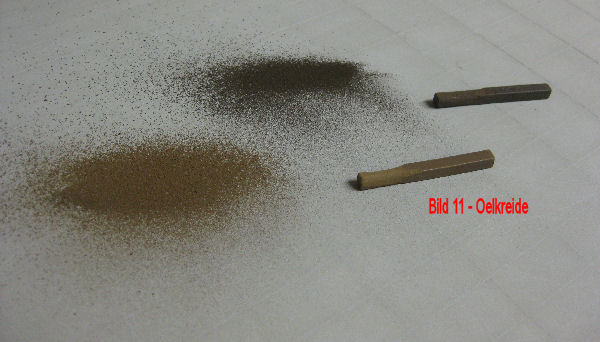
Artist chalk - Pitt Monocrome artists chalk - The light chalk Sepia Medium (Order No. 36161) Eur 1.15 - The dark chalk Umber burnt (Order No. 362191) Eur 1.15. But here are even more colors available. These chalks make more work, but are certainly considerably cheaper than the ready-made powders of various manufacturers from the modeling industry.
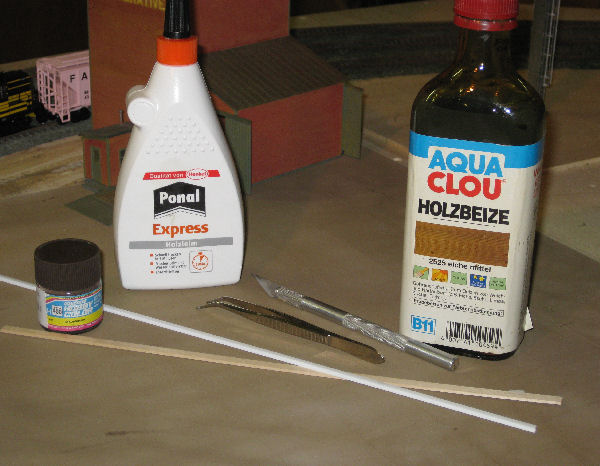
Loading edge - Stain light oak from the hardware store. Evergrenn plastic profile (H-beam) each cut to 2 cm and lacquered with dust brown (applied with a brush). Linden wood lath 1x5mm - cut to about 2 cm each and bleached with Ponal between the beams. Roof after painted with the stain.
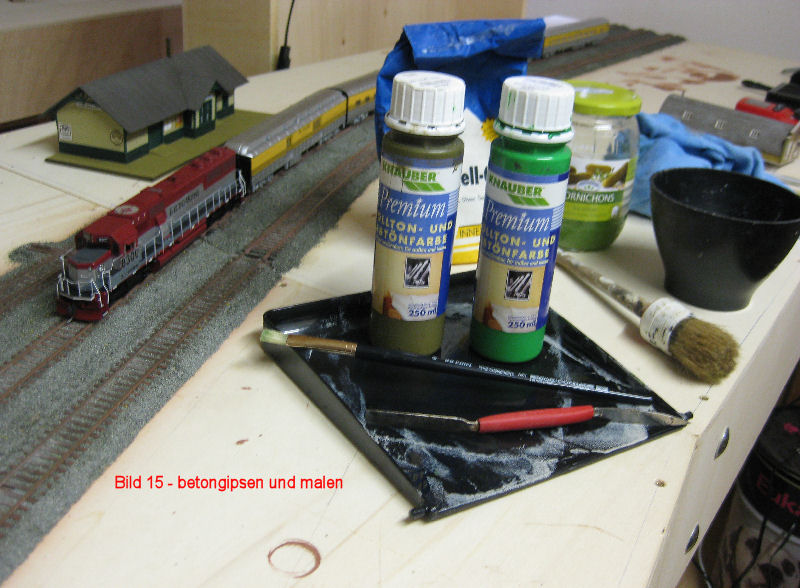 Gips und Farbe - Model plaster (hardware store) is used. The black rubber cup is used to mix the plaster. First fill some water into the cup and then drizzle in plaster and mix. Best consistency: a little thicker like yogurt! The plaster is applied with a palette knife from the hardware store. For fine work, a palette knife set from an artist supply store is recommended. The blades have different shapes and are softer. The tinting colors (brown and green) from the hardware store (here by Knauber http://www.knauber.de , because there is also a nice artist section there!) were mixed and applied with a narrow brush. Bernd loves cucumbers! Because of the expensive Ami track of course only from the ALDI (but taste great!). But the glass contains normal tap water for mixing plaster and paint dilution, etc.
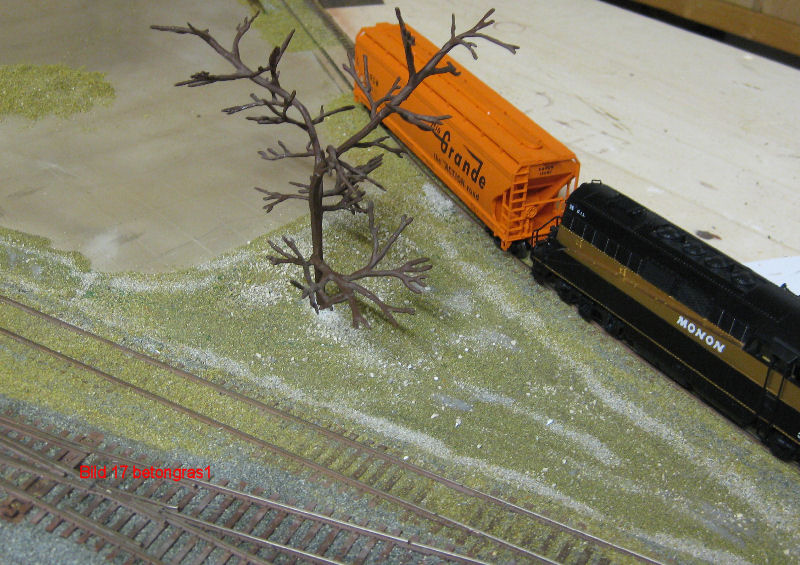 Green stuff - First application: ASOA products - 1255 basalt sand, 1100 limestone gravel fine, 1202 gravel 1 and sand / gravel chippings from the Bergisches Land. Mixed or applied individually. Woodland products - T 43 Turf Yellow Grass, T 50 Earth - Blended Turf, T 42 Earth. Also these products mixed as you like and shaken well in a plastic box for mixing.
Green stuff - Second application: Spread with fingers - Woodland products - T 46 Turf - weed fine, T 49 Bl. Turf meadow, T 64 soil flakes coarse, Heki products - 1561 foliage medium green, 1562 foliage dark green, Hekiflor light and medium green and yellow.
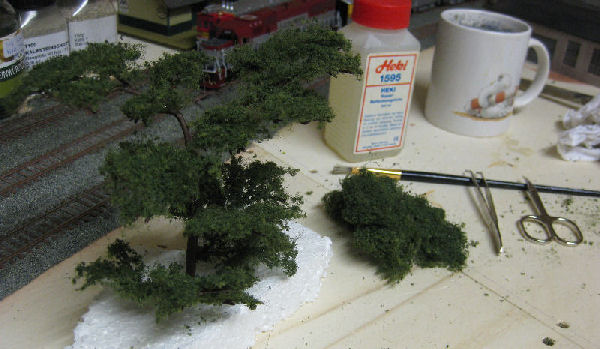
Building a tree - The tree blank of white metal from Woodland comes from the fund of Andy. (Make something out of it! - SUUUPER! always me) The blank was bent to shape and covered with brown lacquer. Heki's foliage glue (1595) was used to attach the Woodland/Hekibel foliage materials (Folange/Flor). This thin-bodied glue was applied with a brush. The folange pieces were slightly pulled apart by hand and then trimmed according to the branch shape with nail scissors (better not tell your wife!) and applied with tweezers (an old one!). Then a drying time of 24 hours is called for. Was my first tree! Per tree about 1.5 hours. The coffee should be strong - for the nerves!
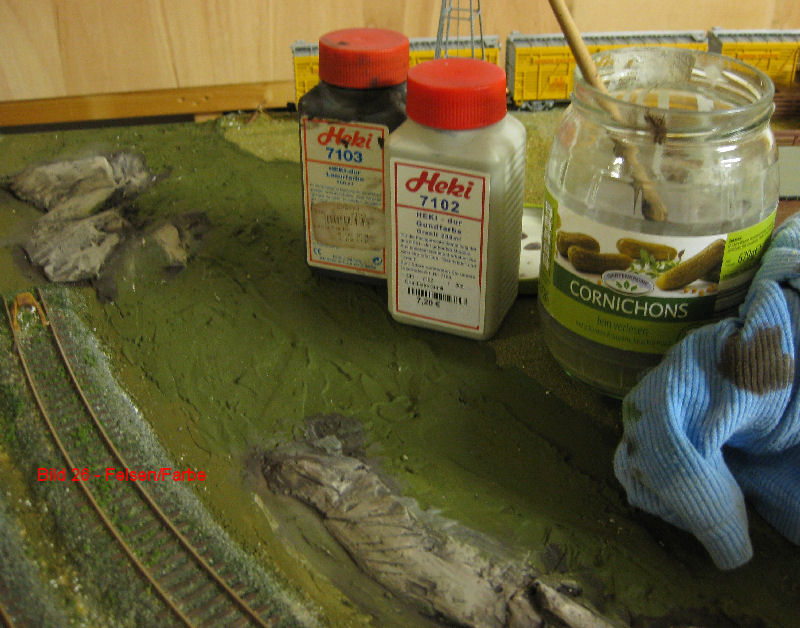 Material for the rocks - The places where rocks are to be created were given appropriately thick applications of model plaster. The following paints were used by Heki for painting: Heki-dur Granitfarbe (7102) primer coat, and Heki-dur Lasurfarbe (7103) for aging. The moss was applied with green acrylic paint, the "lights" with white acrylic paint from the artist supply (here from Reeves). Here I can also only recommend a look in an "artist store" (e.g. see above). The range of colors is huge. A mixture of colors is of course possible without any problems. I am lucky to have a partner in my Manuela, who paints herself and thus brings great experience.
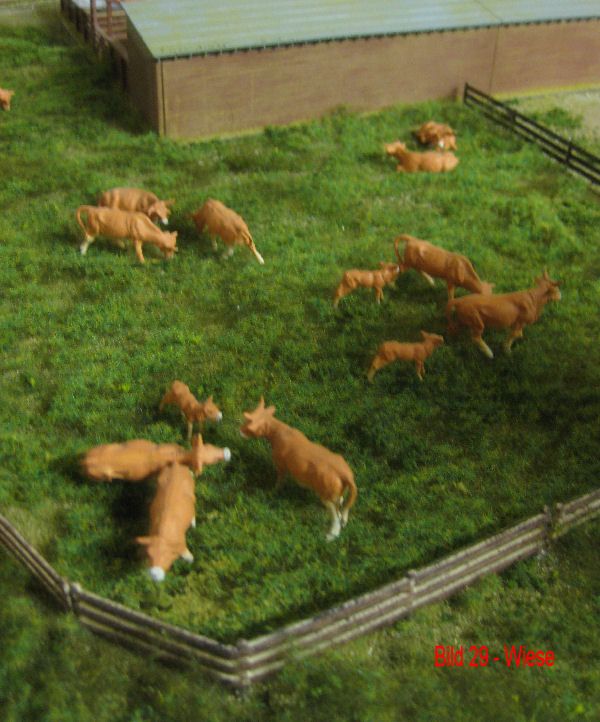
Material for the meadow - first order as for green stuff. The sand was used only at the edges. The grass is again a Heki product - 1591 decovliesMeadow grass medium green. The material comes in a kind of mat. Pieces were cut out with scissors and distributed. Gluing was again done wet in wet.
The fence is from the Noch range. The cows are really American. Andy still had them in his collection. Probably from Walthers.
Styrofoam cutting / modeling
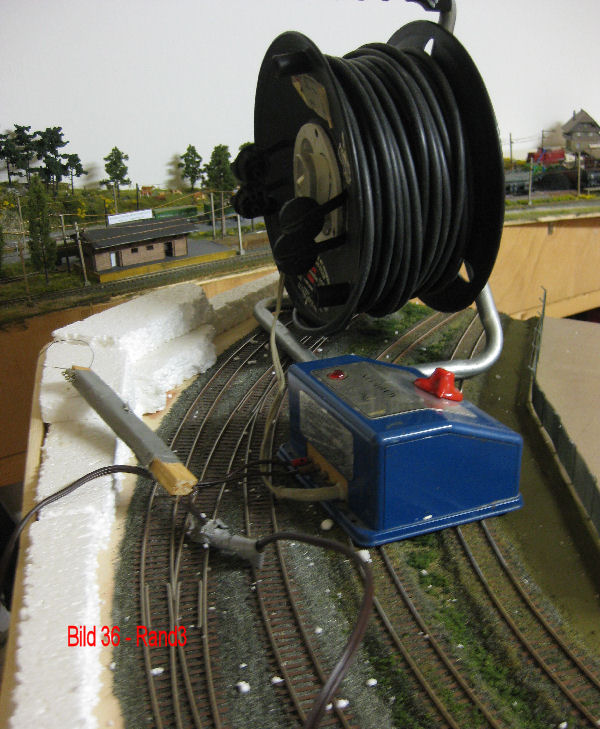 We use a styrofoam cutter built by our club president himselfs. It (not the president!) consists of a wooden strip into which two grooves are milled on the long sides to accommodate one cable each. At the upper end, metal luster clamps are screwed onto the cables. A piece of hot wire is then screwed in from one luster terminal to the other in a bow shape. The cable at the other end is about 1.5 cm long. Two banana plugs (Märklin) are screwed to its end. The whole construction is finally wrapped with insulating tape (removed on the photo!). You can find the needed materials e.g. at Conrad (German online store for electronics).
As power source we use an old Märklin transformer. Newer transformers are unsuitable, because they are immediately overloaded by the very high current consumption of the cutter and switch off. The two plugs of the cutter are plugged into the rail connection of the transformer. Thus the current consumption of the cutter can be controlled by the rotary switch of the transformer. It is sufficient to turn up the transformer just a little. The wire must not glow, as it will then burn immediately. The correct temperature is reached when the cutter slides through the Styrofoam block as if by itself, without hooking. Remove the material in slices.
Make sure the room is adequately ventilated or it is best to work in the fresh air.
Road construction with plaster
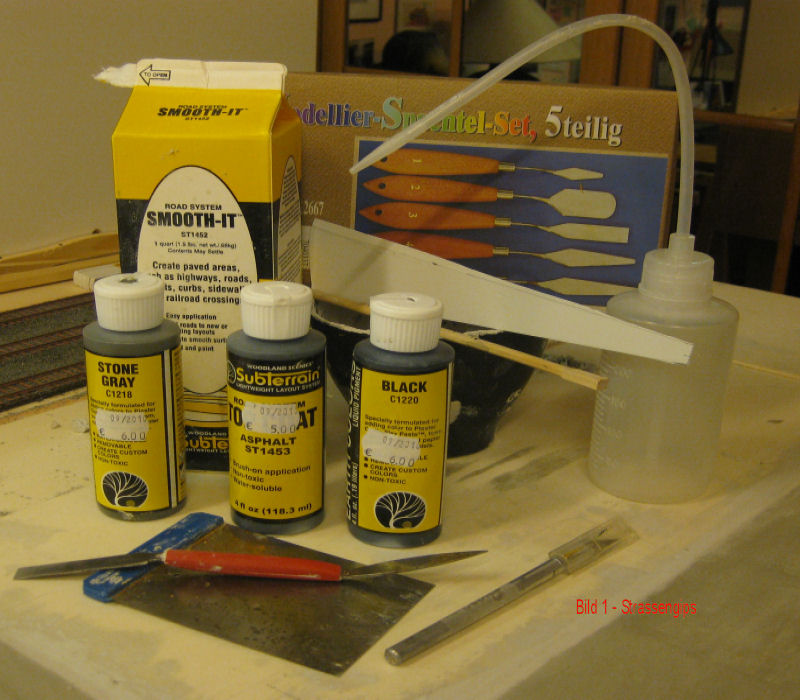
The photo shows the materials used. Into the bottle is filled with a drop of detergent relaxed water. Into this is poured a strip of Stone Gray pigments and a little black pigments. Shake the pigment bottles beforehand, then toothpaste-like "sausages". Then shake the bottle well until the pigments mix with the water. This now colored water is poured into the rubber cup (about a cup full). Smooth-It (plaster-like mass) is now stirred into this water until the desired consistency is reached. The first layer should be slightly firmer. It is applied with a Japan spatula and palette knives. Then the surface is smoothed with a plastic strip cut to street width (the edge must be absolutely smooth and straight). When this layer has dried, a second layer is applied, which must be much more watery (yougurt consistency). This layer is also smoothed with a strip of plastic now cut slightly wider than the road (then runs over the wooden panel located on the right and left). Any slight unevenness or air bubbles can now be removed gaaaanz carefully with a wet index finger (the stuff tastes awful!).
The whole thing should now dry calmly for 48 hours. Now follows the final coat with brush and paint roller. This is done, as a base, with the asphalt paint from Woodland, which was mixed with gray and white acrylic paint, because the pure asphalt paint seemed too dark. After the paint had dried, the pavement was skimmed with fine lubricating gel paper (slightly circular). This gives the surface a roughened appearance. It also results in color shading and traces of use. Road markings etc. will follow later (this is Andi`s job!).
Tools
Water bottle with spout (an old cucumber jar will also do here), modeling spartel set (hardware store or artist supplies - see under "links"), rubber cup for mixing, plastic strips (here from our building boards), palette knife and Japan spartel. Stirring rod and knife. Still missing are fine sandpaper, brushes and paint rollers for the next work step and Bernd`s fingers!
Materials
From Woodland:
ST 1452 Smoth-It, C 1220 Black, C 1218 Stone Gray, ST 1453 Asphalt, possibly ST 1455 Paving tape, these are foam strips that can be used to mark off the edges of roads etc. before casting, instead of the wooden strips we use. These strips can be easily removed after the casting compound has dried, as they are self-adhesive.
The instructions for use are also printed on the packaging in German...only partly in such a funny German that the English instructions are easier to understand. Woodland-Programm
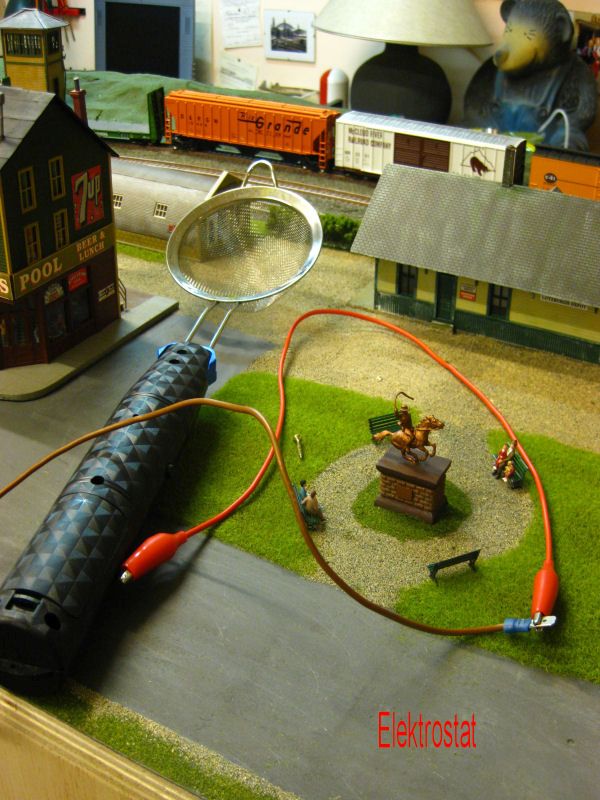 Electrostatic - construction and use
Electrostats are readily available in the accessories trade (e.g. Busch and Heki). However, the devices have their price. In our railroad club, our electrician, electronics engineer and PRESIDENT! Stefan and my Andy looked for a cheaper solution. Andy had found in the exquisite store Aldi (Don't worry, I buy there too!) an electric fly swatter for a few euros. This consisted of a grid frame and a handle with a battery. The battery was electrically connected to the grid frame. On the side was a switch-on button, with which the grid frame under current could be set....und ruckzuck hanging the pests roasted in the net. In China, you get something like that as a delicacy on your plate.
Our president just said, "Great." The grille frame disappeared. Instead, a small kitchen metal screen was adapted and installed in the handle. The Eletroanschluss was led out below from the frame with a cable. Already an electrostat was created. Tests showed that the story works. Costs: no 10 Euro! Thank you Mr. President!
Working with the self-made electostat
The areas to be grassed are coated with liquid wood glue (My experience - somewhat creamy - not liquid, like water). Afterwards, according to Wusch, still with a normal sieve Turfsorten or flakes (weeds etc.) are not distributed surface covering. Now a normal Spax screw is turned at a place into the glued surface and the cable connection of the electrostat is connected with this screw. After switching on the electrostat, a magnetic field is created in the damp substrate. If grass fibers are now scattered out of the sieve of the switched-on electrostat, they shoot down and remain upright.
Special grass fibers for the electrostat are available from several accessory manufacturers in several colors and fiber lengths. The fibers can of course also be mixed. We have used Heki fibers here. Since we wanted a mowed lawn, short fibers were used. Bruno (my grinning growler in the background) thought it was great, too. Cat Jimmy was locked out during the work.